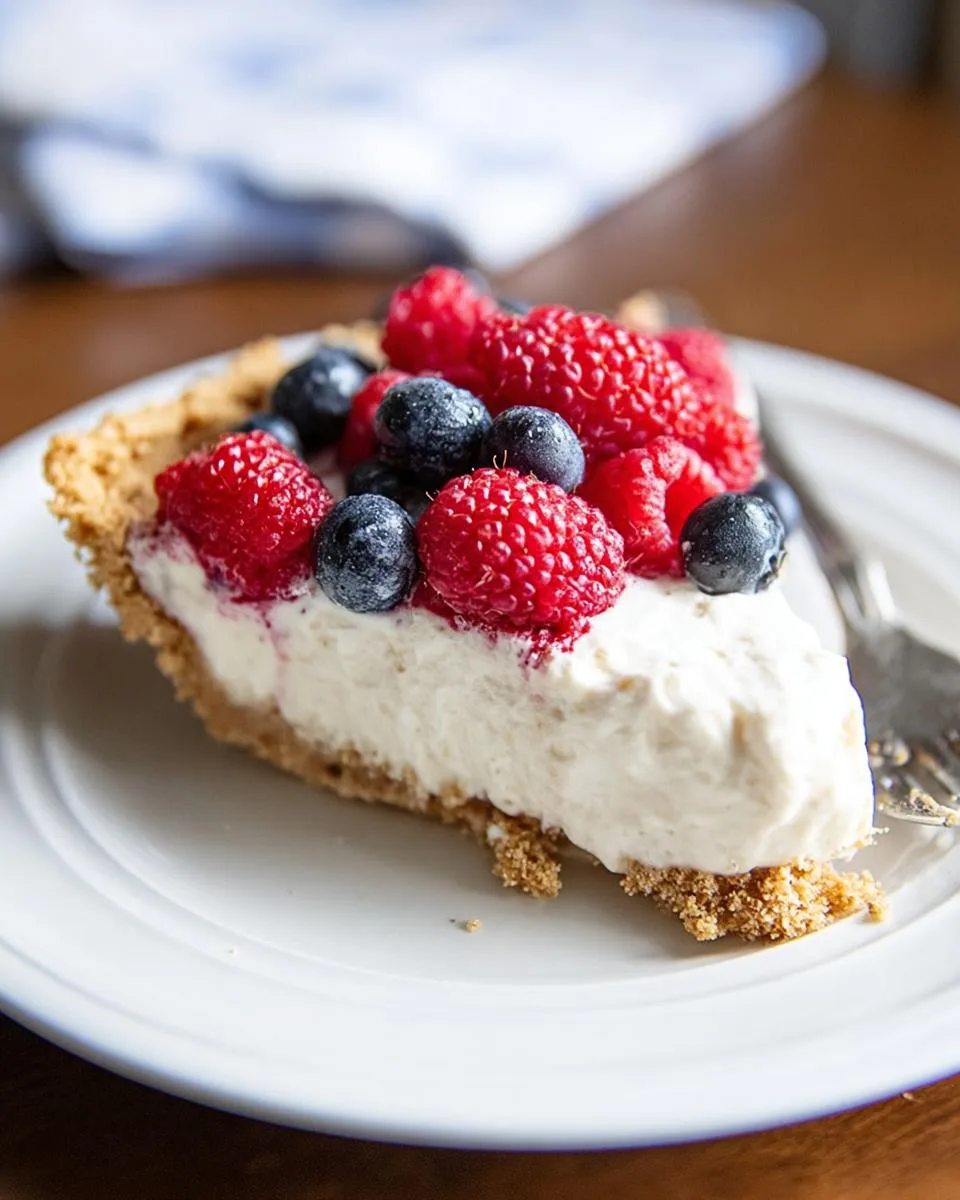
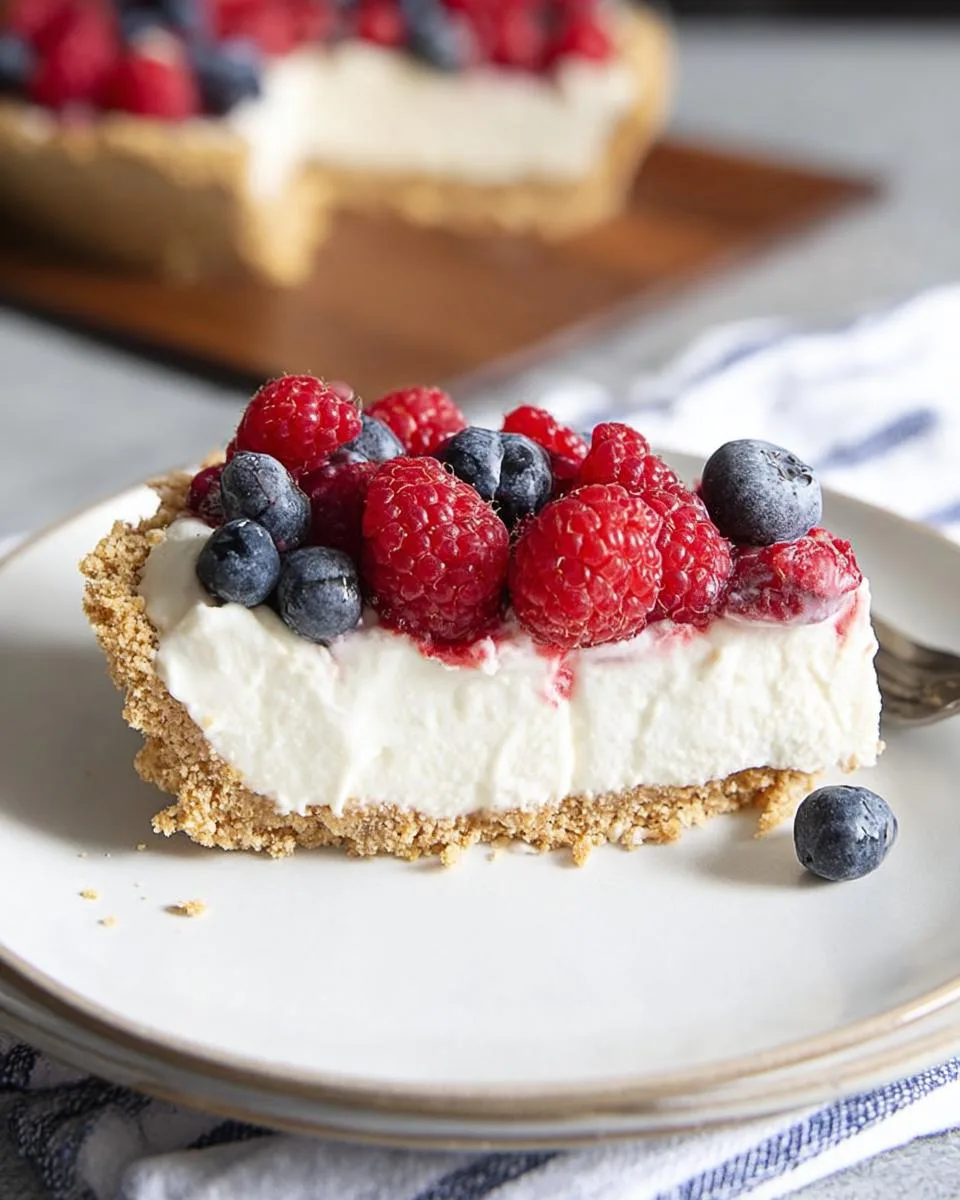
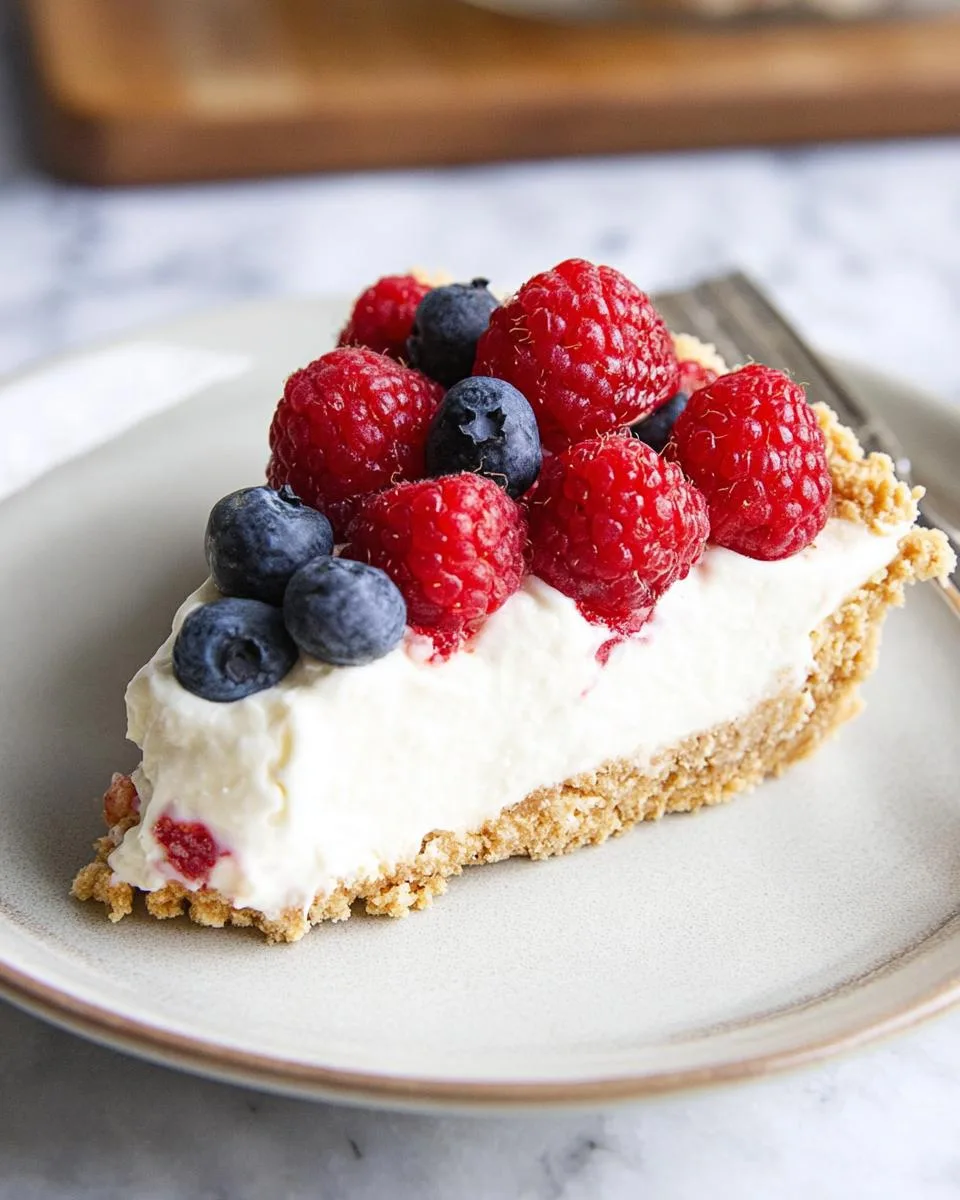
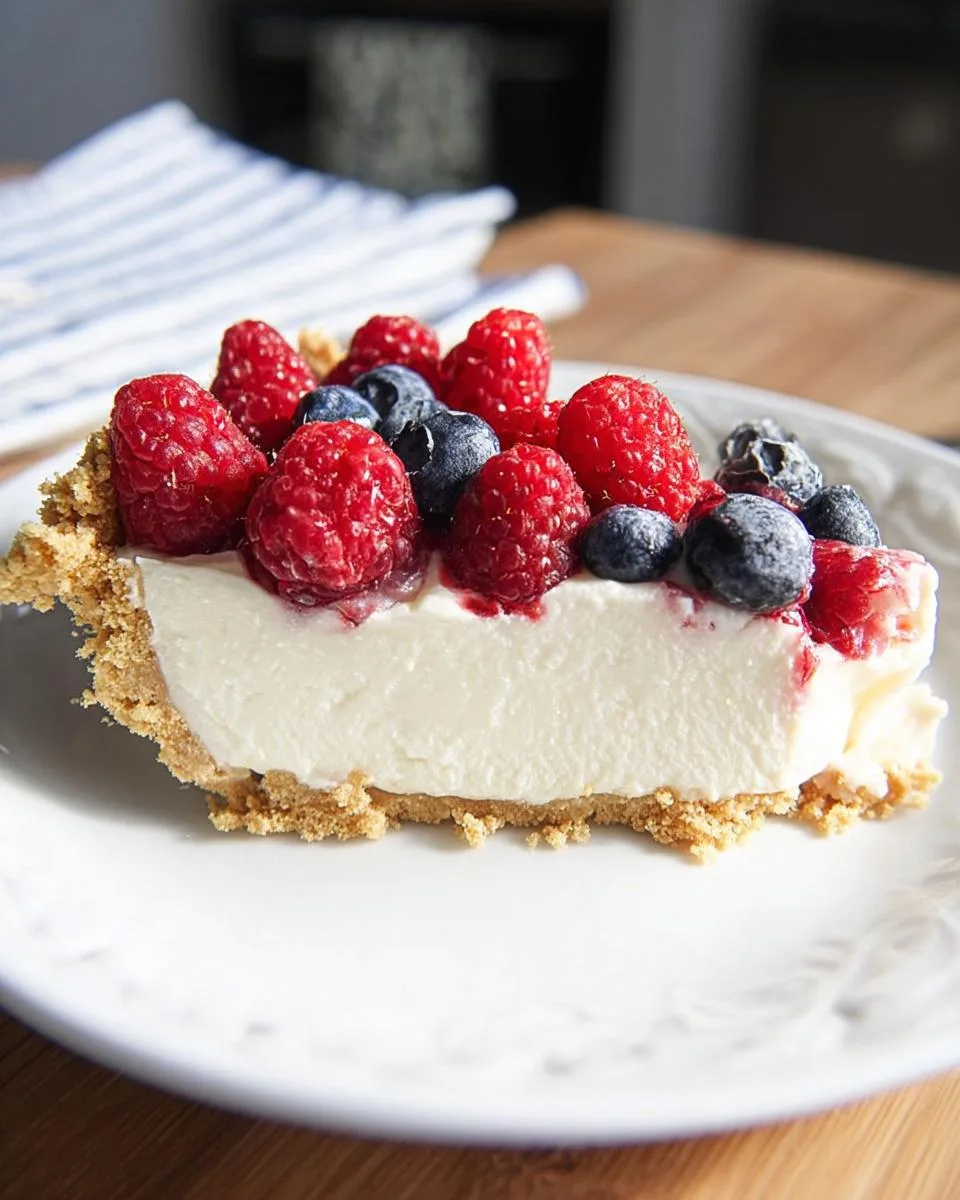
Finding a stunning dessert for a summer party can feel impossible. You want something beautiful but simple, festive but not fussy. This Red White and Blueberry Cheesecake is your answer. It’s a vibrant, no-bake celebration dessert that always steals the show.
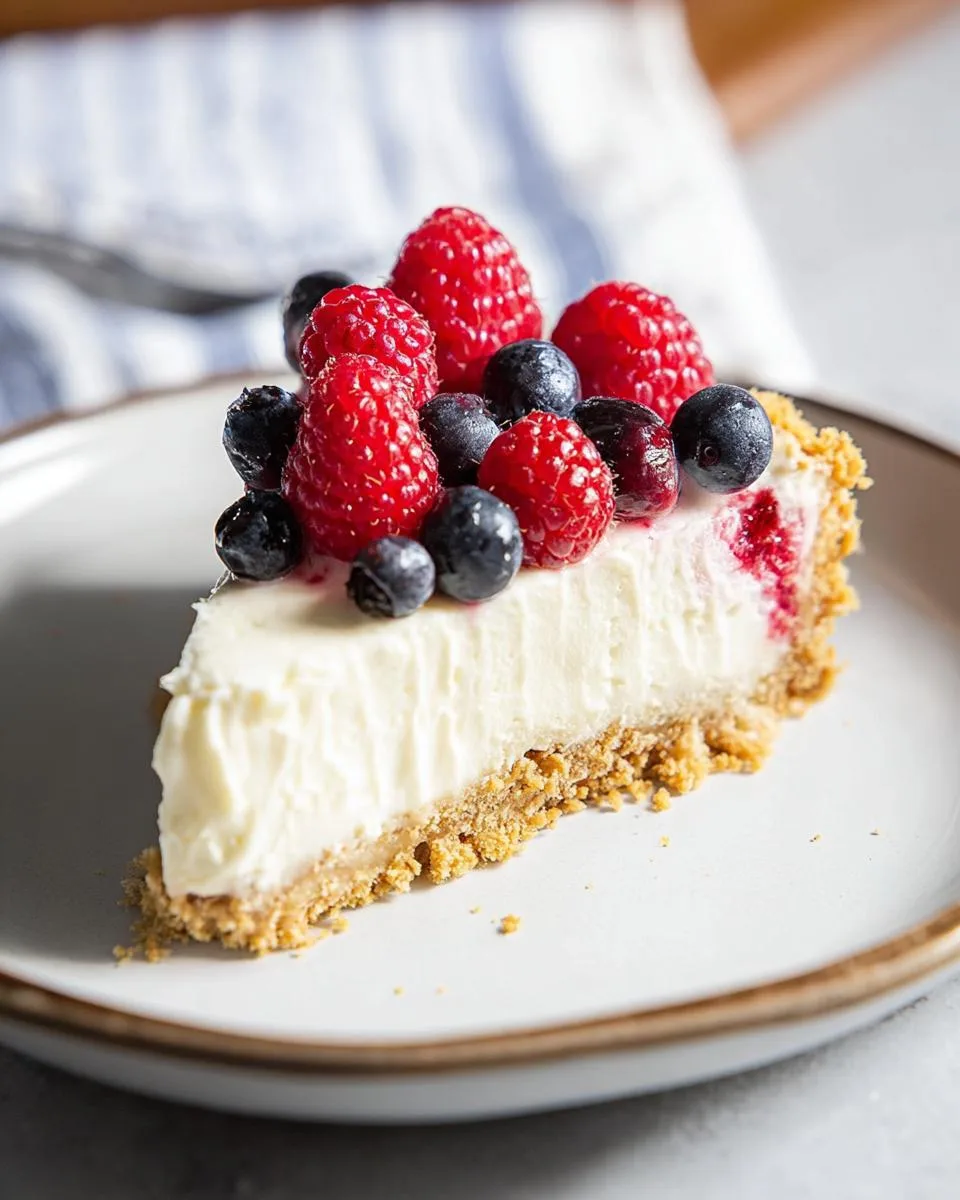
This recipe is all about creamy, tangy filling, a buttery graham cracker crust, and a fresh berry topping. It’s perfect for Fourth of July picnics, backyard cookouts, or any gathering where you want a taste of summer. I’ve made this for years, and it never fails to bring smiles.
The secret to a great no-bake cheesecake isn’t complicated. It’s about patience and a few simple tricks. First, let’s walk through the recipe so you can make your own masterpiece.
Table of Contents
Why You’ll Love This Red White and Blueberry Cheesecake
Let me tell you why this dessert is a forever favorite in my home. It solves every summer hosting problem with style and zero stress.
- No-Bake Simplicity: Your kitchen stays cool. This easy cheesecake recipe comes together without turning on the oven, which is a true gift on a hot July day.
- Make-Ahead Magic: The best kind of party prep is the kind you do the day before. Simply let it chill overnight, and you have a perfect, stress-free dessert ready to go.
- Crowd-Pleasing Flavor: The combination is timeless. You get a creamy, lightly tangy filling, a sweet and buttery crust, and the pop of fresh berries. It delights both kids and adults every single time.
- Visually Stunning: This patriotic dessert is a true centerpiece. The bright red raspberries, snowy white filling, and deep blue blueberries look like a celebration on a plate.
- Customizable: Out of raspberries? Use strawberries. Want a different crunch? Try a pretzel crust. This recipe is a friendly guide, not a strict rulebook.
In short, this Red White and Blueberry Cheesecake delivers maximum impact for minimal effort. It’s the dessert you’ll be asked to bring every year.
Ingredients You’ll Need
This recipe uses simple ingredients. Getting them just right makes all the difference for a perfect texture and flavor.
- For the Crust:
- 12 whole graham crackers (about 1 1/2 cups fine crumbs). Ingredient Note: You can crush them in a bag with a rolling pin if you don’t have a food processor. The crumbs should look like sand.
- 6 tablespoons unsalted butter, melted. Ingredient Note: Using unsalted butter lets you control the salt. If you only have salted butter, that’s fine. Just skip adding any extra salt to the crust.
- For the Filling:
- 8 ounces full-fat cream cheese, softened. Ingredient Note: This is non-negotiable. Let it sit on the counter for 30-60 minutes. When you press it, your finger should leave a deep indent. This prevents a lumpy filling.
- 2/3 cup granulated sugar.
- 1 teaspoon pure vanilla extract.
- 1 tablespoon fresh lemon juice. Ingredient Note: Please squeeze a real lemon. Bottled juice can have a sharp, metallic taste that affects the creamy flavor.
- 1 1/2 cups heavy cream or heavy whipping cream, cold. Cold cream whips up higher and faster. I sometimes chill my mixing bowl for 10 minutes first.
- For the Topping:
- 1 cup fresh raspberries, patted dry.
- 1/2 cup fresh blueberries, patted dry. Gently patting the berries with a paper towel keeps extra moisture from making the topping watery.
Substitution Tip: Want a nuttier crust? You can swap out 1 cup of the graham cracker crumbs for an equal amount of very finely ground pecans or walnuts.
Remember, warm cream cheese and cold heavy cream are the secret duo here. That temperature contrast builds the perfect, stable filling for your Red White and Blueberry Cheesecake.
How to Make Red White and Blueberry Cheesecake
Here is your simple, step by step guide. Follow these instructions, and you will have a perfect no bake cheesecake every single time.
Step 1: Prepare the Graham Cracker Crust
First, make your crust. Place the 12 graham crackers in a food processor. Pulse them until you have fine, even crumbs that look like sand. If you do not have a processor, put the crackers in a sealed zip-top bag and crush them with a rolling pin.
Pour the crumbs into a medium bowl. Add the 6 tablespoons of melted unsalted butter. Stir with a fork until every crumb is coated and the mixture holds together when you pinch it. It should look like wet sand.
Dump the crumbs into a 9-inch pie plate. Use the bottom of a measuring cup or a glass to press them firmly and evenly across the bottom and about halfway up the sides. A firm press now means your crust will not fall apart later. Place the crust in the refrigerator to chill for at least 15 minutes. This helps it set.
Pro-Tip: For an extra firm, crunchy crust, you can bake it. Preheat your oven to 350°F (175°C). Bake the pressed crust for 8 to 10 minutes, then let it cool completely on a wire rack before adding the filling.
Step 2: Make the Cream Cheese Base
Take your softened cream cheese and place it in a large mixing bowl. Using an electric mixer on medium speed, beat it for 2 to 3 minutes. Stop to scrape down the sides of the bowl with a rubber spatula. You want it completely smooth, creamy, and lump-free.
With the mixer on low, gradually add the 2/3 cup of granulated sugar. Then, add the 1 teaspoon of vanilla extract and 1 tablespoon of fresh lemon juice. Turn the mixer back up to medium and beat for another minute, or until everything is fully incorporated. The mixture will be thick and smooth.
Step 3: Whip the Cream and Combine
Now, get your cold heavy cream. Pour the 1 1/2 cups into a separate, clean bowl. Using clean beaters, whip the cream on high speed. Watch it closely. It will go from liquid, to frothy, to soft peaks, and finally to stiff peaks. You will know it is ready when you lift the beaters and the peak of cream stands straight up without flopping over.
Do not over-whip, or it will become grainy and turn into butter.
Next, we fold. Add about one-third of the whipped cream to the cream cheese mixture. Use your rubber spatula to gently cut through the center and fold it over. This “lightens” the thick base. Now, add the rest of the whipped cream. Continue folding gently, turning the bowl as you go, until no white streaks remain and the filling is one uniform, fluffy, creamy color.
Step 4: Assemble and Decorate
Take your chilled crust from the refrigerator. Spoon all of the beautiful filling into the crust. Use an offset spatula or the back of a spoon to spread it evenly and smooth the top.
Gently pat your 1 cup of raspberries and 1/2 cup of blueberries dry with a paper towel. This step is important to keep your topping from getting watery.
Now for the fun part. Arrange the berries on top of the white filling. Create a simple flag design with rows, make a star, or just scatter them artfully. There is no wrong way. Your Red White and Blueberry Cheesecake is now a patriotic masterpiece.
Step 5: Chill to Set
This is the most important step. Loosely cover the pie plate with plastic wrap. Place it in the refrigerator for at least 6 hours. For the absolute best texture and cleanest slices, I always let mine chill overnight.
This time allows the filling to firm up perfectly. Do not rush it. When you are ready to serve, dip a sharp knife in hot water, wipe it dry, and slice for beautiful, clean pieces.
Pro Tips for the Best Red White and Blueberry Cheesecake
A few small tricks make a huge difference. These are my tried and true secrets for a perfect no bake cheesecake every time.
- Soften Cream Cheese Properly: Plan ahead. Leave the block on your counter for 30 to 60 minutes. It should feel soft when you press it. Microwaving often creates hot spots that can make your filling grainy.
- Use Cold Cream for Whipping: I always chill my mixing bowl and beaters in the freezer for 5 to 10 minutes before I start. Cold cream whips up much faster and holds those beautiful stiff peaks that give the filling its structure.
- Fold Gently: This is the key to a light, fluffy texture. Use a wide rubber spatula. Cut down through the center of the mixture, then gently fold it over itself. Turn the bowl as you go. Stop as soon as no white streaks remain.
- Dry Your Berries: This is my non-negotiable secret for a pretty topping. Gently pat the fresh raspberries and blueberries with a paper towel. Removing that extra moisture keeps your patriotic dessert from getting a watery top.
- Cut Clean Slices: For picture-perfect wedges, dip a sharp, thin-bladed knife in a glass of very hot water. Wipe it completely dry with a towel, then make your cut. Repeat this for every slice.
Follow these simple tips, and your Red White and Blueberry Cheesecake will not only taste incredible, it will look like it came from a professional bakery.
Common Mistakes to Avoid
Even the best recipes can have little hiccups. Knowing what to watch for keeps your no bake cheesecake perfect. Here are the common pitfalls and how to steer clear of them.
- Lumpy Filling: Using cold cream cheese. WHY it happens: Cold cheese is too firm to blend smoothly with the sugar. You will end up with tiny, unblended bits throughout. HOW to fix it: Plan ahead. Let the cream cheese block sit on your counter until it is very soft to the touch, about an hour.
- Soupy Filling: Not whipping the cream to stiff peaks. WHY it happens: Soft, droopy cream does not have enough structure to hold up the heavy cream cheese base. HOW to fix it: Whip the cold heavy cream until it is truly stiff. When you lift the beaters, the peak should stand straight up and not curl over at all.
- Soggy Crust: Using wet berries or a warm crust. WHY it happens: Excess moisture from un-dried fruit or heat from a freshly baked crust melts the butter binder. This turns your crunchy base into a mushy one. HOW to fix it: Always pat berries dry and make sure any baked crust is completely cool before filling.
- Cracking Top: Rushing the chill time. WHY it happens: The filling needs those full 6 hours (or more) to set its structure firmly. Skipping this can cause the surface to crack as it settles. HOW to fix it: Be patient. Chill it overnight for the best results. If a small crack does appear, simply cover it with a few extra berries. No one will ever know.
Delicious Variations
One of my favorite things about this easy cheesecake recipe is how easily it adapts. Do not be afraid to make it your own with one of these simple twists.
- Citrus Twist: For a brighter, sunnier flavor, add 1 teaspoon of finely grated lemon or orange zest to the cream cheese base when you add the vanilla. The zest adds a wonderful fragrance and a subtle tang that complements the berries perfectly.
- Different Crust: Swap the graham crackers for an equal amount of crushed vanilla wafers or shortbread cookies for a richer, sweeter base. For a fun sweet-and-salty surprise, use finely crushed pretzels. Just be sure you still have 1 1/2 cups of fine crumbs.
- Mixed Berry: Feel free to play with the color scheme. Use all strawberries and blueberries for a classic look, or mix blackberries and raspberries for a deeper, jewel-toned patriotic dessert. Just keep the total berry amount around 1 1/2 cups.
- Individual Servings: This is perfect for parties. Line a standard muffin tin with paper liners. Press the crust mixture into the bottom of each, then divide the filling. Top with a few berries. They only need to chill for 3 to 4 hours to set, making them a quick, adorable option.
Each variation keeps the spirit of the Red White and Blueberry Cheesecake while letting your creativity shine.
Serving Suggestions
This Red White and Blueberry Cheesecake is a complete star on its own, but pairing it thoughtfully can turn dessert into a full experience. Here are my favorite ways to serve it for any occasion.
- Summer Cookout: Bring this patriotic dessert outside. Serve a cool, creamy slice next to a warm grilled peach half and a scoop of vanilla bean ice cream. The contrast of temperatures and flavors is absolutely magical.
- Picnic Perfection: Pack individual slices in containers. Pair them with tall glasses of homemade sparkling lemonade or sweet iced tea. It’s a refreshing, handheld treat that travels beautifully.
- Elegant Dinner Party: Elevate each plate easily. Before setting down a slice, drizzle the plate with a simple raspberry coulis. You can make one by blending a handful of extra raspberries with a teaspoon of sugar and straining it. It looks professional and tastes incredible.
- Weeknight Treat: You deserve a special moment, too. Enjoy a simple slice with a hot cup of coffee in the evening. The creamy, tangy cheesecake is the perfect sweet note to end your day.
- Brunch Centerpiece: For a festive brunch, cut the cheesecake into smaller, slender slices. Serve them on a platter alongside a big bowl of fresh fruit salad. It offers a sweet option that feels lighter alongside eggs and pastries.
No matter how you serve it, this no bake cheesecake brings a touch of joyful celebration to the table.
FAQs About Red White and Blueberry Cheesecake
Can I use frozen berries for the topping?
I do not recommend it. Frozen berries release a lot of water as they thaw. This extra moisture will make your beautiful topping soggy and can soften the buttery crust. For the best texture and vibrant look, fresh, patted-dry berries are the only way to go.
How long does this cheesecake last in the fridge?
Your Red White and Blueberry Cheesecake will stay fresh for up to 3 days. Keep it covered tightly with plastic wrap in the refrigerator. The graham cracker crust will soften a bit after day one, but the creamy filling and berry flavors will still be absolutely delicious.
Can I make this recipe ahead of time?
Absolutely, and you should. This is the ultimate make-ahead dessert. I always make my no bake cheesecake the day before a party. Letting it chill overnight ensures it sets perfectly firm and makes your day-of hosting completely stress-free.
My filling seems soft after 6 hours. What happened?
This usually means the heavy cream was not whipped to stiff peaks, or the chill time was cut short. The filling needs that full, uninterrupted time to firm up. Pop it back in the fridge for another 2-3 hours. It will set properly with a little more patience.
What are the estimated nutritional values per serving?
For one slice (assuming 8 servings from this recipe), you can expect approximately 464 calories, 34g of fat, 38g of carbohydrates, and 5g of protein. Please note this is an estimate. Final values depend on the specific brands and exact measurements you use.
Your New Go-To Celebration Dessert
This Red White and Blueberry Cheesecake truly has it all. It delivers stunning looks with no-bake ease and make-ahead convenience. I know this patriotic dessert will become your secret weapon for summer parties and beyond. It is the kind of recipe you will make for years, creating sweet memories with every creamy, berry-topped slice.
I would love to hear how yours turns out. Tell me in the comments, what is your favorite berry combination? For more easy, family-friendly dessert ideas that never let flavor take a back seat, be sure to follow along right here. Now, go make a memory. Your kitchen is waiting.
For more delicious recipes and inspiration, check out my Pinterest!
Print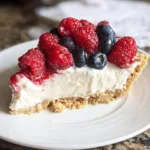
Red White and Blueberry Cheesecake
- Total Time: 6 hours 20 minutes
- Yield: 8 servings 1x
- Diet: Vegetarian
Description
Celebrate summer with this vibrant and effortless no bake cheesecake. Featuring a buttery graham cracker crust, creamy filling, and fresh berry topping, it’s a showstopper dessert perfect for any patriotic gathering.
Ingredients
- 12 graham crackers (about 1 1/2 cups graham cracker crumbs)
- 6 tablespoons unsalted butter, melted
- 8 ounces cream cheese, softened
- 2/3 cup granulated sugar
- 1 teaspoon vanilla extract
- 1 tablespoon fresh lemon juice
- 1 1/2 cups heavy cream
- 1 cup fresh raspberries
- 1/2 cup fresh blueberries
Instructions
- Place graham crackers in a food processor and pulse until fine crumbs form.
- In a small bowl, combine graham cracker crumbs and melted butter. Stir until the crumbs are evenly coated.
- Press the crumb mixture firmly into the bottom and up the sides of a 9-inch pie plate to form the crust.
- Refrigerate the crust for at least 15 minutes while you prepare the filling.
- In a large bowl, beat the softened cream cheese with an electric mixer on medium speed until smooth and creamy, about 2–3 minutes.
- Gradually add the granulated sugar, vanilla extract, and lemon juice to the cream cheese. Beat until well combined and no lumps remain. The lemon juice helps to brighten the flavor of the cream cheese.
- In a separate bowl, whip the heavy cream with an electric mixer on high speed until stiff peaks form.
- Gently fold about one-third of the whipped cream into the cream cheese mixture using a rubber spatula until just incorporated.
- Carefully fold in the remaining whipped cream until the filling is smooth and homogenous.
- Spoon the cheesecake filling into the chilled graham cracker crust, spreading it evenly to create a smooth top.
- Decorate the top of the cheesecake by arranging fresh raspberries and blueberries. You can create a pattern, like a star with raspberries and a border with blueberries.
- Cover the cheesecake with plastic wrap and refrigerate for at least 6 hours, or preferably overnight, to allow it to set completely.
Notes
Ensure your cream cheese is fully softened for a smooth filling. For a firmer crust, you can bake it at 350°F (175°C) for 8–10 minutes and let it cool completely before filling. Using frozen berries will release excess moisture, so fresh berries are recommended for the best topping. Serve chilled, cut into wedges.
- Prep Time: 20 minutes
- Cook Time: 0 minutes
- Category: Dessert
- Method: No-Bake
- Cuisine: American
Nutrition
- Serving Size: 1 slice (1/8 of cheesecake)
- Calories: 464
- Sugar: 26g
- Sodium: 180mg
- Fat: 35g
- Saturated Fat: 21g
- Unsaturated Fat: 11g
- Trans Fat: 0g
- Carbohydrates: 36g
- Fiber: 2g
- Protein: 5g
- Cholesterol: 105mg
Keywords: red white and blueberry cheesecake, no bake cheesecake, patriotic dessert, berry cheesecake