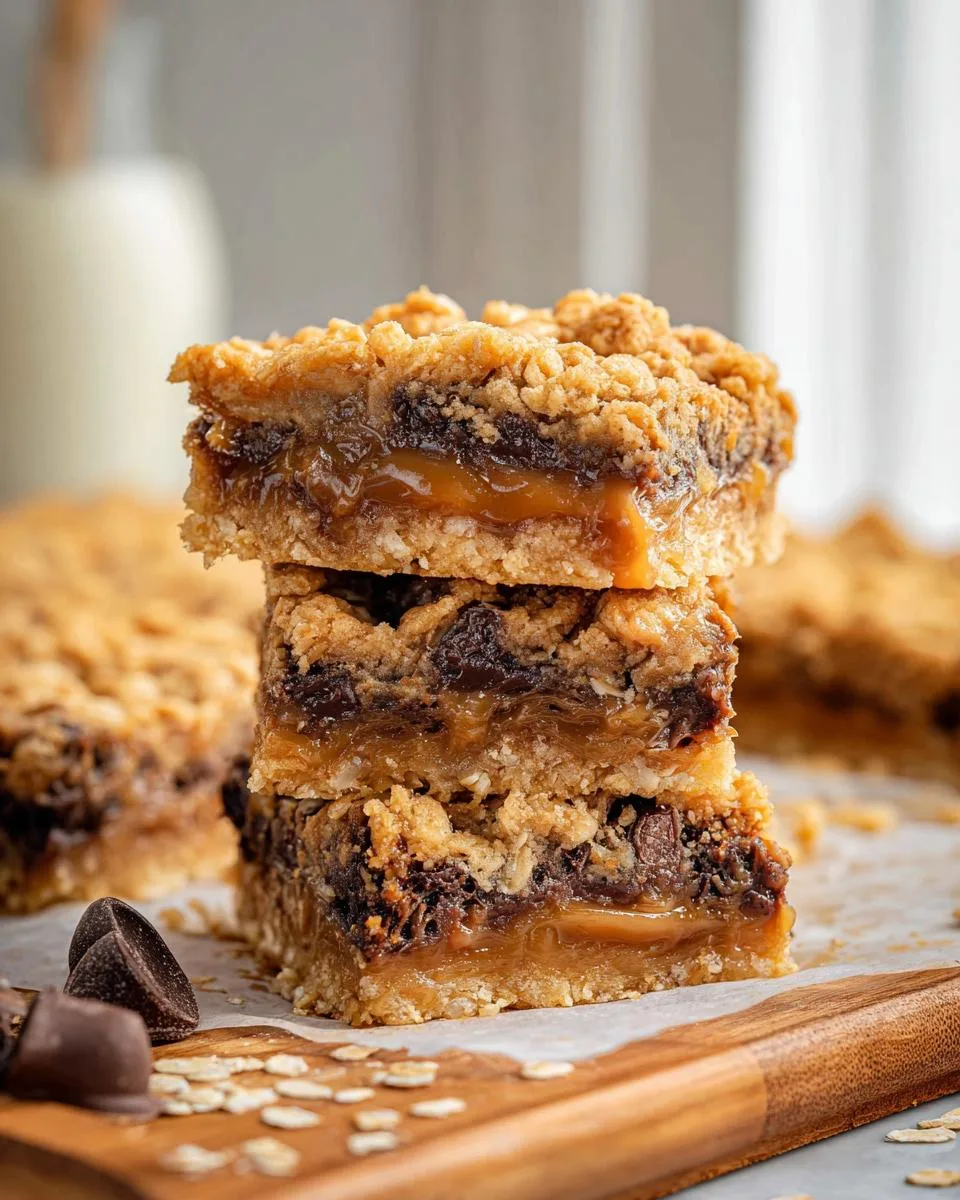
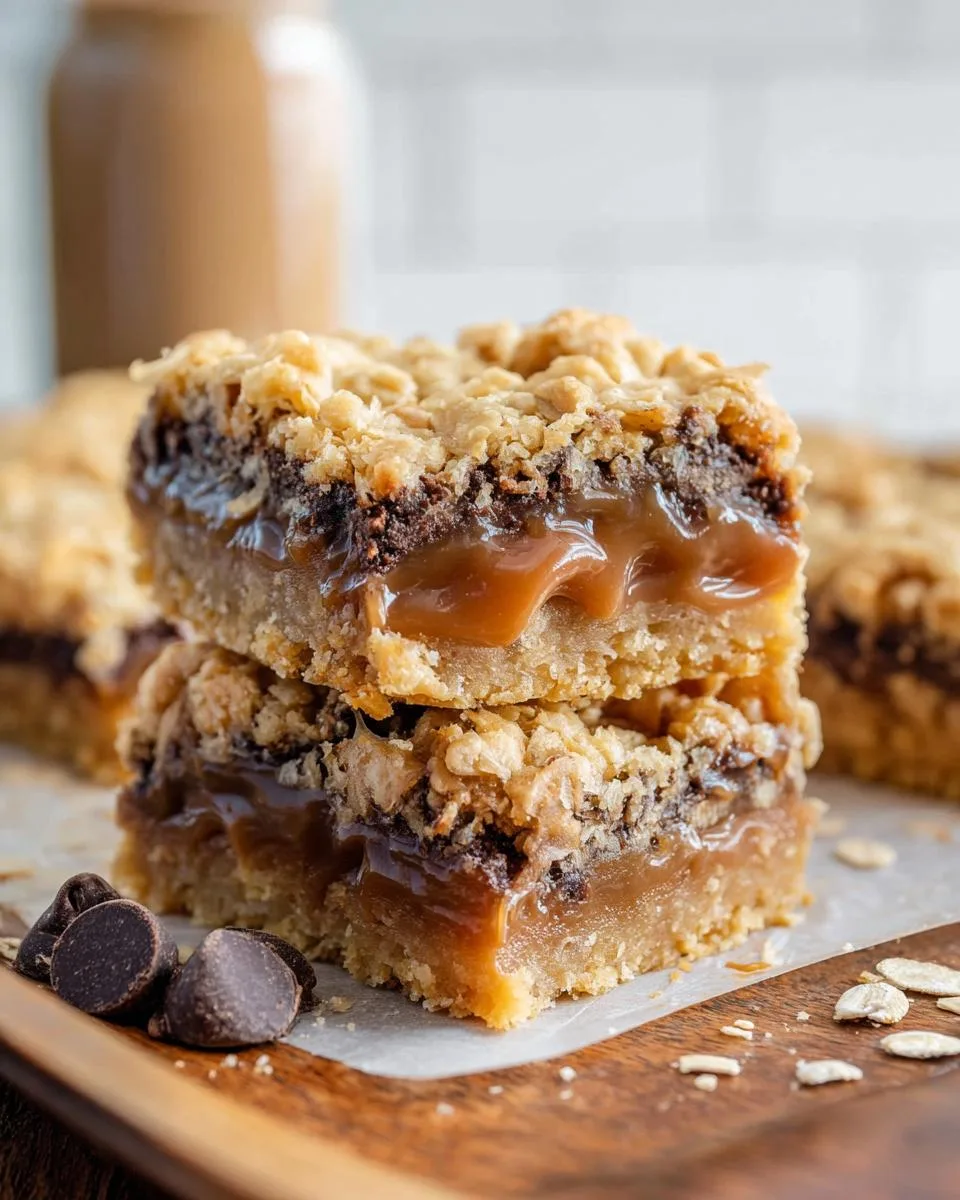
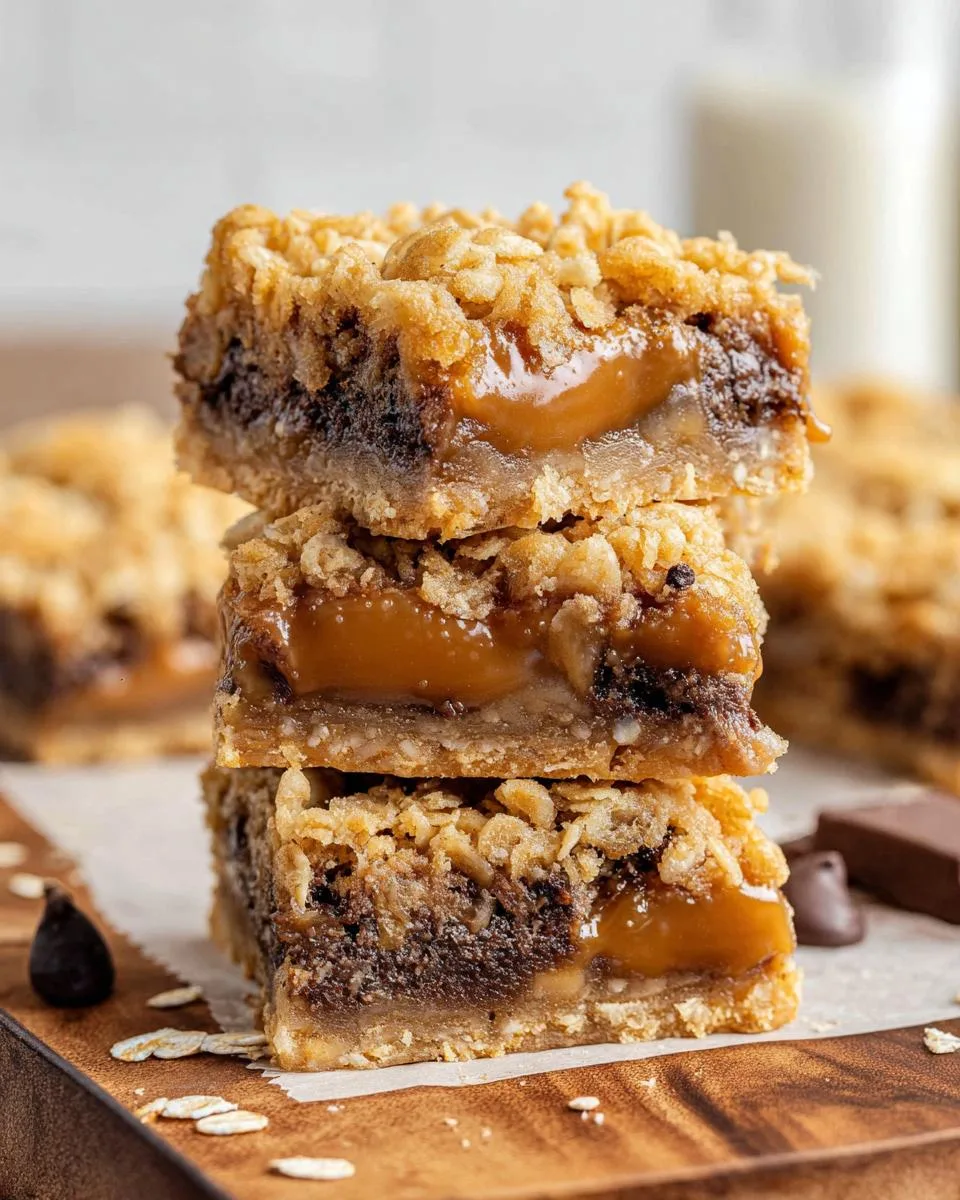
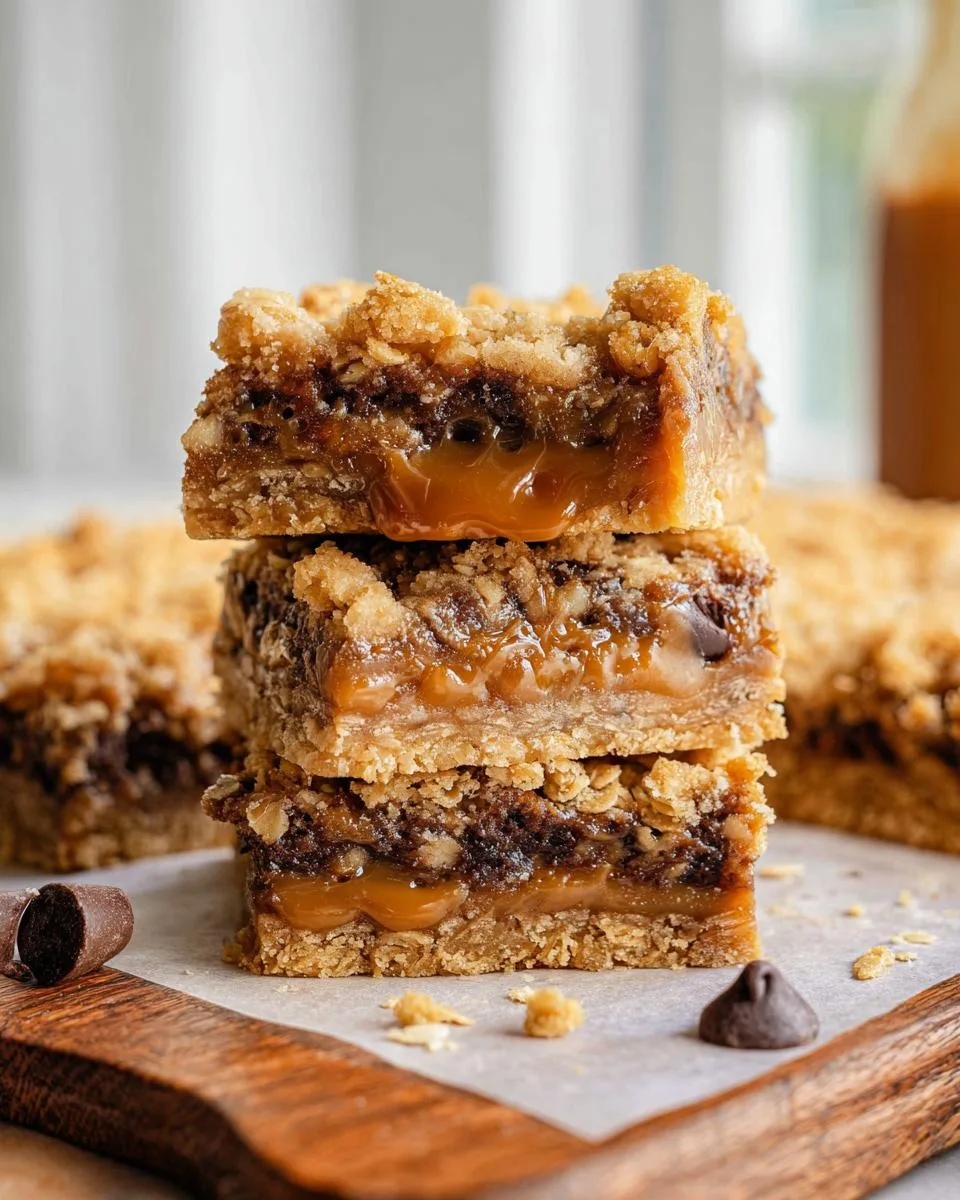
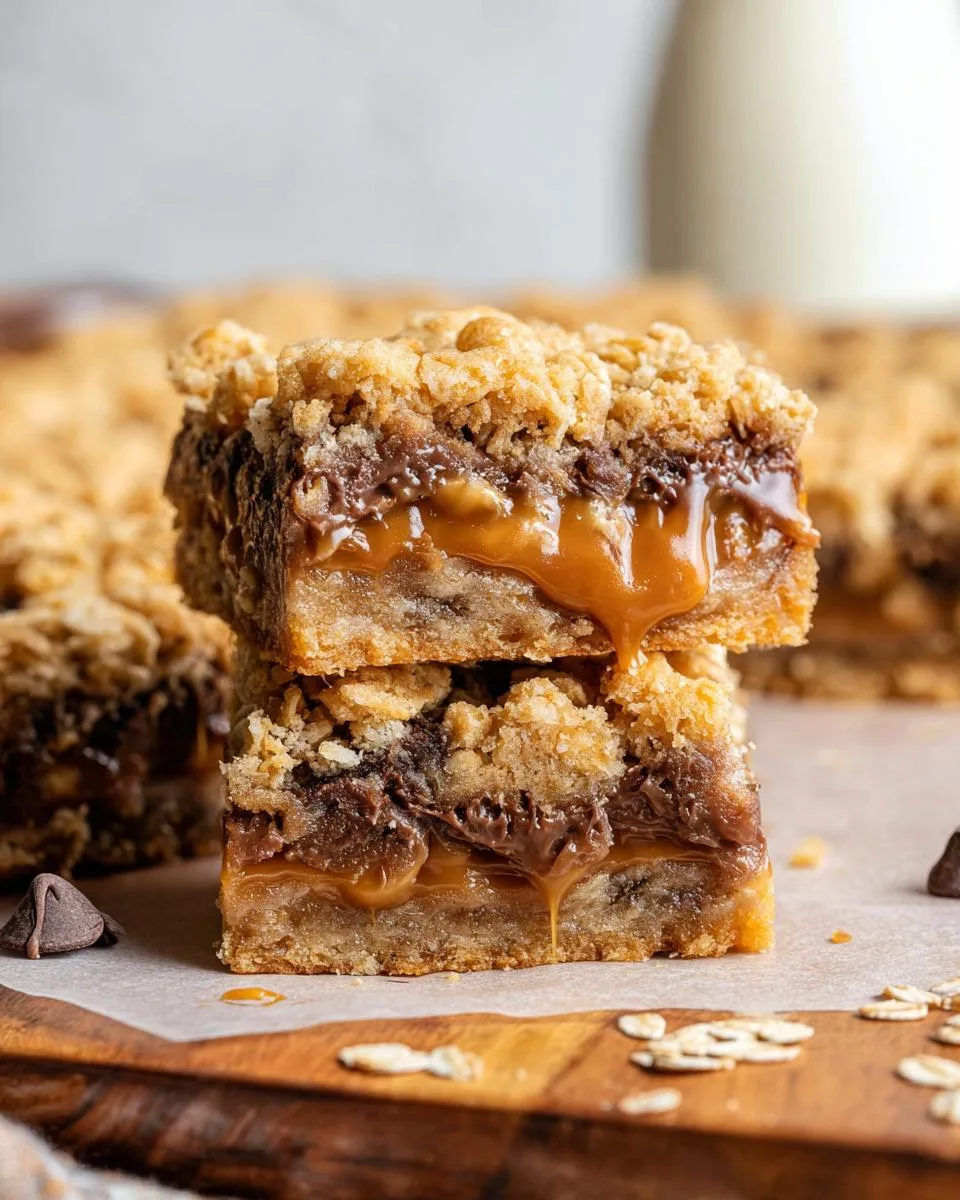
Ever need a dessert that feels like a warm hug? These caramelitas are it. Imagine a chewy oatmeal crust, a river of gooey caramel, and pockets of melted chocolate chips all in one perfect bar. They’re my secret weapon for potlucks and tough days.
The secret to great caramelitas isn’t complicated, it’s about embracing the layers. This recipe is wonderfully simple, requires no mixer, and delivers that irresistible sweet and salty satisfaction every single time. I learned it from a friend during a chaotic family reunion, and it’s been a non-negotiable treat in my kitchen ever since. Here’s what you need to know before you start.
Table of Contents
Why You’ll Love These Caramelitas
I bake these caramelitas more than any other dessert in my kitchen. They hit every single sweet spot you could want. Here’s exactly why they’ll become your new favorite, too.
- Perfect Texture: You get a crisp and chewy oatmeal crust, a gooey caramel center that oozes just right, and pockets of melted chocolate chips. It’s a party in every bite.
- Super Simple: This is a true one-bowl wonder with no mixer needed. If you can stir and press dough into a pan, you can make these easy caramelitas.
- Make-Ahead Magic: They are the ultimate bake sale or potluck hero. Bake them a day ahead, and they taste even better. They travel perfectly and never disappoint a crowd.
- Gourmet Feel, Simple Process: They look and taste like a fancy bakery treat, but the process is straightforward. It’s my go-to for impressing guests without stress.
- Reliable Results: I’ve made this recipe countless times, through every season. It’s foolproof. Follow these steps, and you’ll get the best caramelitas every single time.
Trust me, once you try them, you’ll understand why they’re always on my counter.
Ingredients You’ll Need
These classic caramelitas use simple pantry staples. The magic happens when you combine them with care. The key is using good, soft caramels for the best flavor. Let’s look at what goes into these bars.
- 1 ½ cups all-purpose flour – Spoon the flour into your measuring cup and level it off with a knife. Scooping packs in too much flour and can make the crust dry.
- 1 ½ cups old-fashioned rolled oats – This is crucial. Use old-fashioned oats, not quick oats. They give the perfect chewy texture. Quick oats absorb liquid differently and can make the bars gummy.
- 1 cup packed light brown sugar – Really pack it down into the cup. This adds moisture and a deep, rich molasses flavor to the crust.
- 1 teaspoon baking soda – This helps the oat layer rise a bit and become tender.
- ½ teaspoon kosher salt – Balances all the sweetness perfectly. If you use table salt, use a little less.
- ¾ cup (1 ½ sticks) unsalted butter, melted – I always use unsalted butter so I can control the saltiness. Let it cool for a minute before you mix it in.
- 1 teaspoon vanilla extract – It enhances all the other flavors. Don’t skip it.
- 38 unwrapped caramels (about 11 ounces) – Classic squares like Kraft work perfectly. Unwrap them completely before you start. Any little paper piece will ruin your smooth sauce.
- ⅔ cup heavy whipping cream – This creates a smooth, pourable caramel sauce. Do not substitute with milk. Milk won’t give you the same rich, thick consistency.
- 1 cup semi-sweet chocolate chips – You can use milk chocolate or dark chocolate chips as a fun variation.
For a fun twist, try swapping the chocolate chips for butterscotch or peanut butter chips. It changes the flavor in a delicious way.
How to Make Caramelitas
Making these caramelitas is like building a delicious little tower. Each step is simple, but timing is key. Let’s walk through it together, step by step.
Step 1: Prep and Make the Oat Mixture
First, get your oven ready. Preheat it to 350°F. Line an 8×8 inch baking pan with parchment paper, leaving some overhang on two sides. This overhang is your lifesaver for lifting the finished bars out cleanly. In a large bowl, whisk together your flour, old-fashioned oats, packed brown sugar, baking soda, and salt. Pour in your slightly cooled melted butter and the vanilla extract. Stir everything with a spatula until it’s just combined. Your mixture will look like a bunch of delicious, buttery crumbs. That’s exactly what you want.
Step 2: Form and Pre-Bake the Base
Now, grab exactly half of that crumbly oat mixture. Press it firmly and evenly into the bottom of your prepared pan. I use the bottom of a measuring cup to press it down. You want a nice, compact layer. This is your foundation. Bake this base layer for 10 minutes. It won’t look fully baked, but it will be set. This quick pre-bake is crucial. It gives the bottom crust structure so it can hold all the gooey layers we’re about to add.
Step 3: Prepare the Caramel Sauce
While that base is baking, start your caramel. Put your completely unwrapped caramels and the heavy cream into a small saucepan. Cook this over medium heat. Stir it constantly with a wooden spoon or spatula. Keep stirring until every caramel has melted and the sauce is completely smooth and creamy. No lumps. Once it’s smooth, take it off the heat right away. Your sauce should be pourable and glossy.
Step 4: Assemble the Layers
Take your hot pan out of the oven. Immediately sprinkle the cup of chocolate chips evenly over the warm oat base. The heat will start melting them. Next, pour your warm caramel sauce over the chocolate chips. Try to cover the whole surface. Finally, take the remaining half of your oat mixture. Crumble it over the caramel layer with your fingers. Don’t press it down. Just let the crumbles fall evenly across the top.
Step 5: Final Bake and Cool
Put your assembled pan back into the oven. Bake for 18 to 22 more minutes. Look for golden brown edges and a top that looks set. The bars will still look quite soft in the center when you take them out. That’s normal. Place the whole pan on a wire rack and let it cool completely. This is the most important step for clean slices. The caramel needs time to firm up. For the cleanest cuts, I often chill the whole pan in the refrigerator for about 30 minutes after it has cooled on the rack. Then, use the parchment paper overhang to lift the whole slab out before slicing into squares.
Pro Tips for the Best Caramelitas
Want bakery-perfect caramelitas right from your own oven? A few simple tricks make all the difference. These are the little secrets I’ve learned after making dozens of pans for my family and friends.
- Choose Your Pan Wisely: Use a light-colored metal pan for the best, even browning. If you only have a glass dish, add 3-5 minutes to the final bake time and watch the edges closely.
- Press That Crust: Really press the first half of the oat mixture into the pan. A firm, compact base is your best defense against crumbly bars. The bottom of a flat measuring cup is my favorite tool for this job.
- Perfect Your Caramel Sauce: Stir the caramels and cream constantly over medium heat. Don’t stop until the sauce is utterly smooth, with no lumps in sight. If you see a stray bit of caramel, keep stirring. It will not melt later in the oven.
- Patience is Key: Let the pan cool completely on the wire rack. I know it’s hard to wait, but this lets the caramel layer set. For the cleanest squares, chill the whole pan in the fridge for 30 minutes after it cools. The caramel will firm up beautifully.
- Slice Like a Pro: Use a large, sharp chef’s knife. Run it under very hot water and wipe it dry before your first cut. Wipe the blade clean with a damp cloth between each slice for those picture-perfect edges every time.
Follow these tips, and your caramelitas will look as incredible as they taste. You’ve got this.
Common Mistakes to Avoid
Even the best recipes have little pitfalls. I’ve made them all myself, so let’s learn from my mistakes. Avoiding these common issues will guarantee your caramelitas turn out perfectly every time.
- Slicing Too Soon: Cutting into warm bars creates a gooey mess. The caramel needs time to set and firm up. Wait until the pan is completely cool on a wire rack. For the cleanest slices, chill the bars for 30 minutes after they cool.
- Using Quick Oats: Quick oats absorb liquid differently. They can make the texture of your caramelitas soft and gummy, not chewy. Always stick with old-fashioned rolled oats for the perfect bite.
- Over-Measuring Flour: Scooping flour directly from the bag packs too much into your cup. This makes the oat crust dry and dense. Instead, spoon the flour lightly into your measuring cup and level it off with a knife for accuracy.
- Under-Melting the Caramel: If you don’t stir constantly over medium heat, you’ll get lumps. Any unmelted caramel pieces will stay hard, even after baking. Keep stirring until your sauce is completely smooth, glossy, and pourable.
Don’t panic if something goes wrong. Just remember these tips next time. Your next batch will be flawless.
Delicious Caramelitas Variations
The classic caramelitas recipe is perfect, but sometimes you want to play. These easy variations let you customize your bars without any fuss. Each one adds a new layer of flavor or texture.
- Salted Caramelitas: After you pour the warm caramel sauce over the chocolate chips, sprinkle a teaspoon of flaky sea salt over the top. Then add the final oat crumble. This creates that perfect sweet and salty balance everyone loves.
- Nutty Caramelitas: Add a half cup of chopped pecans or walnuts to your dry oat mixture before you mix in the butter. The nuts bake into the crust, adding a wonderful crunch and earthy flavor that pairs beautifully with the caramel.
- Different Chips: Swap out the semi-sweet chocolate chips. Try milk chocolate for a sweeter bar, dark chocolate for a richer one, or even white chocolate chips for a fun contrast. Butterscotch chips are another fantastic swap that my kids adore.
- Gluten-Free Caramelitas: Use a trusted 1:1 gluten-free all-purpose flour blend and certified gluten-free old-fashioned oats. The texture and flavor will be just as amazing. This is a great way to share the joy with friends who have dietary needs.
My favorite is the salted version. It feels like a gourmet upgrade with just one extra sprinkle. Try one, or mix a few ideas together for your own signature bar.
Serving Suggestions
These caramelitas are a complete treat on their own, but they’re also incredibly versatile. Their sturdy, chewy texture makes them perfect for so many occasions.
For a truly decadent dessert, serve a square slightly warmed with a scoop of vanilla ice cream. The warm caramel will soften and meld with the cold ice cream. It’s pure bliss.
They are the ideal lunchbox dessert or afternoon snack with a cup of coffee. Their rich flavor satisfies any sweet craving. Arrange them on a platter at a party. They are a guaranteed crowd-pleaser.
Because they are so sturdy, they travel beautifully. Pack them for picnics or bake sales without worry. They also make a wonderful homemade gift. Place a few squares in a decorative box or tin. It’s a thoughtful present anyone will love.
No matter how you serve them, these bars deliver comfort and joy in every bite.
FAQs About Caramelitas
Can I use store-bought caramel sauce instead?
You can use jarred caramel sauce, but the texture will be different. The sauce from caramels and cream is thicker and sets up firmer. If you use store-bought sauce, use about 1 ¼ cups of a thick caramel. The bars might be a bit softer, but they’ll still taste great.
How do I store leftover caramelitas?
Store them in an airtight container at room temperature for up to 4 days. They keep their chewy texture perfectly. For longer storage, you can refrigerate them for up to a week. Just note that chilling makes the caramel layer firmer.
Can I freeze caramelitas?
Yes, they freeze beautifully. Let the bars cool completely first. Wrap the whole slab or individual squares tightly in plastic wrap, then foil. Freeze for up to 3 months. Thaw them at room temperature when you’re ready for a treat.
Why are my bars falling apart when I slice them?
The most common reason is slicing them before they are fully cooled. The caramel needs time to set. If you cut into a warm pan, the layers will separate. Always let the pan cool completely on a wire rack. For the cleanest cuts, chill the bars for 30 minutes after they cool.
What’s the calorie count for one caramelita?
One bar is approximately 375 calories. This is an estimate. The exact number can vary based on the specific brands of caramels, chocolate chips, and butter you use. It’s a rich, satisfying treat meant to be enjoyed.
Time to Bake Your Own Caramelitas
Now you know everything you need to bake the perfect caramelitas. It’s time to create that magic in your own kitchen. This recipe gives you the joy of making something truly special. You get a chewy oatmeal crust, a gooey caramel river, and pockets of melted chocolate all in one bar.
I hope this recipe brings you as much happiness as it has brought my family. I’d love to hear how yours turns out. Did you try the salted caramel version? Did your kids love the butterscotch chips? Please rate the recipe and leave a comment below telling me your favorite variation. For more simple and delicious dessert ideas, be sure to follow along here. Happy baking.
For more delicious recipes and baking inspiration, check out our recipes section or follow us on Pinterest.
Print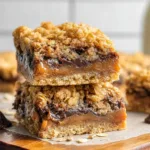
Caramelitas
- Total Time: 50 minutes
- Yield: 16 servings 1x
- Diet: Vegetarian
Description
These oatmeal bars combine a chewy oat base with a gooey caramel and chocolate chip layer, then are topped with a crumbly oat mixture.
Ingredients
- 1 ½ cups all-purpose flour
- 1 ½ cups old-fashioned rolled oats
- 1 cup packed light brown sugar
- 1 teaspoon baking soda
- ½ teaspoon kosher salt
- ¾ cup (1 ½ sticks) unsalted butter, melted
- 1 teaspoon vanilla extract
- 38 unwrapped caramels (about 11 ounces)
- ⅔ cup heavy whipping cream
- 1 cup semi-sweet chocolate chips
Instructions
- Preheat your oven to 350 degrees Fahrenheit. Line an 8×8 inch baking dish with parchment paper.
- In a large bowl, whisk together the flour, oats, brown sugar, baking soda, and salt.
- Pour the melted butter and vanilla extract into the dry ingredients. Stir with a spatula until just combined.
- Press half of the oat mixture firmly and evenly into the bottom of the prepared baking dish.
- Bake the base for 10 minutes.
- While the base bakes, combine the unwrapped caramels and heavy whipping cream in a small saucepan.
- Heat over medium heat, stirring constantly, until the caramels have completely melted and the sauce is smooth.
- Remove from heat.
- Once the base is out of the oven, immediately sprinkle the chocolate chips evenly over the hot oat layer.
- Pour the warm caramel sauce over the chocolate chips, spreading it to cover the entire surface.
- Crumble the remaining half of the oat mixture over the caramel layer with your hands.
- Bake for an additional 18-22 minutes, or until the edges are golden brown and the top is set.
- Let the bars cool completely in the baking dish on a wire rack before slicing into squares.
Notes
- For cleaner slicing, chill the bars for at least 30 minutes before cutting.
- Ensure your caramels are fully unwrapped before starting the sauce.
- Make sure the caramel sauce is creamy before pouring to prevent it from becoming too stiff.
- Prep Time: 20 minutes
- Cook Time: 30 minutes
- Category: Dessert
- Method: Baking
- Cuisine: American
Nutrition
- Serving Size: 1 bar
- Calories: 375 kcal
- Sugar: 30g
- Sodium: 150mg
- Fat: 18g
- Saturated Fat: 10g
- Unsaturated Fat: 6g
- Trans Fat: 0g
- Carbohydrates: 50g
- Fiber: 2g
- Protein: 4g
- Cholesterol: 35mg
Keywords: caramel chocolate chip oatmeal bars, dessert bars, oat bars, caramelitas, baked treats