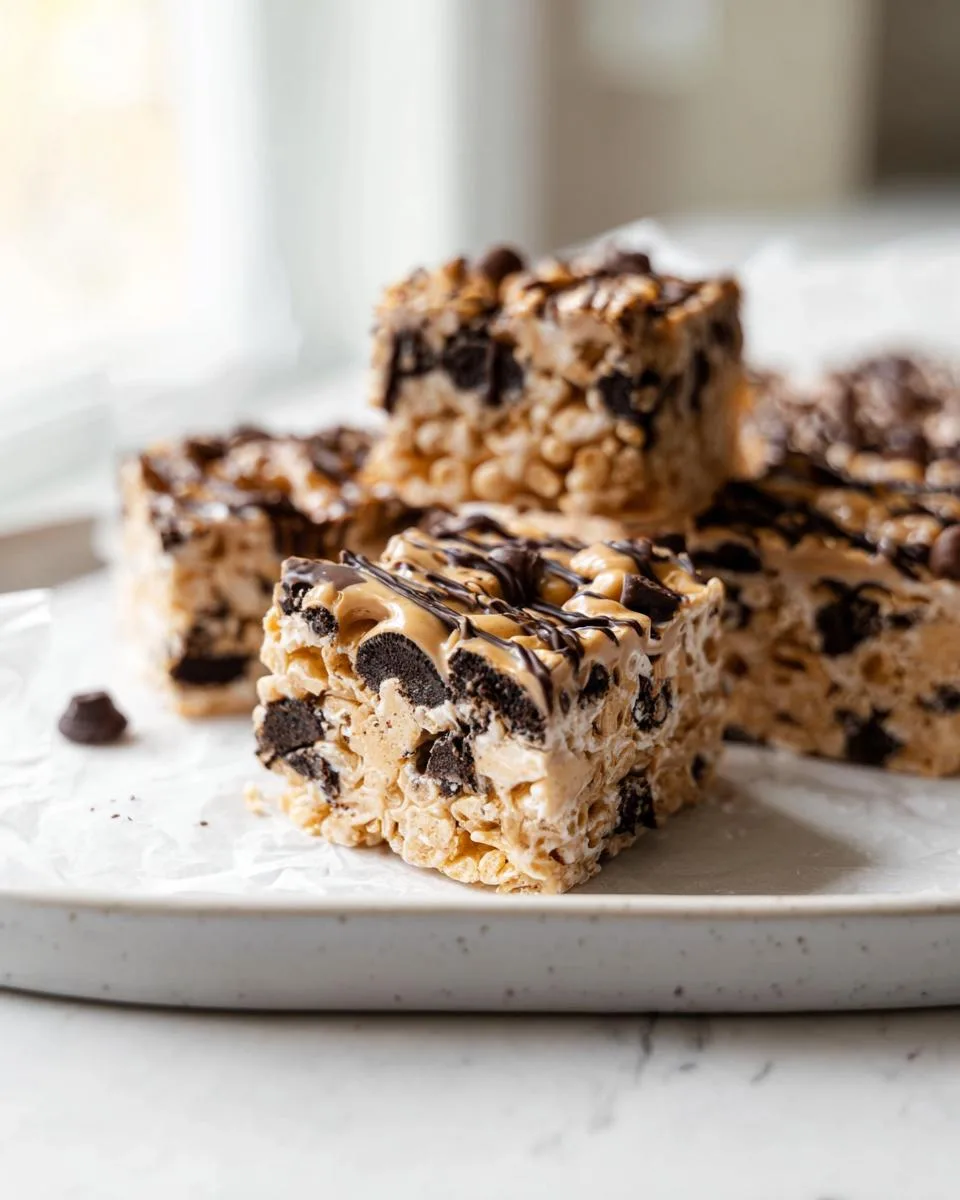
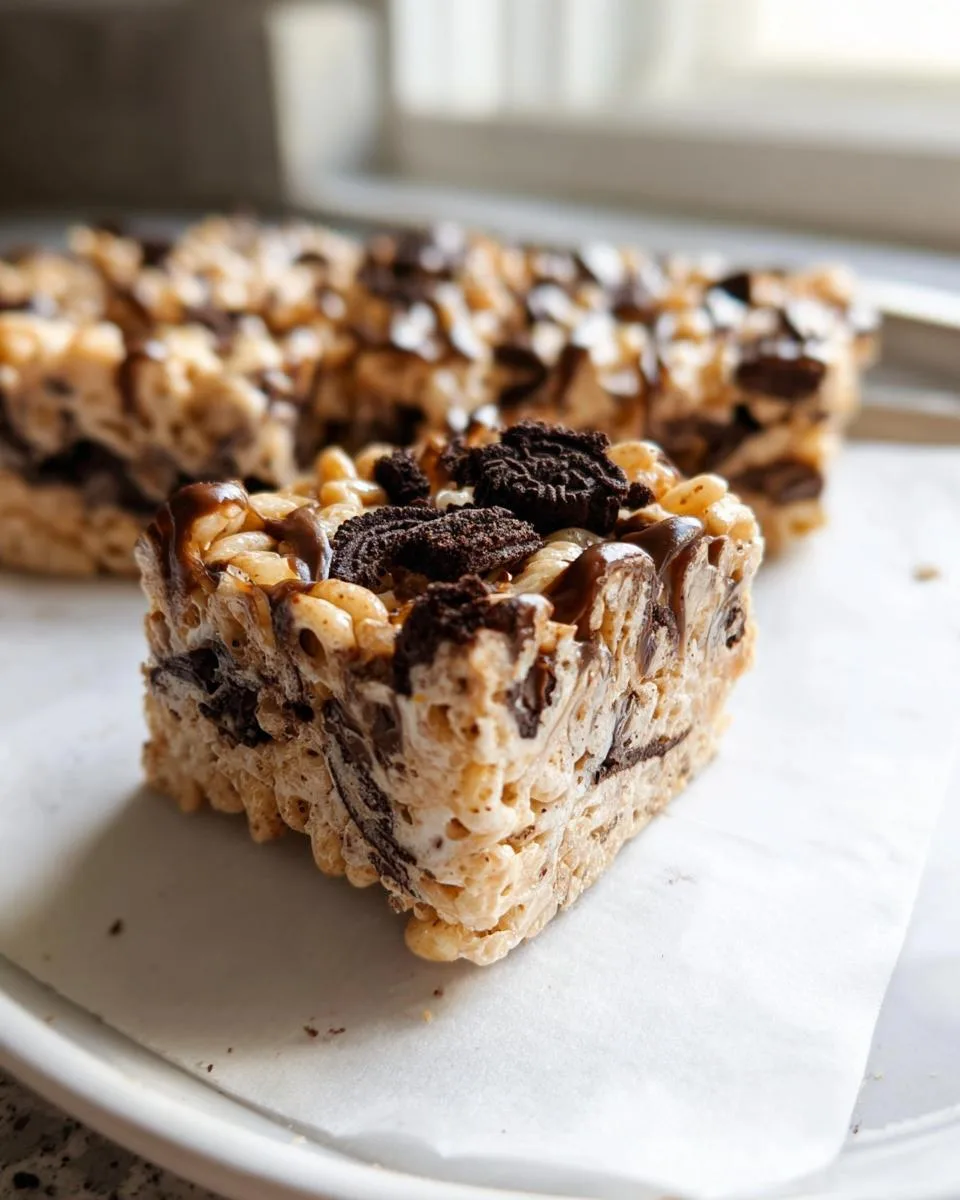
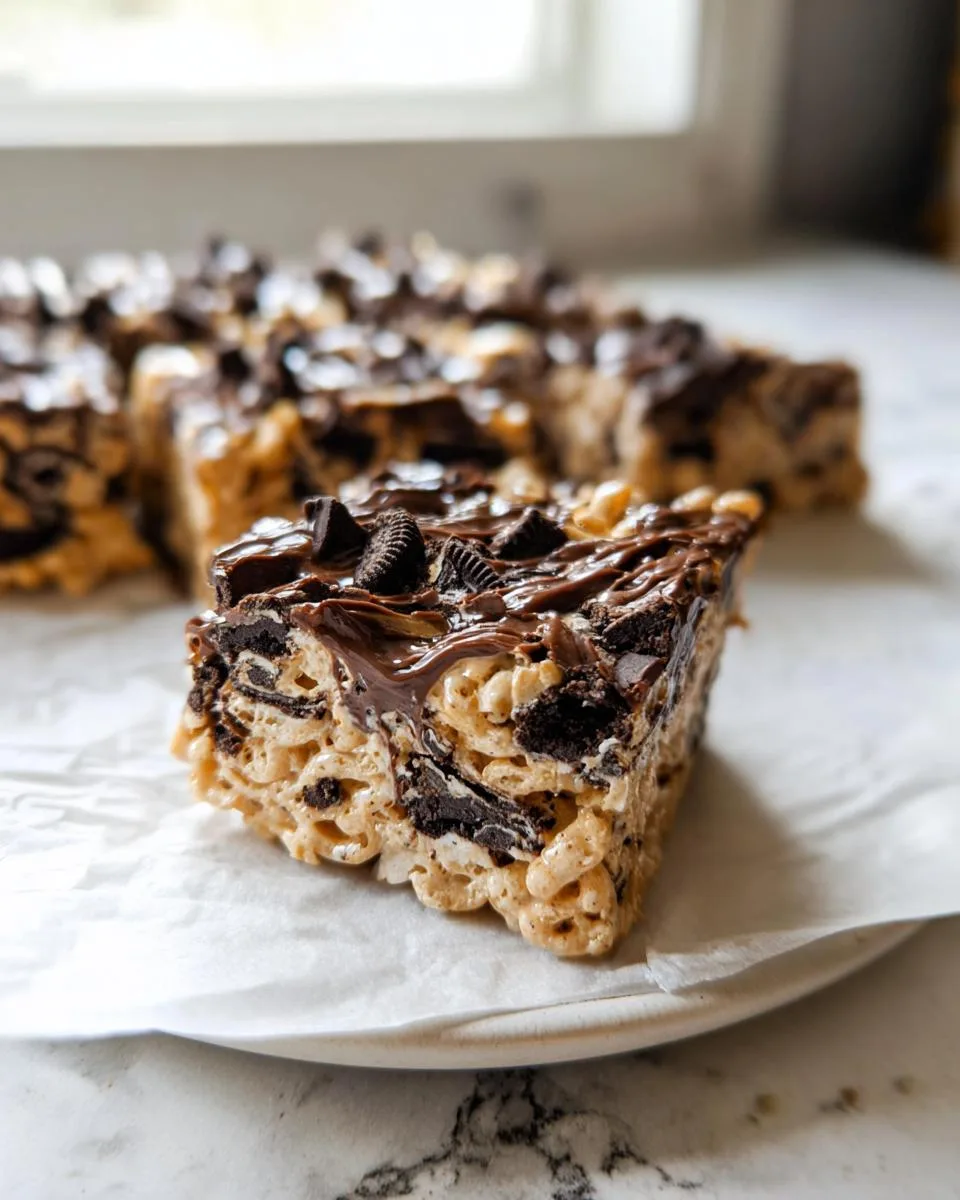
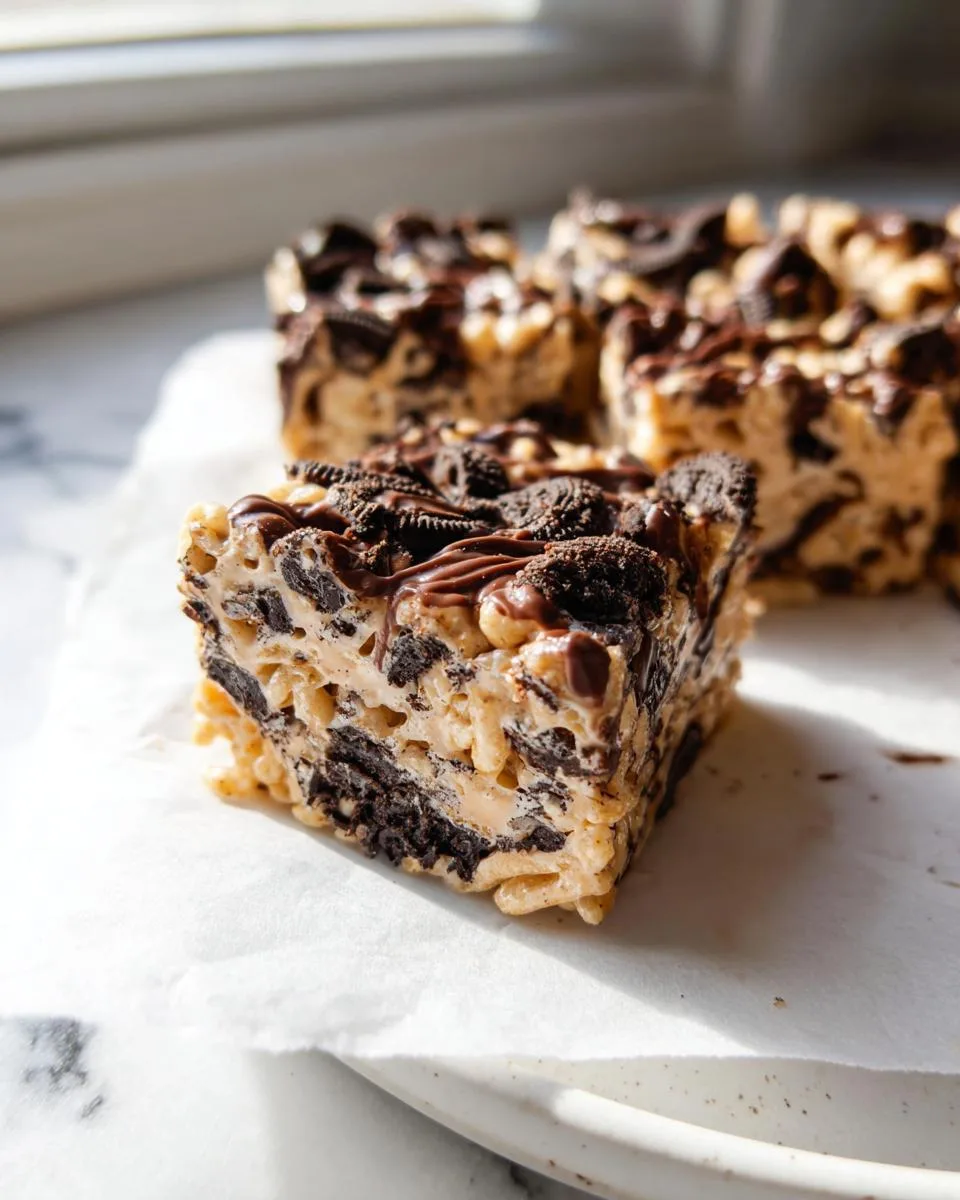
Have you ever wished your classic Rice Krispie treat could be a little more, well, amazing? I discovered the answer at a chaotic school bake sale, where a plate of these disappeared in minutes. These Peanut Butter Oreo Rice Krispie Treats are the ultimate no-bake dessert, combining three perfect flavors into one irresistible bar.
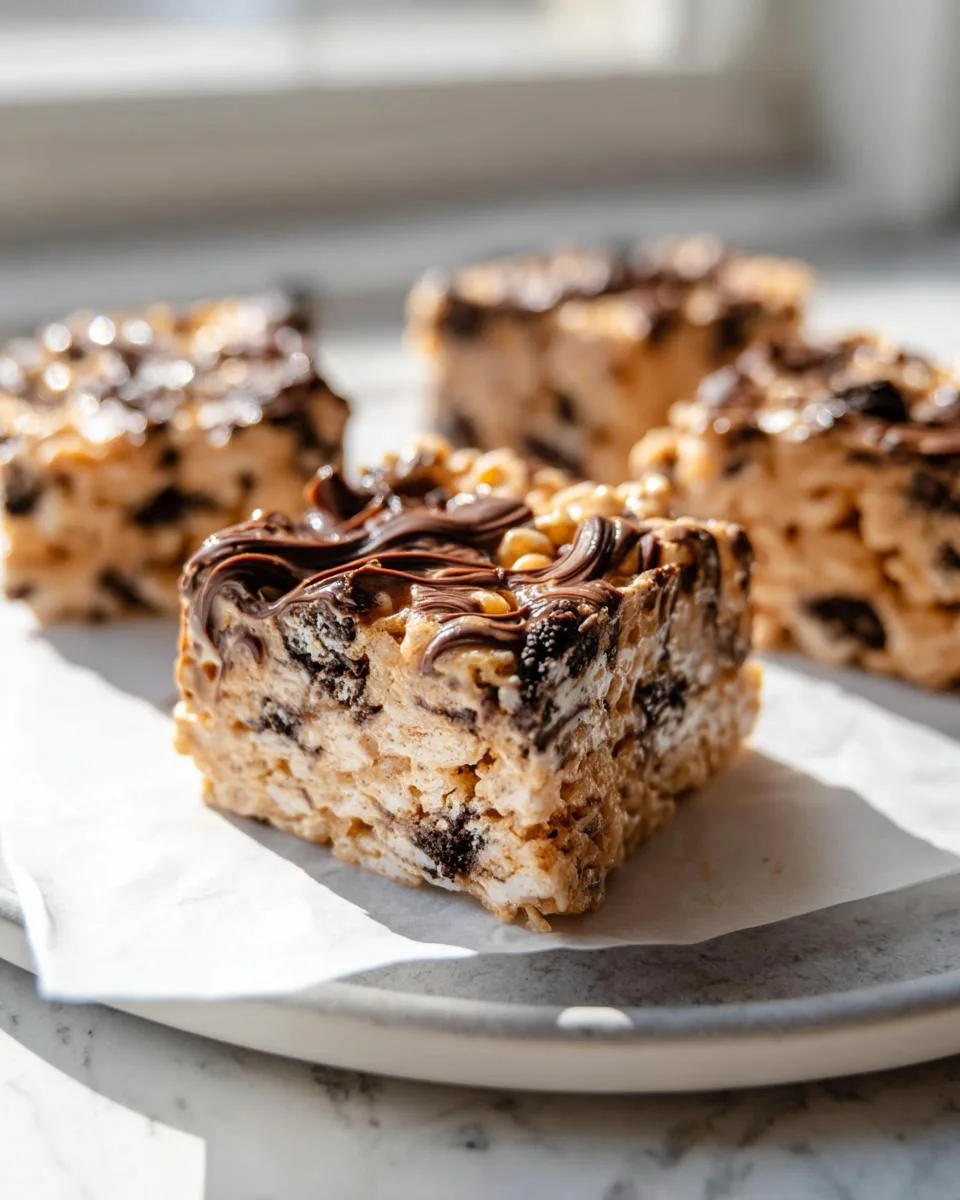
After years of testing recipes in my real kitchen, I can tell you the secret isn’t complicated. It’s about that magical swirl of peanut butter and the crunch of Oreo cookies. This is the easy, foolproof treat you’ll make for every movie night and potluck from now on. Let’s walk through the recipe together.
Table of Contents
Why You’ll Love These Peanut Butter Oreo Rice Krispie Treats
Honestly, what’s not to love? This recipe takes a beloved classic and makes it over-the-top delicious with just a few simple stirs. Here is exactly why it will become your new go-to sweet.
- No-Bake Easy: You do not need to turn on your oven. The entire process happens in one pot on the stovetop in about 15 minutes. It is the ultimate easy no bake dessert for busy days.
- Fantastic Texture: Every bite gives you the classic crispy cereal snap, creamy pockets of peanut butter, and satisfying crunches from the Oreo pieces. It is a perfect party in your mouth.
- Always a Hit: I bring these to every gathering. They disappear fast because they appeal to both kids and adults. They are a guaranteed crowd-pleaser for potlucks and parties.
- Make It Your Own: This base recipe is highly customizable. You can swirl in different sauces, use your favorite cookie, or add extra candy. I will share my favorite variations later.
- Perfect for Planning: These peanut butter Oreo rice krispie treats store beautifully. You can make them a day or two ahead for an event, or keep them on hand for a quick after-school snack all week.
In short, this recipe delivers maximum joy for minimal effort. Let us gather our simple ingredients.
Ingredients You’ll Need
You only need six simple ingredients to make these unforgettable peanut butter Oreo rice krispie treats. Each one plays a key role in creating that perfect chewy, crunchy, and creamy bite. Let’s get them ready.
- 3 tablespoons unsalted butter: This gives our treats a rich base and helps the marshmallows melt smoothly. Using unsalted butter lets you control the saltiness perfectly.
- 10 ounces mini marshmallows: I always use minis. They melt faster and more evenly than the large ones, which means no lumps and a perfectly smooth mixture every single time.
- 1/4 teaspoon fine salt: Do not skip this. A little salt makes the sweet marshmallow and rich peanut butter flavors pop. It is the secret to a well-balanced dessert.
- 6 cups Rice Krispies cereal: For the best texture, lightly spoon the cereal into your measuring cup. Do not pack it down. You want it fluffy so your treats stay light.
- 1/2 cup creamy peanut butter, divided: Use a standard, no-stir variety like Jif or Skippy. The stabilized oils work better for swirling. We will use half in the mix and half for drizzling.
- 12 Oreo cookies, roughly chopped: This is about one heaping cup of chunks. No need to remove the cream. Just give them a rough chop for wonderful texture in every bar.
Quick substitution: For a nut-free version, swap the peanut butter with an equal amount of sunflower seed butter. It gives a similar creamy, rich result. With your ingredients set out, you are just minutes away from the best treats.
How to Make Peanut Butter Oreo Rice Krispie Treats
This is where the magic happens, and it all comes together in one pot. The key is moving with confidence but without rushing. Follow these simple steps for perfect peanut butter Oreo rice krispie treats every single time.
Step 1: Prepare Your Pan
First, grab your 8×8-inch baking pan. Tear off a sheet of parchment paper large enough to line the bottom and sides with some extra hanging over the edges. This overhang is your best friend. It acts like handles to lift the whole slab out later for super clean cuts. If you do not have parchment, generously grease the pan with non-stick spray. But trust me, parchment is the way to go.
Step 2: Melt the Butter and Marshmallows
Place a large pot or Dutch oven over medium heat. Add your three tablespoons of butter. Let it melt completely, swirling the pot occasionally. Once it is melted and bubbling slightly, pour in all 10 ounces of mini marshmallows and the quarter teaspoon of salt. Now, start stirring. Keep that spatula moving in a figure-eight motion. The marshmallows will puff up and then slowly melt into a smooth, glossy, white lava. This takes about 4 to 5 minutes. The second the last marshmallow lump disappears, pull the pot off the heat. Do not let it cook longer or it can scorch.
Step 3: Combine with Cereal and Oreos
Working quickly, dump all six cups of Rice Krispies and your cup of chopped Oreos right into the pot with the melted marshmallow. Use your spatula to gently fold and turn the mixture. You want every single piece of cereal and cookie to get a glossy coat of that sweet marshmallow glue. It will feel stiff, but keep folding until you see no dry spots. The heat from the marshmallow will soften the Oreos just a bit, which is perfect.
Step 4: Create the Peanut Butter Swirls
Measure out a quarter cup of your creamy peanut butter. Warm it in the microwave for just 15 seconds to make it soft and pourable. Drop big spoonfuls of this warm peanut butter all over the cereal mixture in the pot. This is the fun part. Take your spatula and fold everything together just two or three times. Stop. You want beautiful, marbled ribbons of peanut butter, not a uniform, homogenous mix. Those pockets of pure peanut butter flavor are what make these treats so special.
Step 5: Press and Top the Treats
Immediately scrape the mixture into your prepared pan. Lightly coat your spatula with cooking spray or butter. Use it to gently press the mixture into a flat, even layer. I say gently for a reason. If you pack it down too firmly, your bars will be hard instead of delightfully chewy. If you like, drizzle the remaining quarter cup of softened peanut butter over the top. You can also sprinkle a few extra Oreo crumbs on for a pretty finish.
Step 6: Cool and Slice
Now, walk away. Let the pan sit untouched at room temperature for a full hour. This patience is crucial for the treats to set properly so they hold their shape. Once the hour is up, use the parchment paper handles to lift the entire slab onto a cutting board. Use a sharp knife to cut it into 12 neat bars. For the cleanest slices, wipe your knife with a damp cloth between each cut. Then, it is finally time to enjoy.
Pro Tips for the Best Peanut Butter Oreo Rice Krispie Treats
After making countless batches, I have picked up a few tricks that make a real difference. These pro tips will help you nail the texture and flavor of your peanut butter Oreo rice krispie treats every single time.
- Choose Your Pot Wisely: Always use a large pot, bigger than you think you need. This gives you plenty of room to fold in the cereal and Oreos without making a mess. A Dutch oven is my perfect tool for this job.
- Double the Oreo Fun: For an even richer, creamier flavor, use Double Stuf Oreos. The extra filling melts into the marshmallow just a bit, creating an incredible taste. It is my secret for a truly decadent treat.
- Revive a Stiff Mix: If the marshmallow mixture cools and sets too fast, making it hard to combine, do not panic. Simply place the pot back on the burner over the lowest heat for just 10 to 15 seconds. This softens it up perfectly for easy mixing.
- Get Picture-Perfect Bars: For the cleanest cuts, wipe your knife with a damp paper towel between each slice. This removes any sticky peanut butter or marshmallow, giving you neat, professional-looking bars every time.
- Keep Them Soft: To store leftovers, place them in a single layer in an airtight container with parchment paper between layers. They will stay fresh and perfectly chewy at room temperature for up to five days.
With these simple tricks, you are guaranteed a perfect batch. Now let us talk about how to sidestep any common hiccups.
Common Mistakes to Avoid
Even the easiest recipes have little pitfalls. Knowing what to watch for is the mark of a confident cook. Here are the most common mistakes I see with peanut butter Oreo rice krispie treats and exactly how to fix them.
- Overheating the Marshmallows: This is the top mistake. If you cook the marshmallows too long, they become tough and cause hard, chewy bars. The fix is simple. Stir constantly over medium heat and remove the pot the moment the mixture is completely smooth with no lumps.
- Overmixing the Peanut Butter: If you stir the peanut butter in completely, it coats every piece and can make the final treats feel a bit greasy. Remember, swirling is the goal. Just two or three folds creates those perfect, flavorful pockets.
- Packing the Mixture Too Firmly: Pressing down with all your might compacts the cereal, leading to a dense, hard bar instead of a light, chewy one. Use a greased spatula to gently press the mixture just enough to create an even layer in the pan.
- Not Letting Them Cool Completely: I know it is tempting, but cutting into warm treats is a mess. They will be gooey and fall apart. Patience is key. Let them set at room temperature for the full hour so they hold their shape when sliced.
Do not panic if you make one of these errors. The treats will still taste wonderful. Now, let us talk about how to make this recipe your own.
Delicious Variations
The best part about this recipe is how easily you can make it your own. Once you master the basic peanut butter Oreo rice krispie treats, try one of these fun twists for your next batch. Each one adds a new layer of flavor and fun.
- Chocolate Drizzle: For a double chocolate hit, melt half a cup of semi-sweet chocolate chips with a teaspoon of coconut oil. Let your bars cool completely, then drizzle the chocolate over the top with a fork. Let it set before serving.
- Salted Caramel Swirl: Love sweet and salty? Warm three tablespoons of salted caramel sauce. When you add the peanut butter in Step 4, drop spoonfuls of caramel in too. Swirl everything together for a gooey, irresistible ribbon in every bite.
- Different Cookies: Swap the classic Oreos. Golden Oreos give a lovely vanilla flavor. For a peanut butter explosion, use a heaping cup of roughly chopped peanut butter cups instead of the cookies.
- Candy Mix-In: Add half a cup of mini chocolate chips or Reese’s Pieces to the pot along with the cereal. The heat will soften them just enough. This makes the treats even more colorful and fun for kids.
Do not be afraid to get creative. The base recipe is wonderfully forgiving, so mix and match your favorite flavors.
Serving Suggestions
These bars are the ultimate versatile treat. They stand proudly on their own, but they also love to play with others. Here are my favorite ways to serve these peanut butter Oreo rice krispie treats for any occasion.
For a classic, no-fuss treat, serve them as a handheld dessert. They are perfect for packing into lunchboxes, taking to a picnic, or setting out on a plate at a bake sale. Their neat shape and sturdy texture make them ideal for eating on the go.
Turn them into a simple sundae by crumbling one bar over a scoop of high-quality vanilla ice cream. The warm, soft ice cream mingles with the crispy cereal and peanut butter swirls for a dessert you can make in seconds. It is a guaranteed smile-maker.
For a special touch at a birthday party or holiday gathering, wrap each bar individually in clear cellophane bags and tie them with a ribbon. They make wonderful, homemade party favors that guests can take home and enjoy later.
Finally, never underestimate the power of the perfect pairing. A cold glass of milk is their best friend for an after-school snack. For us adults, a square alongside a hot cup of afternoon coffee makes the perfect sweet break. However you serve them, they are always a hit.
FAQs About Peanut Butter Oreo Rice Krispie Treats
You have questions, I have answers from my own kitchen experience. Here are the most common things people ask me about making these peanut butter Oreo rice krispie treats.
Can I use natural peanut butter?
I do not recommend it. Natural peanut butters tend to separate, and the extra oil can make your treats greasy and prevent them from setting properly. For the best swirl and texture, stick with a standard creamy peanut butter like Jif or Skippy.
How do I store these treats?
Store them in an airtight container at room temperature for up to 5 days. To keep them from sticking together, place a sheet of parchment paper between layers. Do not refrigerate them, as that can make the cereal lose its crisp snap.
Can I freeze peanut butter Oreo rice krispie treats?
Absolutely. For long-term storage, wrap each bar individually in plastic wrap, then place them all in a freezer bag. They will keep well for up to 2 months. Thaw them at room temperature for about an hour before serving.
What are the nutrition facts for one bar?
Nutritional values depend heavily on the specific brands you use. A typical bar from this recipe may have around 250-300 calories. For the most accurate count, I suggest using an online recipe calculator with your exact ingredient list.
Can I use a different size pan?
Yes, but it will change the thickness of your bars. A 9×9-inch pan will yield thinner treats and you might want to reduce the cooling time slightly. A 9×13-inch pan will make a very thin layer; I would not recommend it for this recipe if you want a substantial bar.
Make Your Next Batch of Peanut Butter Oreo Rice Krispie Treats
I hope you are as excited about this recipe as I am. These Peanut Butter Oreo Rice Krispie Treats are the ultimate proof that the easiest desserts are often the best. They are chewy, crunchy, creamy, and guaranteed to make someone’s day a little sweeter.
Now it is your turn. I would love to hear how your batch turns out. Did you add a chocolate drizzle? Did your family gobble them up? Leave a comment below and tell me all about it. For more simple, joy-filled recipes like this one, follow along with me on Pinterest. Happy baking, friends.
Print
Peanut Butter Oreo Rice Krispie Treats
- Total Time: 70 minutes
- Yield: 12 servings 1x
- Diet: Vegetarian
Description
Get ready for the ultimate treat upgrade! These Peanut Butter Oreo Rice Krispie Treats are a delicious fusion of creamy peanut butter, crunchy Oreos, and classic crispy cereal. They’re incredibly easy to make and perfect for satisfying any sweet craving.
Ingredients
- 3 tablespoons unsalted butter
- 10 ounces mini marshmallows
- 1/4 teaspoon salt
- 6 cups Rice Krispies cereal
- 1/2 cup creamy peanut butter, divided
- 12 Oreo cookies, roughly chopped
Instructions
- Line an 8×8 inch baking pan with parchment paper, leaving some overhang on the sides for easy removal. Alternatively, grease the pan well with cooking spray.
- In a large saucepan, melt the butter over medium heat, stirring often.
- Add the mini marshmallows and salt to the melted butter. Stir continuously until the marshmallows are completely melted and smooth, being careful not to scorch them.
- Remove the saucepan from the heat. Immediately add the Rice Krispies cereal and chopped Oreo cookies. Gently fold the ingredients together until the cereal and cookies are evenly coated with the marshmallow mixture.
- Lightly warm 1/4 cup of the peanut butter in a microwave for about 15 seconds, just until it’s slightly softened and more pourable.
- Drop spoonfuls of the slightly softened peanut butter into the cereal mixture. Gently swirl and fold it in a few times with a spatula. The goal is to create ribbons of peanut butter throughout the treats, not to fully combine it.
- Spoon the mixture into the prepared pan. Use a spatula coated lightly with cooking spray to gently press the mixture into an even layer. Avoid pressing too firmly, as this can make the treats hard.
- If desired, drizzle the remaining 1/4 cup of slightly softened peanut butter over the top. You can also sprinkle a few extra Oreo crumbles on top for added texture and visual appeal.
- Let the treats cool in the pan for at least 1 hour before lifting them out using the parchment paper.
- Slice into 12 bars and enjoy!
Notes
- For softer treats, use mini marshmallows; they melt more evenly.
- Don’t overmix the peanut butter; keeping it in swirls creates the best texture and flavor contrast.
- Covering the spatula with cooking spray before pressing the mixture will prevent sticking.
- Prep Time: 15 minutes
- Cook Time: 10 minutes
- Category: Dessert
- Method: No-Bake
- Cuisine: American
Nutrition
- Serving Size: 1 bar
- Calories: 0
- Sugar: 0g
- Sodium: 0mg
- Fat: 0g
- Saturated Fat: 0g
- Unsaturated Fat: 0g
- Trans Fat: 0g
- Carbohydrates: 0g
- Fiber: 0g
- Protein: 0g
- Cholesterol: 0mg
Keywords: Peanut Butter, Oreo, Rice Krispie Treats, No-Bake Dessert, Easy Snack