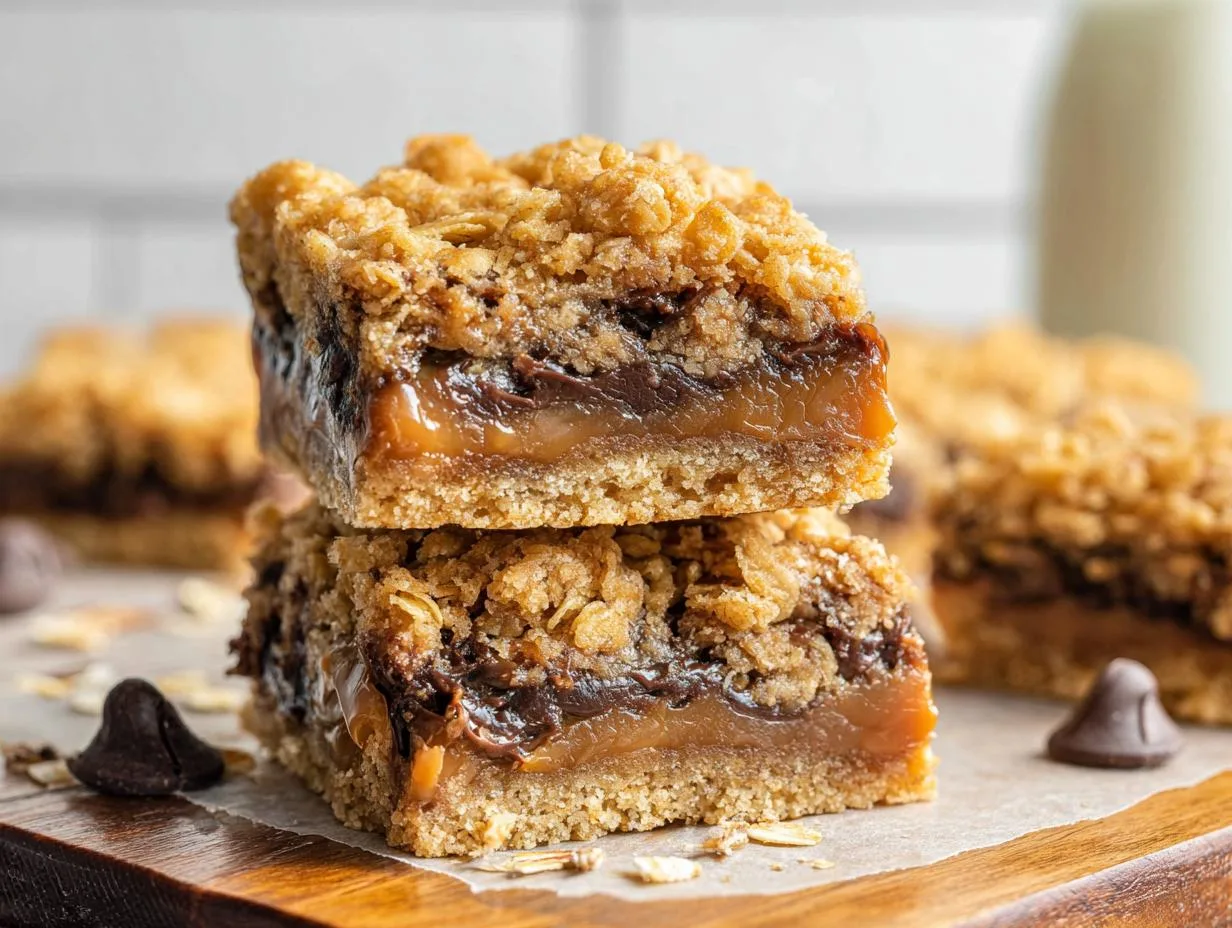
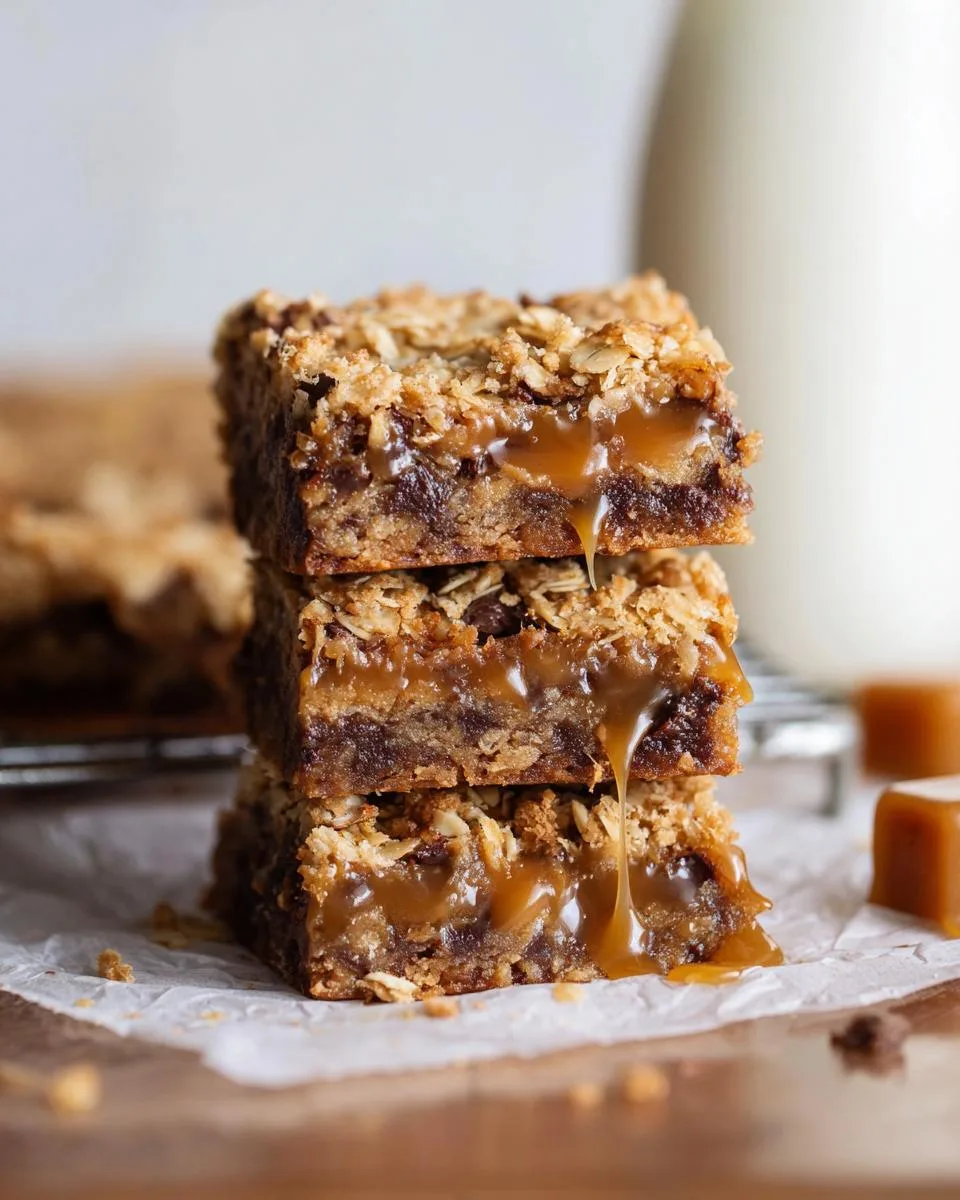
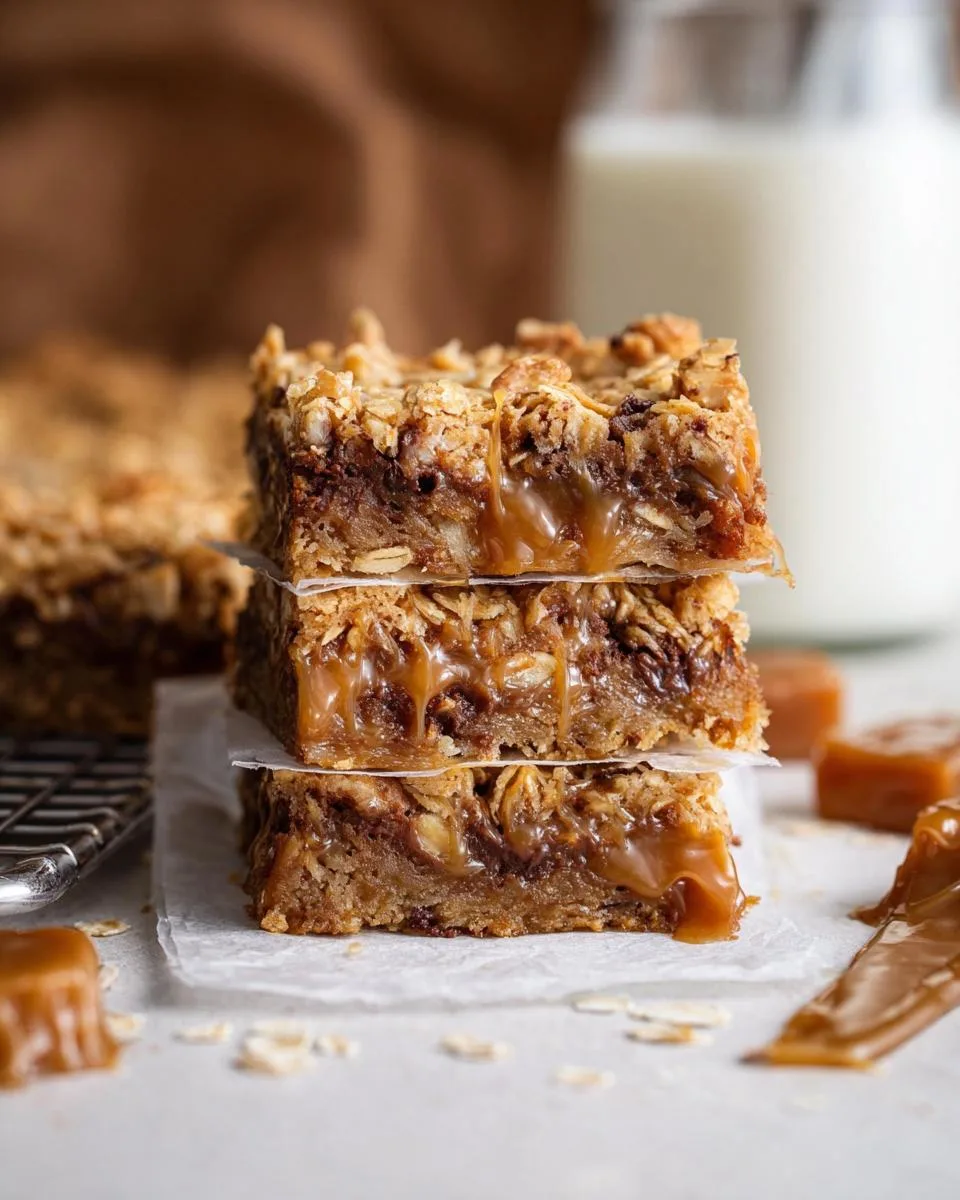
Picture the smell of nutty brown butter mixing with sweet, bubbling caramel. It is the first sign you are about to make something truly special. These Brown Butter Carmelitas are my absolute favorite bar cookie. They combine a chewy oat crust, a soft salted caramel center, and a crumble topping into one perfect bite.
I discovered this recipe years ago during a chaotic family reunion. I needed a dessert that could please a crowd and handle the summer heat. These carmelitas were the hero. They are easy to make ahead and always disappear first. After many batches in my real kitchen, I have perfected the method.
The secret to amazing Brown Butter Carmelitas isn’t complicated. It is about patience with the butter and letting the bars cool completely. First, let’s walk through the recipe.
Table of Contents
Why You’ll Love These Brown Butter Carmelitas
Once you try one, you will understand the hype. These bars are not your average dessert. They are a symphony of textures and a masterclass in flavor. Here is exactly why this recipe earns a permanent spot in my baking rotation.
- Next-Level Flavor: Browning the butter is a simple step with a huge payoff. It adds a deep, toasty, nutty flavor that makes these Brown Butter Carmelitas unforgettable. It is the secret ingredient that elevates them from good to “can I have the recipe?” great.
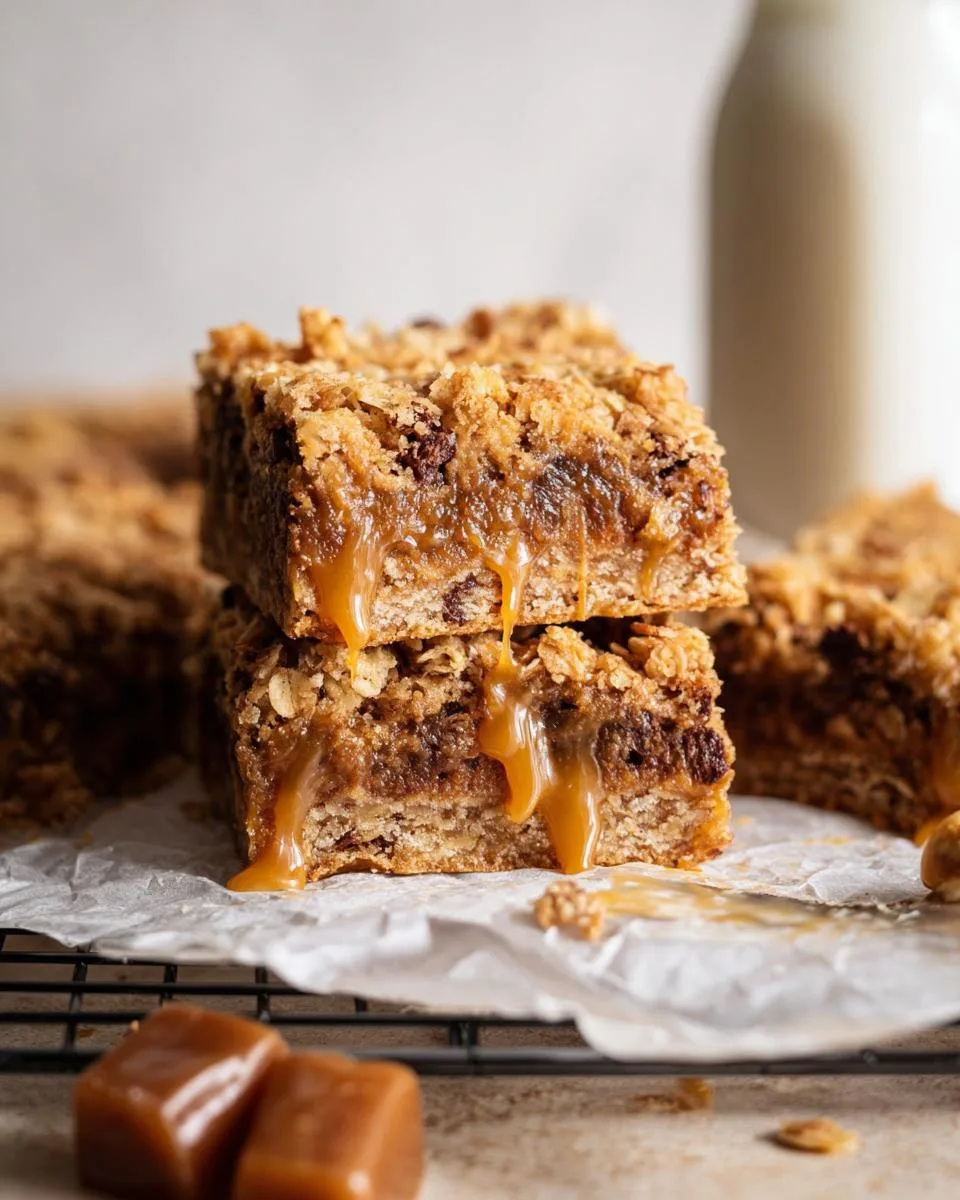
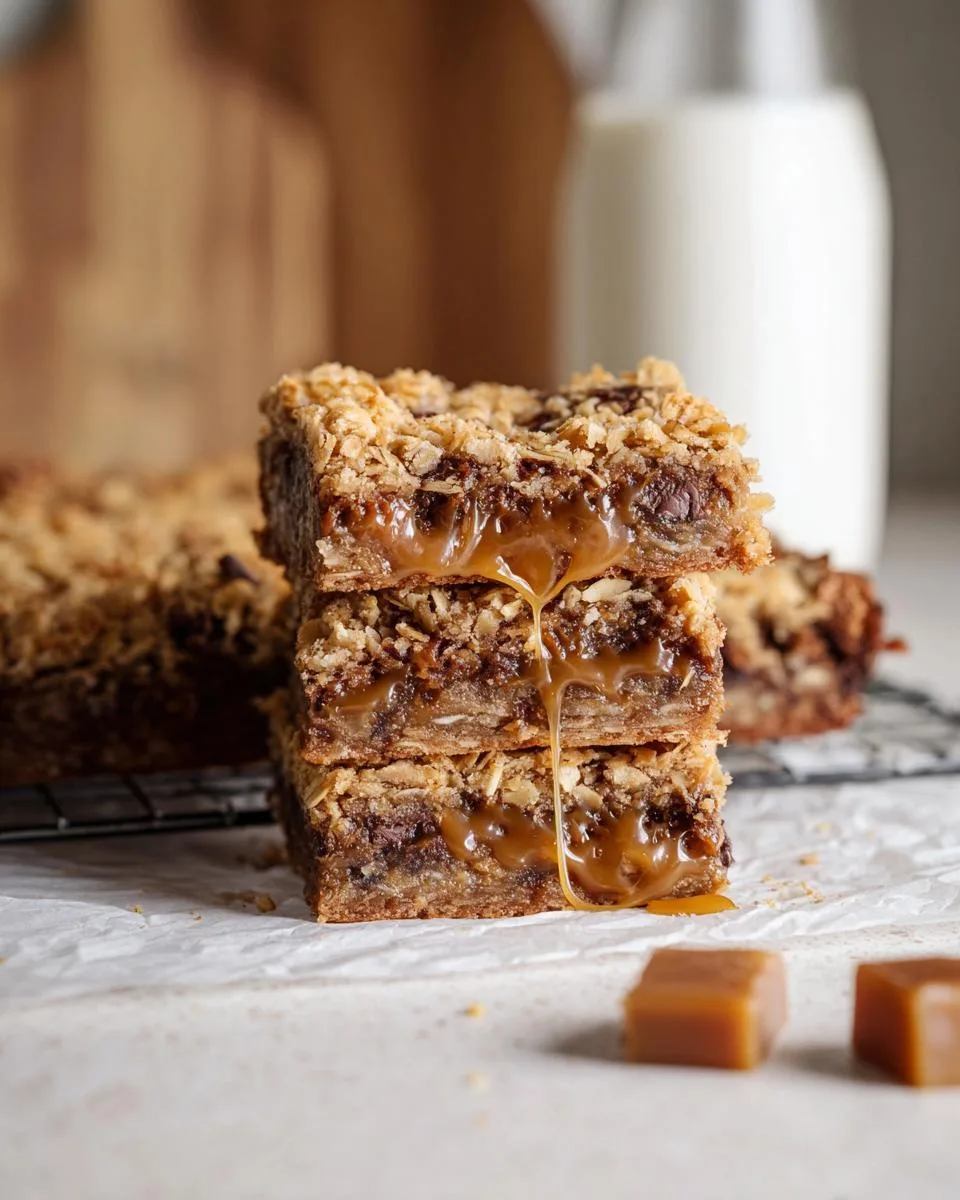
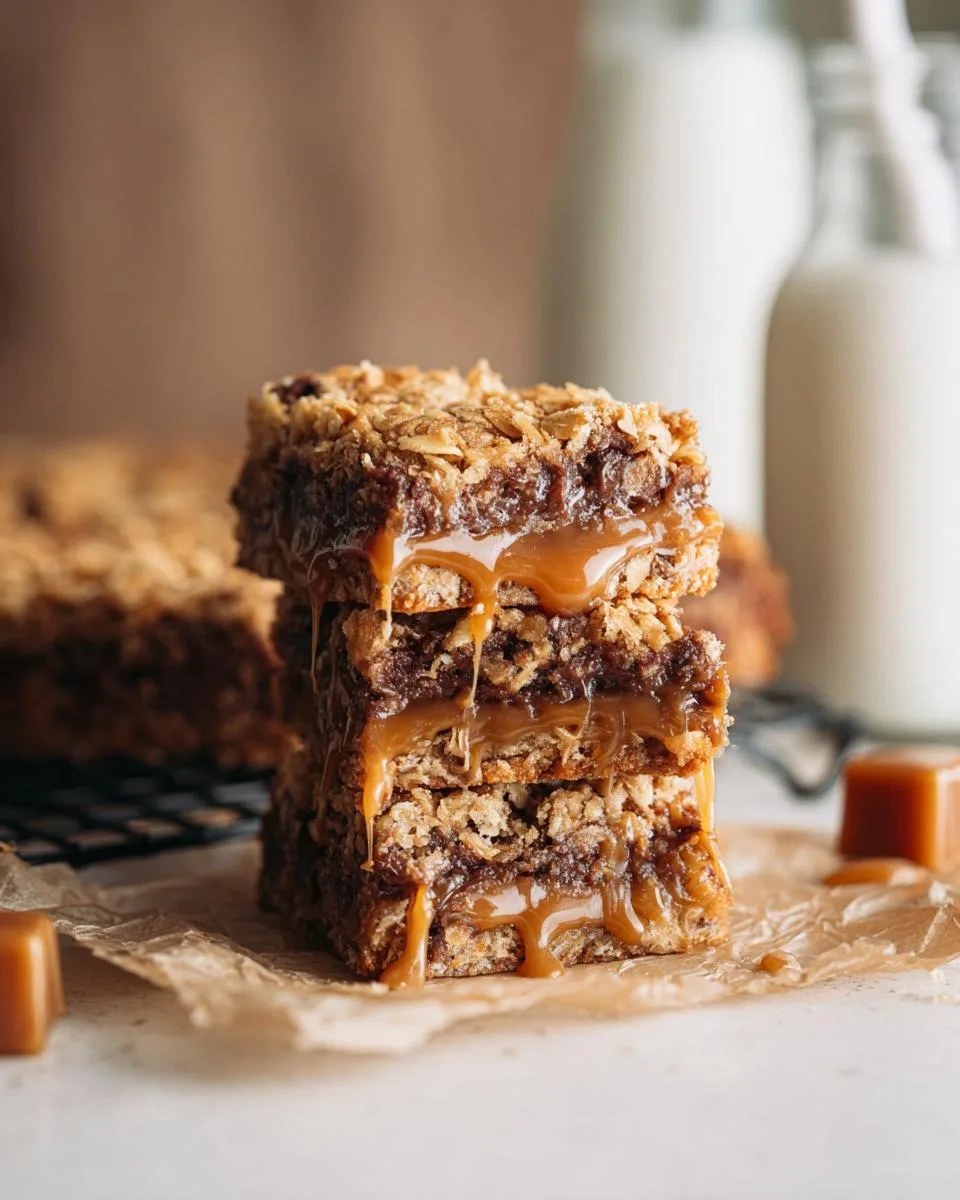
- Perfect Texture in Every Bite: You get a chewy, substantial oat base, a luxuriously soft and gooey caramel center, and a crisp, crumbly streusel-like topping. It is the best of all worlds in one square.
- Surprisingly Simple: Do not let the layers fool you. The process is very straightforward. If you can melt butter and stir a bowl, you can make the best caramelitas. They look and taste like they came from a fancy bakery.
- Always a Crowd-Pleaser: I bring these to every potluck and holiday gathering. They travel beautifully, and I have never brought home a single crumb. They also make a wonderful gift packed in a little box.
- Tested for Real Kitchens: I have made this easy bar cookie recipe countless times. I have tested oven temperatures, cooling times, and ingredient brands. This version is reliable, forgiving, and guaranteed to win you compliments.
In short, these bars deliver maximum joy for manageable effort. They are pure, salted caramel dessert magic.
Ingredients You’ll Need
Great baking starts with great ingredients. Using a few key items makes these Brown Butter Carmelitas taste incredible. I have broken everything down into two simple groups. Grab your measuring cups and let’s get set up.
For the Brown Butter Oat Crust & Topping
- 1 cup (2 sticks) unsalted butter, browned and slightly cooled Ingredient Note: I always use unsalted butter. This lets you control the saltiness perfectly. Browning it is the flavor magic here.
- 1 cup packed light brown sugar Ingredient Note: “Packed” means you press the sugar firmly into the cup. This ensures you get the right amount for a chewy texture.
- 1 1/3 cups all-purpose flour
- 1 1/3 cups old-fashioned rolled oats Ingredient Note: Do not swap these for quick oats. Old-fashioned oats give the crust its perfect, sturdy chew.
- 3/4 teaspoon baking soda
- 3/4 teaspoon fine sea salt
- 1 large egg yolk, at room temperature The yolk binds the dough without making it tough.
- 2 teaspoons pure vanilla extract
- 1 cup semi-sweet chocolate chips
For the Caramel Filling
- 40 soft, individually wrapped caramels, unwrapped Ingredient Note: Brands like Kraft work perfectly. Make sure they are soft for easy, smooth melting.
- 1/2 cup heavy cream
- 1 teaspoon pure vanilla extract
- 1/4 teaspoon fine sea salt This balances the sweetness and makes the flavor pop.
Here’s a handy shortcut. If you want to skip unwrapping caramels, you can use 1 1/4 cups of a high-quality store-bought caramel sauce instead. Just warm it slightly before pouring. Before you start, measure everything out. This makes the process smooth and fun.
How to Make Brown Butter Carmelitas
Now for the fun part, bringing all those wonderful ingredients together. Follow these steps closely, and you will have a pan of perfect bars. I promise it is easier than it looks. Let’s make some magic.
Step 1: Prep and Brown the Butter
First, get your oven ready. Preheat it to 350°F (175°C). Line a 9×9-inch baking pan with parchment paper. Let the paper hang over the sides. This creates little handles to lift the whole batch out later.
Now, brown the butter. This is your flavor foundation. Melt the two sticks of unsalted butter in a light-colored saucepan over medium heat. A light pan lets you see the color change clearly. Keep cooking, swirling the pan often. The butter will foam up and then quiet down. Watch closely. When it turns a deep amber color and smells wonderfully nutty, it is done. This takes about 5 to 7 minutes. Do not walk away. Immediately pour it into a heatproof bowl to stop the cooking. Let it cool for about 10 minutes. You want it warm, but not hot.
Step 2: Make the Oat Dough
In a large mixing bowl, whisk together your light brown sugar, flour, old-fashioned oats, baking soda, and salt. Make a little well in the center of these dry ingredients. Pour in your slightly cooled brown butter, the egg yolk, and the vanilla extract. Stir everything together with a sturdy spoon or spatula. You will get a thick, crumbly dough that holds together when pressed. Finally, fold in the cup of chocolate chips until they are evenly distributed.
Step 3: Layer the Base
This dough makes both the bottom crust and the top crumble. Take about one-third of the dough and press it firmly and evenly into the bottom of your parchment-lined pan. I like to use the bottom of a measuring cup to get it really flat. The remaining two-thirds of the dough is for the topping. Set it aside in the bowl.
Step 4: Prepare the Caramel Filling
In a clean medium saucepan, combine your unwrapped soft caramels and the heavy cream. Cook this over low to medium heat, stirring constantly with a spatula. Keep the heat gentle to avoid scorching. Stir until the caramels are completely melted and the mixture is smooth and silky. This usually takes 3 to 5 minutes. Remove the pan from the heat. Stir in the teaspoon of vanilla and the quarter-teaspoon of salt. Your caramel is now ready.
Step 5: Assemble and Bake
Pour the warm caramel sauce evenly over your pressed dough base. Try to cover it all. Now, take the reserved dough from the bowl. Crumble it over the top of the caramel layer in an even, loose scattering. Do not press it down. Some caramel will peek through, which is perfect. It creates those gorgeous, gooey pockets.
Place the pan in your preheated oven. Bake for 28 to 32 minutes. You will know they are done when the top is a lovely golden brown and you see the caramel bubbling actively around the edges.
Step 6: Cool Completely
This step is non-negotiable for perfect Brown Butter Carmelitas. Place the hot pan on a wire rack and let it cool completely to room temperature. This takes at least 2 hours. The caramel needs this time to set up properly. If you cut them warm, they will be a delicious but messy puddle. For the cleanest, sharpest slices, once they are room temperature, pop the whole pan into the refrigerator for about 30 minutes to chill. Then, use the parchment paper handles to lift the whole slab out onto a cutting board. Slice into squares or bars.
Pro Tips for the Best Brown Butter Carmelitas
A few simple tricks can take your bars from good to absolutely incredible. These are the little things I learned after baking dozens of pans. They make the process smoother and the results even better.
- See Your Butter Brown: Always use a light-colored saucepan. A stainless steel or light-bottomed pot lets you watch the butter’s color change from yellow to golden amber. This visual cue is your best guide to avoid burning it.
- Cool Butter is Key: Let your browned butter cool for about 10 minutes before mixing it into the dry ingredients. If it’s too hot, it can cook the egg yolk, which changes the dough’s texture. It should be warm but not scalding.
- Gentle Caramel Melting: Keep the heat on low to medium when melting the caramels with cream. Stir constantly with a spatula. If the heat is too high, the caramel can scorch or become grainy. A smooth, silky sauce is your goal.
- Charlotte’s Secret for the Base: For a perfectly even bottom layer, use the bottom of a dry measuring cup to press the dough. It gives you a flat, uniform surface that bakes evenly and supports the caramel beautifully.
- The Patience Payoff: Let the bars cool completely in the pan on a wire rack. Then, chill them in the fridge for 30 minutes before slicing. This sets the caramel firmly, giving you clean, neat bars instead of a gooey mess. It is the single most important tip for perfect carmelitas.
Follow these tips, and you will have a batch of bar cookies that looks and tastes professionally made.
Common Mistakes to Avoid
We all have kitchen mishaps. I’ve made these mistakes myself, so I can tell you exactly how to fix them. Avoiding these four common pitfalls guarantees perfect Brown Butter Carmelitas every single time.
- Burning the Butter: This happens if you walk away or use too high heat. Swirl the pan constantly. Remove it from heat as soon as the butter turns a deep amber color and smells nutty, not burnt. If you see black specks, you’ve gone too far.
- Using Quick Oats: They absorb liquid differently and create a mushy, gummy texture. Old-fashioned rolled oats are essential for that sturdy, chewy base and topping we all love.
- Skipping the Cooling Time: Impatience leads to a gooey mess. The caramel needs hours at room temperature to set up. Do not slice them warm. For clean cuts, chill the cooled pan in the fridge for 30 minutes first.
- Overbaking: The bars continue to set as they cool. Remove them from the oven when the top is golden brown and the caramel is actively bubbling around the edges. A minute too long can make them dry.
Don’t panic if something goes wrong. Baking is forgiving. Just remember these tips next time.
Delicious Variations
Once you master the classic Brown Butter Carmelitas, you can play with the recipe. These easy swaps let you create a whole new dessert. They are perfect for different tastes or seasons. Here are my favorite twists that always get rave reviews.
- Nutty Twist: Add 1/2 cup of chopped toasted pecans or walnuts to the oat dough when you fold in the chocolate chips. The nuts add a wonderful crunch and earthy flavor that pairs beautifully with the brown butter.
- Chocolate Swap: Feel free to change the chocolate. Use dark chocolate chips for a richer, less sweet bite, or milk chocolate chips for a creamier, sweeter flavor. The recipe works perfectly with any type.
- Sea Salt Finish: For an extra pop of salty-sweet goodness, sprinkle a pinch of flaky sea salt over the warm bars right after they come out of the oven. The heat helps it stick, and it looks gorgeous.
- Dulce de Leche: If you love a deeper, caramelized flavor, replace the homemade caramel filling with 1 1/4 cups of store-bought dulce de leche. Warm it slightly so it’s easy to pour. It creates a richer, almost butterscotch-like center.
These variations are simple but make each batch feel unique. Try one next time you bake.
Serving Suggestions
These Brown Butter Carmelitas are rich and satisfying on their own. A single square is a perfect treat. But if you want to make them extra special, I have a few favorite ways to serve them.
For a truly decadent dessert, serve a square slightly warm with a scoop of cold vanilla ice cream. The warm, gooey caramel and the cold ice cream create a perfect contrast. It is my favorite way to enjoy them.
They also pair wonderfully with a cup of coffee or a cold glass of milk for a cozy afternoon snack. Their sweet, salty flavor balances the bitterness of coffee beautifully.
These bars are perfect for sharing. They travel well for picnics or potlucks. For a bake sale or holiday cookie tray, cut them into neat squares and arrange them on a plate. You can also wrap individual bars and pack them in a decorative box for a thoughtful homemade gift.
FAQs About Brown Butter Carmelitas
I get asked these questions a lot. Here are the quick, clear answers to help you bake with confidence.
Can I make these ahead of time?
Yes, absolutely. They are perfect for making ahead. Store your sliced Brown Butter Carmelitas in an airtight container at room temperature for up to 3 days. For longer storage, keep them in the fridge for up to a week. The caramel will stay soft and delicious.
Can I freeze Brown Butter Carmelitas?
You can freeze them beautifully. Wrap the whole pan or individual bars tightly in plastic wrap, then place them in a freezer bag or container. They will keep for up to 3 months. Thaw them at room temperature for a few hours before serving.
My caramel seized or is grainy. What happened?
This usually means the heat was too high. Always melt the caramels with cream over low to medium heat and stir constantly. If your caramel gets lumpy, remove it from the heat immediately and stir vigorously. Adding a splash more warm cream can sometimes help smooth it out.
Can I use salted butter?
I recommend unsalted butter. Using salted butter adds extra salt to the recipe, which can make the final bars taste too salty. With unsalted butter, you control the salt level perfectly.
What are the nutrition facts?
Nutritional values vary based on the specific brands you use. A typical bar has around 350 calories. For the most accurate information, use an online recipe calculator and input your exact ingredients and brands.
Bake Your Batch of Brown Butter Carmelitas
I hope this recipe brings as much joy to your kitchen as it does to mine. The magic of brown butter turns a simple bar cookie into something truly special. Its nutty depth paired with that gooey caramel is a combination you will crave. Now you know all my secrets for perfect, chewy bars.
I cannot wait to hear how yours turn out. Did you add nuts? Did the caramel bubble just right? Please share your results in the comments below. For more easy, family-friendly baking ideas that never disappoint, follow along on Pinterest. Happy baking!
Print
Brown Butter Carmelitas
- Total Time: 50 minutes
- Yield: 16 servings 1x
- Diet: Vegetarian
Description
Chewy brownies with a nutty brown butter oat crust, layered with gooey salted caramel and chocolate chips.
Ingredients
- 1 cup (2 sticks) unsalted butter, browned
- 1 cup packed light brown sugar
- 1 1/3 cups all-purpose flour
- 1 1/3 cups old-fashioned rolled oats
- 3/4 teaspoon baking soda
- 3/4 teaspoon salt
- 1 large egg yolk
- 2 teaspoons vanilla extract
- 1 cup semi-sweet chocolate chips
- 40 soft caramels, unwrapped
- 1/2 cup heavy cream
- 1 teaspoon vanilla extract
- 1/4 teaspoon salt
Instructions
- Preheat your oven to 350°F. Line a 9×9-inch baking pan with parchment paper, ensuring it hangs over the edges for easy removal.
- Brown the butter: Melt unsalted butter in a saucepan over medium heat. Continue to cook, swirling the pan occasionally, until the milk solids turn a golden brown and the butter has a nutty aroma. This usually takes about 5-7 minutes. Immediately remove from heat and let cool slightly.
- In a large bowl, whisk together the brown sugar, flour, oats, baking soda, and salt.
- Create a well in the center of the dry ingredients. Add the slightly cooled browned butter, egg yolk, and vanilla extract. Stir until a cohesive, slightly dry dough forms.
- Fold in the chocolate chips. Reserve about 2/3 of this dough for the topping and spread the remaining 1/3 evenly into the bottom of your prepared baking pan.
- Make the caramel filling: In a separate medium saucepan, combine the unwrapped caramels and heavy cream. Cook over low to medium heat, stirring constantly with a spatula, until the caramels are completely melted and smooth, about 3 minutes.
- Remove the caramel mixture from the heat. Stir in the vanilla extract and 1/4 teaspoon salt.
- Pour the warm caramel evenly over the dough layer in the pan.
- Crumble the reserved 2/3 of the dough over the top of the caramel, gently pressing it down to create an even layer. Don’t worry if some caramel shows through; it adds to the charm.
- Bake for 30 minutes, or until the top is golden brown and the caramel appears bubbly around the edges.
- Let the bars cool completely in the pan on a wire rack before slicing and serving. This is crucial for the caramel to set properly.
Notes
- Browning the butter adds a depth of nutty flavor that elevates these carmelitas beyond the ordinary.
- Ensure your caramels are soft and pliable for easy melting.
- For cleaner cuts, chill the cooled bars in the refrigerator for about 30 minutes before slicing.
- Prep Time: 20 minutes
- Cook Time: 30 minutes
- Category: Dessert
- Method: Baking
- Cuisine: American
Nutrition
- Serving Size: 1 bar
- Calories: 350 kcal
- Sugar: 28g
- Sodium: 220mg
- Fat: 18g
- Saturated Fat: 11g
- Unsaturated Fat: 6g
- Trans Fat: 0g
- Carbohydrates: 45g
- Fiber: 2g
- Protein: 4g
- Cholesterol: 55mg
Keywords: brown butter caramel brownies, dessert bars, caramel brownies, oat crust brownies