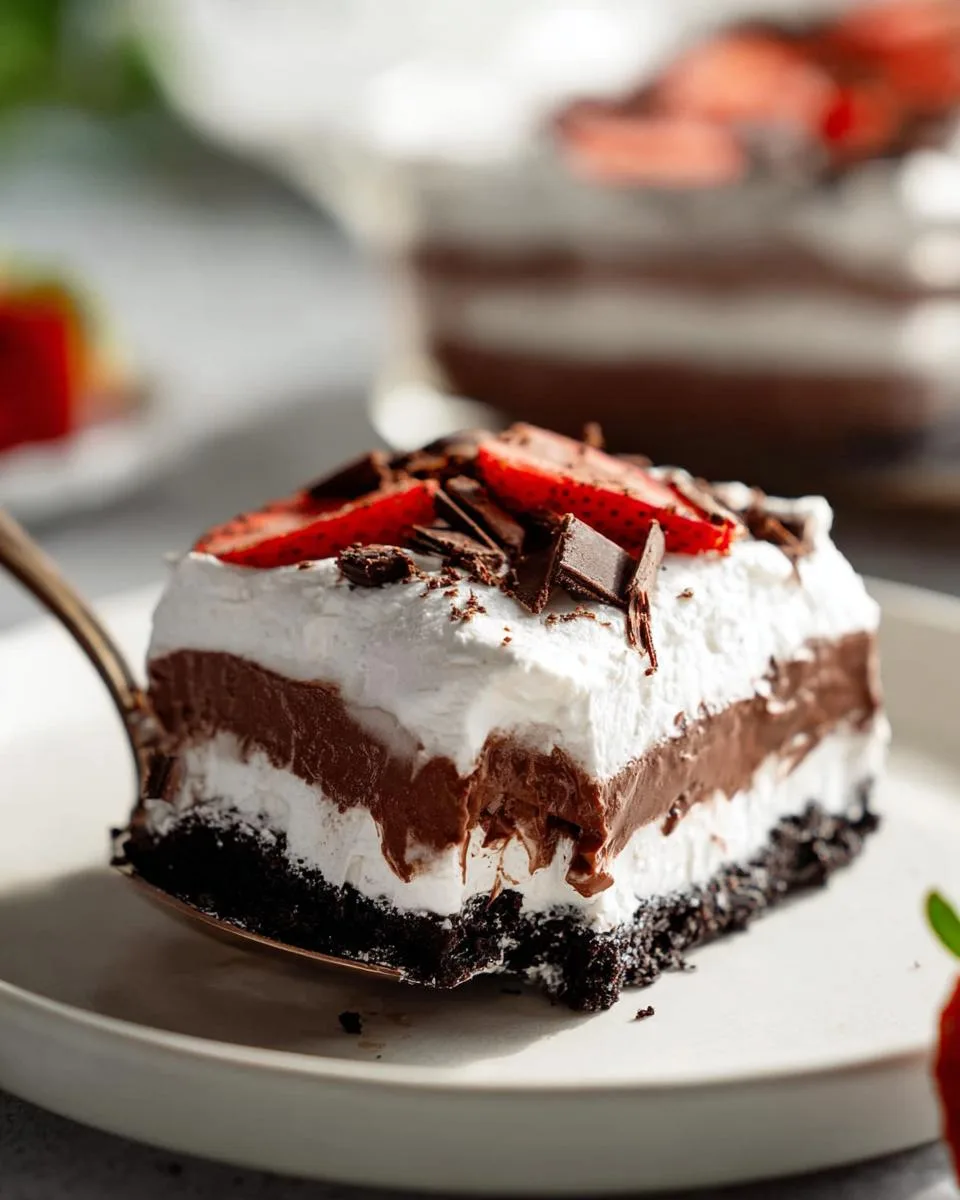
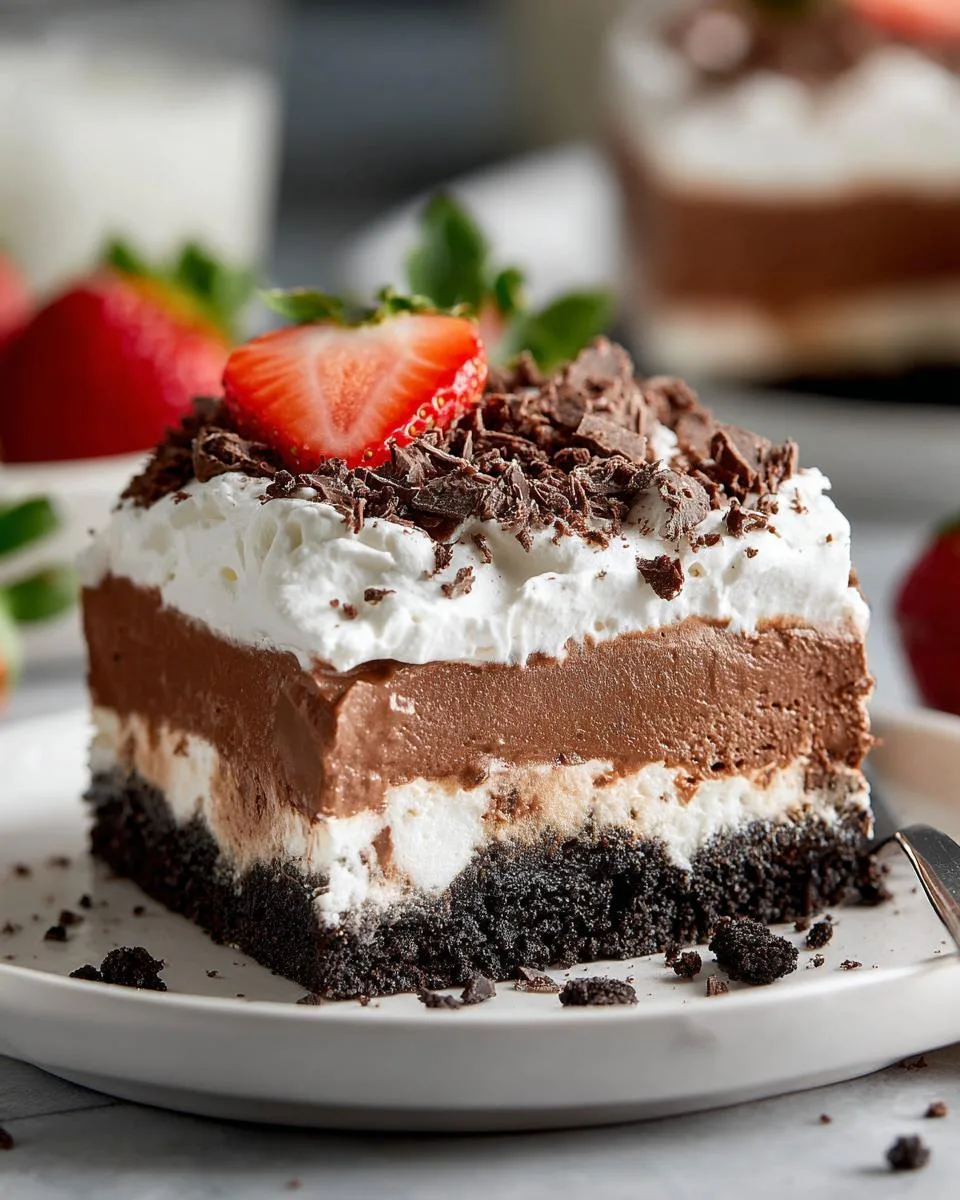
Ever need a show-stopping dessert but your oven is off-limits? This No-Bake Oreo Delight is your secret weapon. It delivers layers of creamy, crunchy, chocolatey goodness without turning on a single appliance.
I created this recipe after years of testing no-bake desserts for hot Carolina days and last-minute potlucks. The secret to a great No-Bake Oreo Delight isn’t complicated, it’s about nailing those perfect, distinct layers. My family now requests it for every summer gathering.
Here’s what you need to know before you start.
Why You’ll Love This No-Bake Oreo Delight
This dessert is a triple threat. It looks fancy, tastes amazing, and couldn’t be simpler to make. Here is exactly why it will become your new favorite.
- Zero baking required: This is perfect for hot summer days or when you just don’t want to heat up the kitchen. It’s a quick dessert solution that feels special.
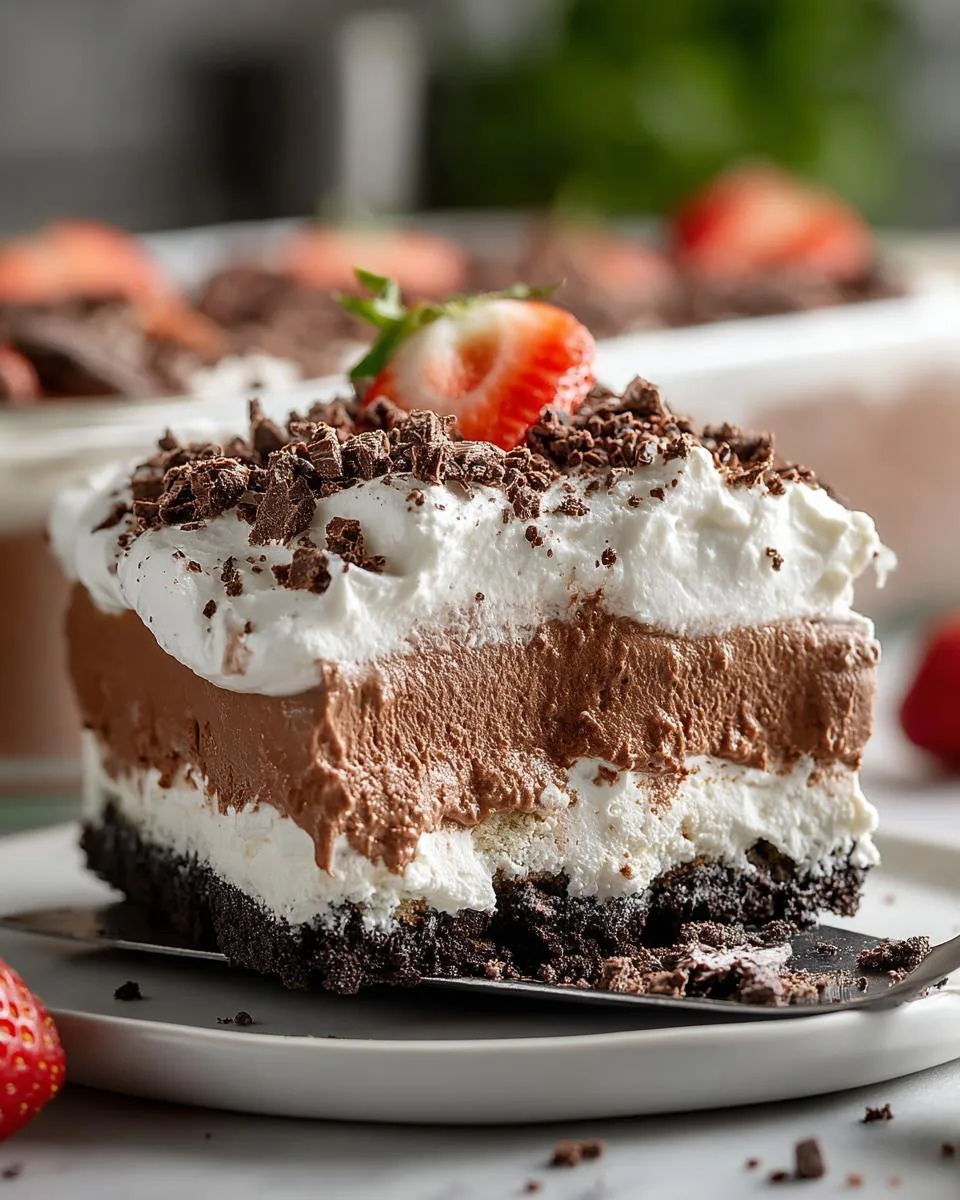
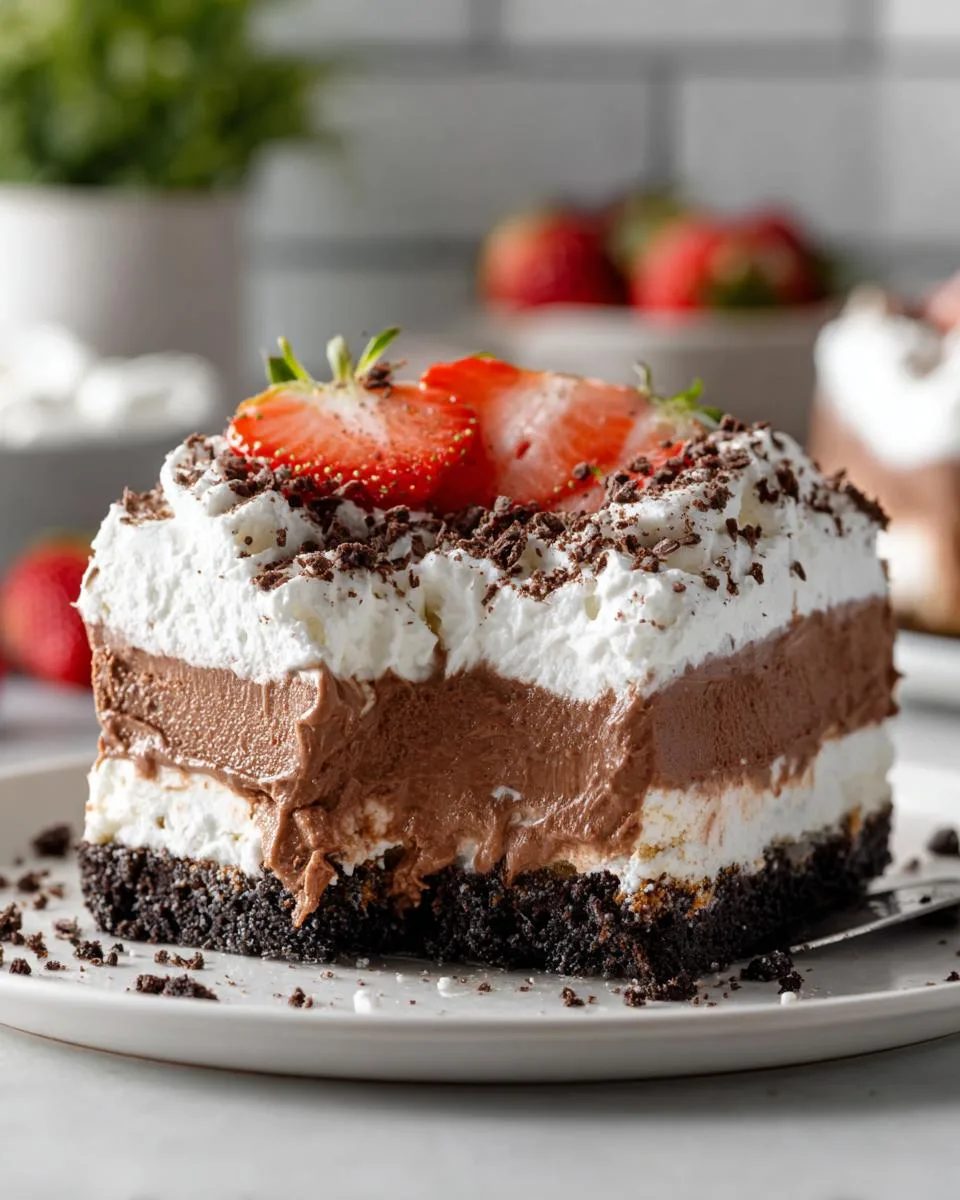
- Secretly simple layers: The beautiful stripes of chocolate, cream, and pudding look like you spent hours. The truth? You just spread one layer after another. It’s a guaranteed crowd-pleaser.
- Pantry-friendly ingredients: You probably have most of these items already. Oreos, milk, pudding mix. It’s a budget-friendly treat that feels indulgent.
- An irresistible texture party: You get the crunchy cookie crust, the fluffy cream cheese filling, and the smooth, rich pudding. Every bite is a perfect mix.
- Your canvas for creativity: Change the pudding flavor, swap the cookies, or add fresh fruit. This recipe is a forgiving base for your own ideas.
- The ultimate make-ahead magic: Make it the night before a party. The long chill time in the fridge means dessert is done, and you are free to enjoy your guests.
In short, it solves the “what dessert can I make?” problem with ease and a whole lot of delicious style.
Ingredients You’ll Need
Gathering these simple ingredients is the first step to your delicious dessert. Here’s your easy-to-follow shopping list.
- 24 Oreo cookies: This includes the cream filling. Use the standard size package for the right crust texture.
- 6 tablespoons butter, melted: Unsalted butter is best to control sweetness. Melt it completely but don’t let it get hot.
- 8 ounces cream cheese, softened: This is one full standard block. Softened truly means room temperature for at least 30 minutes; this is critical for a smooth, lump-free mix.
- 1 cup powdered sugar: Measure this by spooning into the cup and leveling off for accuracy. Don’t pack it down.
- 1 teaspoon vanilla extract: Pure extract gives the best flavor, but imitation works in a pinch.
- 16 ounces whipped topping, divided: This is typically two 8-ounce containers. Use divided as instructed. Thaw it according to package directions.
- ৩.4 ounces instant chocolate pudding mix: This is one standard box size. Do not use “cook-and-serve” pudding.
- 2 cups milk: Whole milk creates the richest, thickest pudding layer. Cold milk from the fridge works best.
Ingredient Note: For a lighter option, you can use Neufchâtel cheese instead of cream cheese and light whipped topping. The texture will be slightly less firm but still delicious.
With these items ready, you’re all set to build your delightful layers.
How to Make No-Bake Oreo Delight
Let’s build this beauty layer by layer. The process is simple, but a few key techniques make all the difference for perfect results.
Step 1: Create the Oreo Crust Base
First, crush your Oreos. A food processor gives you fine, even crumbs in seconds. If you’re using a bag and rolling pin, go for it. Just crush them well. You want the texture to be like coarse sand. In a medium bowl, pour the melted butter over the crumbs. Mix until every crumb is coated and the mixture holds together when you pinch it. It should look like dark, wet sand. Dump this into your 9×13 dish. Use the bottom of a cup or a flat measuring cup to press it down firmly and evenly. A solid, packed crust is your foundation. It won’t crumble when you cut it later.
Step 2: Mix the Creamy Cheese Layer
Now, grab your large bowl and softened cream cheese. Beat it with a mixer on medium speed for a full minute. Scrape down the sides. You want it completely smooth and creamy, with no lumps at all. This is your most important step for a silky layer. Add the powdered sugar and vanilla. Beat again until it’s fully incorporated and looks fluffy. Here’s the gentle part. Take 8 ounces (one container) of your thawed whipped topping. Add it to the bowl. Use a spatula to fold it in. Use big, gentle turns, scraping from the bottom up. You are mixing just until you see no more white streaks. Over-mixing will deflate your topping and make this layer dense.
Step 3: Spread and Layer the Creamy Filling
Pour your fluffy cream cheese mixture over the prepared crust. Gently spread it into one even layer with your spatula. Start from the center and push outward. Try not to drag the crust up. You’re creating a smooth, white barrier. This layer seals the crust and keeps it crisp. Take your time to make it level. A flat surface here makes the next layers much easier.
Step 4: Prepare and Set the Chocolate Pudding
In a separate medium bowl, pour in the cold milk. Add the entire box of instant chocolate pudding mix. Grab a whisk. Now, whisk vigorously and continuously for two full minutes. Set a timer. This activates the pudding. It will start to thicken right away. After two minutes, stop whisking. Let the bowl sit untouched on your counter for exactly 5 minutes. This resting time is non-negotiable. The pudding will thicken dramatically into a soft, spreadable consistency. If you try to spread it too soon, it will be runny and sink into the cream cheese layer.
Step 5: Assemble the Final Layers and Chill
After the 5-minute wait, give the pudding one quick stir. Spoon it over the cream cheese layer. Carefully spread it to the edges. Now, take your last 8 ounces of whipped topping. Spread this fluffy cloud over the chocolate pudding. Cover the dish tightly with plastic wrap or a lid. This is the final step. Place the whole dish in the refrigerator. You must chill it for at least 1 hour before serving. For the absolute best texture and the cleanest slices, let it chill overnight. The layers will set together beautifully.
Pro Tips for the Best No-Bake Oreo Delight
A few small tricks make this dessert go from good to absolutely perfect. These are my tried-and-true secrets for flawless layers every single time.
- Master the crust texture: For ultra-fine, even crumbs, use a food processor. If you use a bag and rolling pin, roll until the cookies look like dark sand. No big pieces left.
- Win the cream cheese battle: Ensure your cream cheese is truly soft. Poke it. It should give easily. Cold cheese will create stubborn lumps no matter how long you mix.
- Fold, don’t stir: When adding whipped topping to the cream cheese, use a spatula. Gently fold it in with big, lifting motions. This keeps the filling light and airy instead of dense.
- Patience with the pudding: Let the pudding mixture sit for the full 5 minutes after whisking. It thickens from a liquid to a soft, spreadable consistency. This prevents a runny middle layer.
- Charlotte’s secret for clean slices: For perfect squares, run your knife under very hot water. Wipe it dry, then make your cut. The heat glides right through the cold layers for a beautiful presentation.
- Refresh leftovers: If the dessert sits out, the crust can soften. Simply cover and pop it back in the fridge for 30 minutes. The layers will firm right back up.
Follow these simple tips, and your No-Bake Oreo Delight will be the star of the table.
Common Mistakes to Avoid
We have all been there, rushing through a recipe. Avoid these common pitfalls to ensure your No-Bake Oreo Delight turns out perfect every single time.
- Using cold cream cheese: Cold cream cheese is impossible to beat smooth. It creates stubborn lumps in your creamy layer. To fix it, let the full block sit on your counter for at least 30 minutes until it feels soft and yields to a gentle poke.
- Not dividing the whipped topping: Adding all the whipped topping at once ruins the distinct layer structure. The recipe needs half for the cream cheese filling and half for the top. Simply separate it into two equal 8-ounce portions before you begin mixing anything.
- Rushing the pudding step: Instant pudding needs time to absorb the liquid and thicken properly. If you spread it immediately, it will be runny and sink. Always whisk the mix and milk for a full two minutes, then let it sit untouched for five minutes until it’s thick and spoonable.
- Skipping the long chill: The layers need time to firm up together. Cutting into it too soon makes a messy slice. For clean layers and the best texture, chill the dessert for at least one hour, but overnight is truly ideal.
Don’t panic if you make a mistake. Just cover and chill it longer. This dessert is very forgiving.
Delicious Variations
The beauty of this No-Bake Oreo Delight is how easily you can make it your own. Think of this recipe as your favorite canvas. Here are some simple twists my family loves.
- Cookie Swap: Use Golden Oreos for a vanilla-caramel crust. Mint Oreos create a cool, refreshing flavor base perfect for the holidays.
- Pudding Change: Swap the chocolate pudding for vanilla or cheesecake flavor for a lighter taste. White chocolate pudding mix makes an extra creamy, sweet middle layer.
- Fruit Addition: Add a fresh layer of sliced strawberries or bananas on top of the cream cheese filling before adding the pudding. It adds a juicy, bright pop to each bite.
- Coffee Boost: For a rich mocha twist, add one tablespoon of instant coffee granules or espresso powder directly to the dry chocolate pudding mix before whisking it with the milk.
Do not be afraid to mix and match. A mint Oreo crust with chocolate pudding is a classic combination everyone will adore.
Serving Suggestions
This dessert shines in any setting. Here are my favorite ways to serve this No-Bake Oreo Delight for maximum enjoyment.
- Classic Family Night: Slice it into neat squares right in the pan. Serve each piece on a simple plate after a weeknight dinner. It is the perfect sweet ending that feels special with zero fuss.
- The Party Showstopper: For a cookout or potluck, layer the ingredients in a large glass trifle bowl instead of a baking dish. Everyone can see the beautiful stripes, and you can scoop it right from the table.
- Weekend Coffee Pairing: This rich dessert loves a bitter friend. Serve a smaller portion with a hot cup of strong black coffee or an iced latte for a perfect weekend afternoon treat.
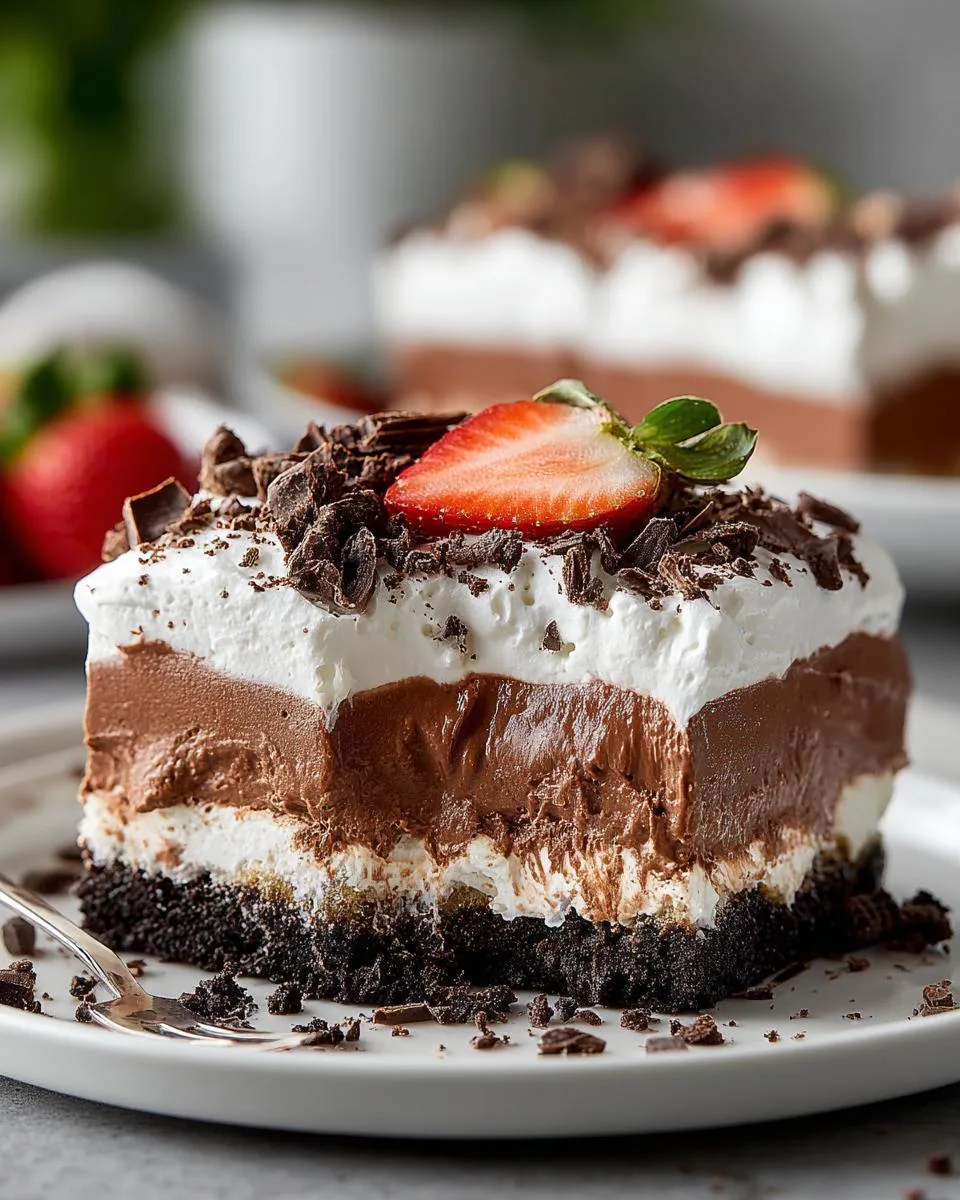
- Elevated Dinner Dessert: Dress up individual servings. Right before serving, top each square with fresh raspberries, a drizzle of chocolate sauce, or a few delicate chocolate curls. It instantly looks gourmet.
Remember, this dessert is rich and complete all on its own. You do not need to pair it with ice cream or any other side. A simple garnish is all it needs.
FAQs About No-Bake Oreo Delight
Can I make this ahead of time?
Absolutely. This dessert is ideal for making ahead. Chilling it overnight gives the layers time to set firmly together, making it easier to cut into clean, beautiful squares. Simply cover it tightly after assembly.
How long does it last in the fridge?
Your No-Bake Oreo Delight will stay fresh and delicious for up to 3 days when stored covered in the refrigerator. The crust may soften slightly over time, but the flavors remain wonderful.
Can I freeze No-Bake Oreo Delight?
Yes, you can freeze it. For easiest serving, cut it into portions first. Wrap pieces tightly or store them in an airtight container. It will keep well in the freezer for up to one month. Thaw it in the refrigerator before serving.
What is the estimated calorie count per serving?
Using the exact ingredients listed, one serving is about 320 calories. This is an estimate. The final count depends on the specific brands of cookies, pudding, and whipped topping you use.
My cream cheese layer is lumpy. What can I do?
This happens if the cream cheese was too cold. For your next batch, let it soften fully on the counter. For this batch, you can try to beat it vigorously with a mixer to smooth it out, or simply spread it as is. The taste will still be great.
Your No-Bake Oreo Delight is Ready
There you have it. Your perfect, no-bake, crowd-pleasing dessert is chilling in the fridge, ready to make everyone smile. You just created layers of magic with zero oven time. I love how a simple recipe like this becomes the star of the table.
I would love to hear how your No-Bake Oreo Delight turned out. Did you try a fun variation? Share your experience or a photo in the comments below. For more simple, family-friendly dessert ideas just like this, follow me on Pinterest. Now, go enjoy that first creamy, crunchy, perfect bite.
Print
No-Bake Oreo Delight
- Total Time: 20 minutes
- Yield: 10 servings 1x
- Diet: Vegetarian
Description
Indulge in layers of creamy, crunchy, and chocolatey goodness with this No-Bake Oreo Delight. It is a simple yet impressive dessert that is perfect for parties, potlucks, or a sweet weekend treat. It requires zero oven time and delivers a beautiful, layered presentation that your readers are going to love!
Ingredients
The Crust
- 24 Oreo cookies
- 6 tbsp butter, melted
The Cream Cheese Layer
- 8 oz cream cheese, softened
- 1 cup powdered sugar
- 1 tsp vanilla extract
- 8 oz whipped topping (half of a 16 oz tub)
The Chocolate Pudding Layer
- 3.4 oz instant chocolate pudding mix
- 2 cups milk
The Topping & Garnish
- 8 oz whipped topping (remaining half of the 16 oz tub)
- Optional: Fresh strawberries or shaved chocolate
Instructions
- Crush the cookies: Place the Oreo cookies in a food processor and pulse until they form fine crumbs. You can also crush them by placing them in a zip-top bag and rolling over them with a rolling pin.
- Mix the crust: In a medium bowl, combine the Oreo crumbs with the melted butter. Stir until all of the crumbs are fully moistened.
- Form the base: Press the crumb mixture evenly into the bottom of a 9×13-inch baking dish to form the crust.
- Beat the cream cheese: In a large bowl, beat the softened cream cheese with an electric mixer until smooth and creamy. This step ensures there are no lumps in your creamy layer.
- Sweeten the filling: Add the powdered sugar and vanilla extract to the cream cheese and beat until well combined.
- Fold the whipped topping: Gently fold 8 ounces of the whipped topping into the cream cheese mixture until just combined.
- Layer the cream cheese: Spread this cream cheese mixture evenly over the prepared Oreo crust.
- Whisk the pudding: In a separate medium bowl, whisk together the instant chocolate pudding mix and the milk. Continue whisking for about 2 minutes until the pudding begins to thicken. Let it sit for 5 minutes to fully set.
- Add the pudding layer: Carefully spread the set chocolate pudding evenly over the cream cheese layer.
- Finish with topping: Top the pudding layer with the remaining 8 ounces of whipped topping, spreading it smoothly from edge to edge.
- Chill and serve: Cover the baking dish and refrigerate for at least 1 hour, or until firm and chilled, before serving. Ideally, chill it overnight for the absolute best results and cleanest slices.
Notes
- Room Temperature Ingredients: Ensure your cream cheese is truly at room temperature before mixing. This guarantees a smooth, lump-free creamy layer.
- Crust Variation: If you prefer a firmer crust and do not mind turning on the oven, you can bake the Oreo crust for 8 to 10 minutes at 350°F. Let it cool completely before adding the creamy layers.
- Storage & Freezing: This dessert freezes beautifully! Cut it into individual portions before freezing for quick and easy serving later.
- Serving Suggestion: This treat is best served chilled, straight from the refrigerator. Garnish with fresh, sliced strawberries or a sprinkle of shaved chocolate just before serving to add a touch of color and elegance.
- Prep Time: 20 minutes
- Cook Time: 0 minutes
- Category: Dessert
- Method: No Bake
- Cuisine: American
Nutrition
- Serving Size: 1 serving
- Calories: 320 kcal
- Sugar: Not Provided
- Sodium: Not Provided
- Fat: Not Provided
- Saturated Fat: Not Provided
- Unsaturated Fat: Not Provided
- Trans Fat: Not Provided
- Carbohydrates: Not Provided
- Fiber: Not Provided
- Protein: Not Provided
- Cholesterol: Not Provided
Keywords: no bake Oreo dessert, easy dessert, layered dessert, chocolate pudding dessert