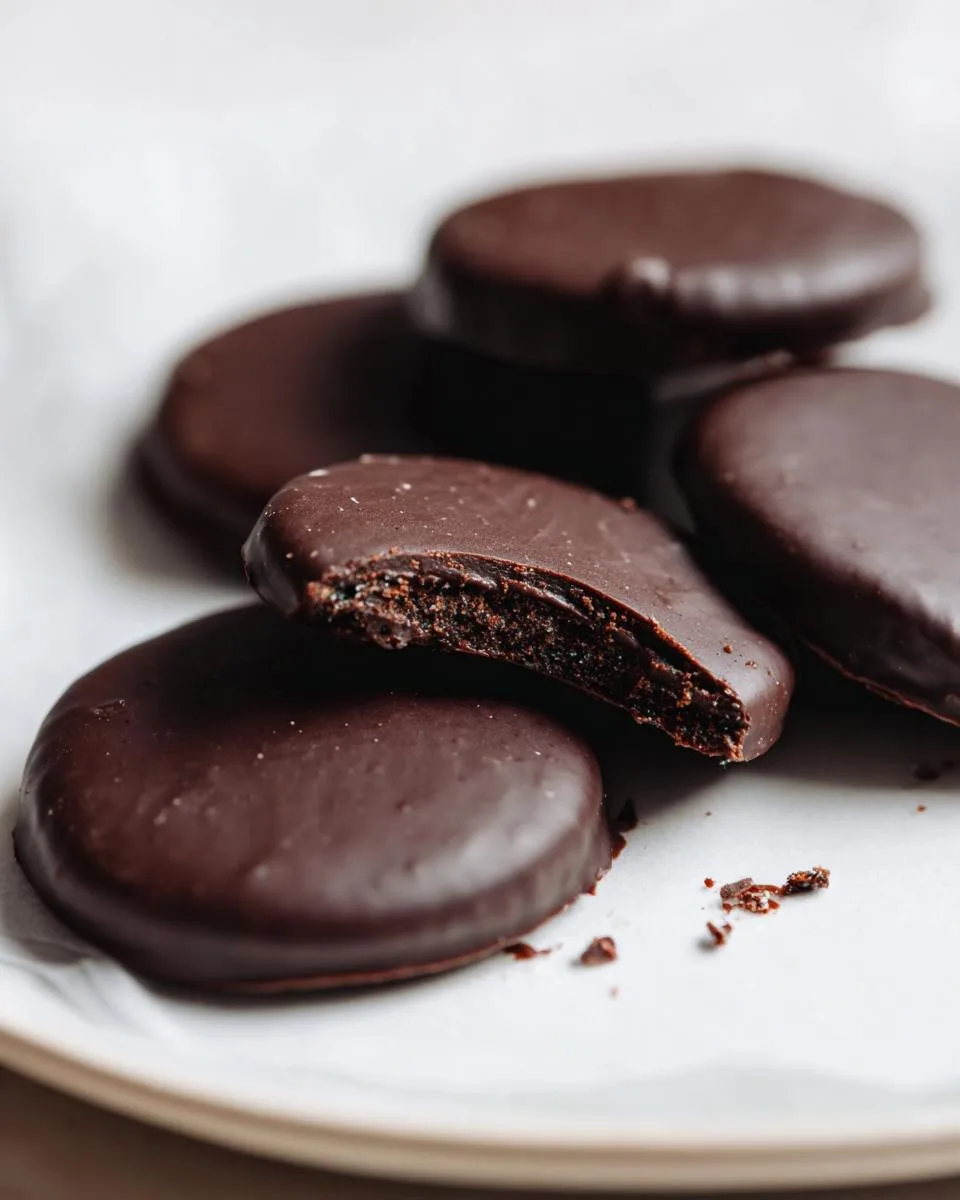
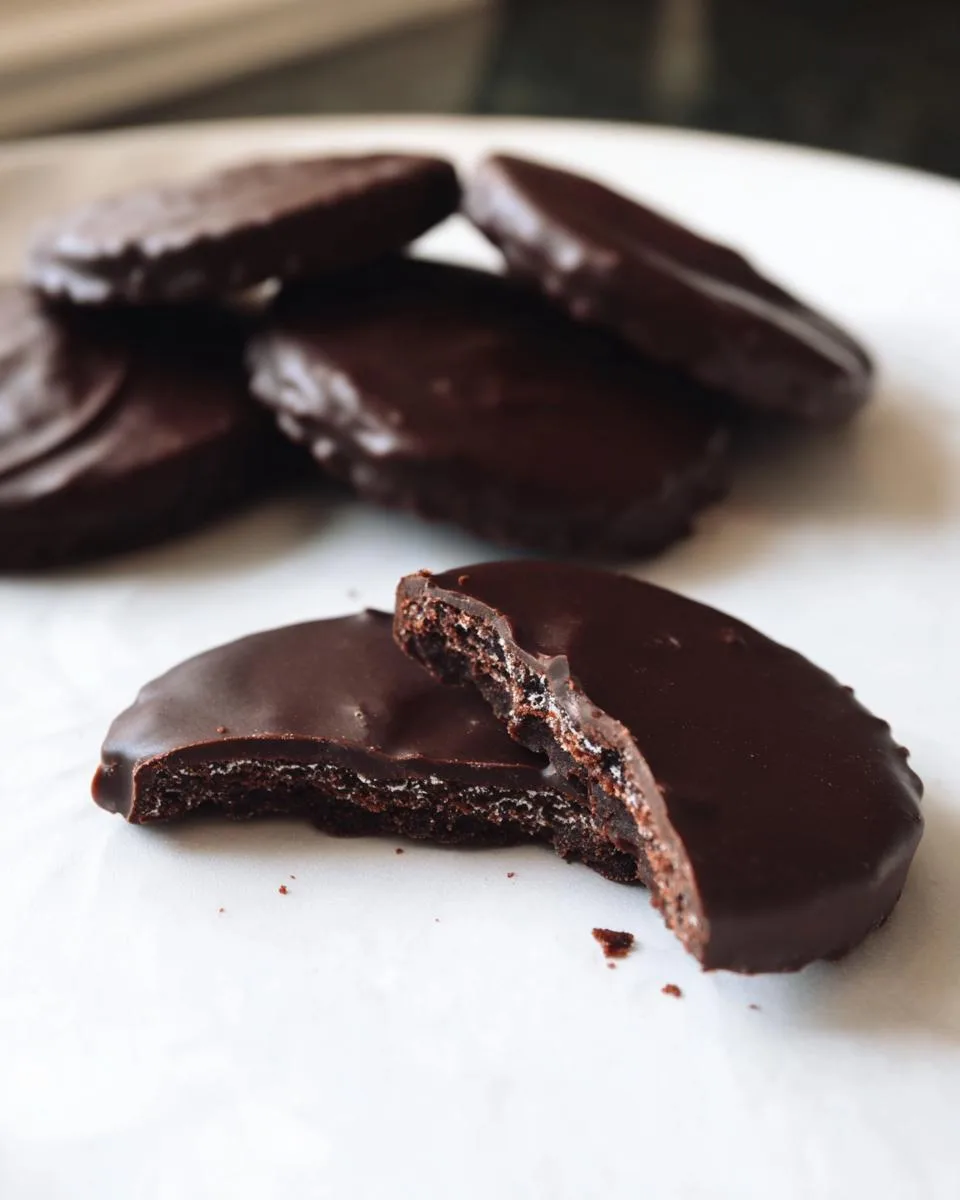
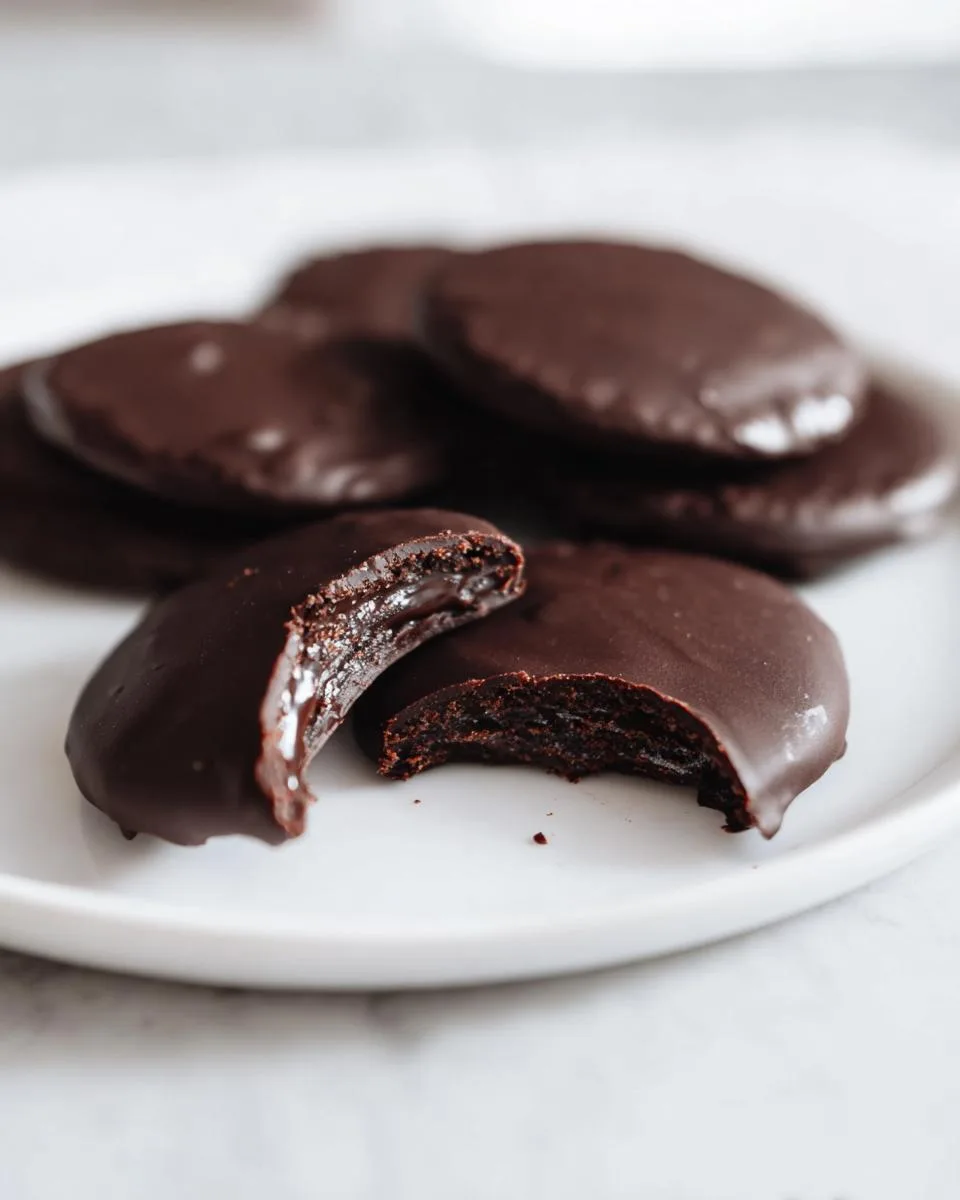
Have you ever craved a box of Girl Scout Thin Mints in, say, the middle of July? I have, and that’s exactly why I perfected this recipe for Homemade Thin Mints. You can now capture that iconic crisp wafer and cool mint coating anytime you want.
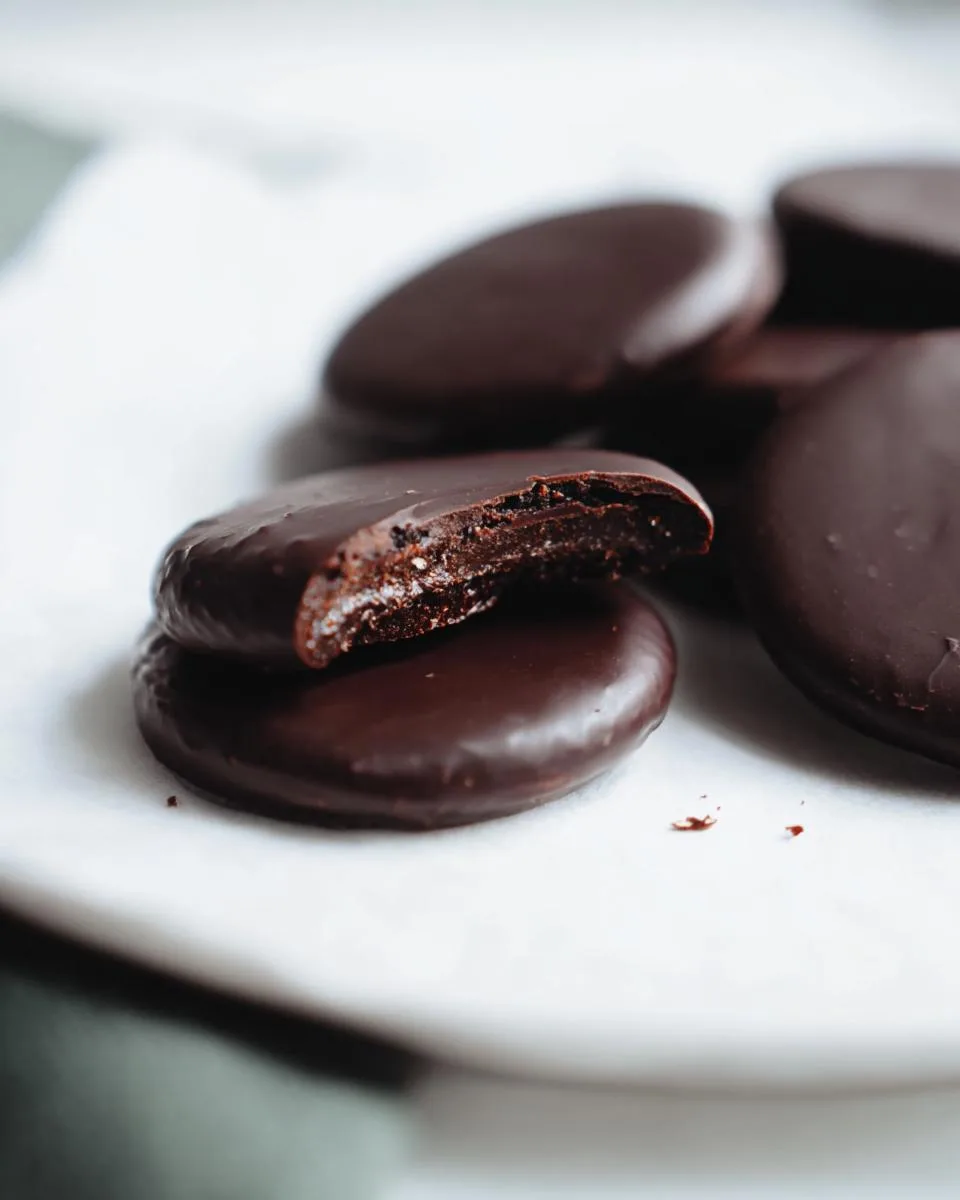
The secret to perfect Homemade Thin Mints isn’t complicated, it’s about rolling the dough thin and using real peppermint extract. This recipe breaks it all down with simple steps and my best kitchen-tested tips to guarantee success. It’s easier than you think to make this beloved treat in your own cozy kitchen.
I love making a big batch to stash in the freezer. There’s nothing better than that satisfying crunch with a cold glass of milk after a long day. Let’s walk through the recipe so you can enjoy that classic flavor, no cookie season required.
Table of Contents
Why You’ll Love This Homemade Thin Mints Recipe
If you’ve ever been tempted by a box of cookies at the grocery store, this recipe is your answer. Making your own Homemade Thin Mints is a fun project with a delicious payoff. Here’s why it’s a keeper.
- Year-round satisfaction: No need to wait for a specific season. This recipe lets you enjoy that perfect mint-chocolate combo anytime a craving hits.
- Simple, clear steps: I’ve broken the process down so it feels manageable, even for beginner bakers. From chilling the dough to dipping the cookies, each step is straightforward.
- Quality you control: You choose the chocolate and use real peppermint extract. This means a cleaner, brighter mint flavor and a rich, smooth coating.
- Authentic texture: Rolling the dough super thin is the key. Your cookies will bake up crisp and delicate, mirroring the iconic wafer we all love.
- Universal appeal: These easy Homemade Thin Mints disappear fast at gatherings. They also make a wonderfully thoughtful gift, wrapped up in a simple bag.
In short, this recipe delivers the classic taste with homemade pride. It’s a project my family looks forward to, and I think yours will too.
Ingredients You’ll Need
Gathering your ingredients is the first easy step. This list is simple, and you likely have most items in your pantry right now. Each one plays a specific role in creating that perfect crisp cookie and smooth coating.
- 10 tablespoons unsalted butter, softened This is 1 stick plus 2 tablespoons. Your butter should be soft enough to leave a clear indent when you press it, but not oily. This texture is key for creaming it properly with the sugar.
- 1 cup granulated sugar
- 1 large egg
- 1 teaspoon peppermint extract I insist on pure peppermint extract, not imitation mint flavoring. The pure extract gives you that cool, clean taste without any weird aftertaste.
- 1 teaspoon vanilla extract This might seem small, but it’s important. The vanilla rounds out the sharpness of the peppermint and makes the chocolate flavor richer.
- 1 ¾ cups all-purpose flour For accuracy, always spoon the flour into your measuring cup and level it off with a knife. Scooping directly from the bag packs in too much flour and can make the dough dry.
- ⅓ cup unsweetened cocoa powder Use natural cocoa powder here, not Dutch-processed. It has the right acidity to work with the baking powder and gives us that classic Thin Mint flavor.
- ¼ teaspoon baking powder
- ½ teaspoon salt This balances all the sweetness and makes the chocolate taste more chocolatey.
- 8 ounces dark chocolate, finely chopped A baking bar chopped up melts much smoother than chocolate chips, which are designed to hold their shape. I use a bar around 60-70% cacao.
- 1 tablespoon coconut oil This is my secret for a glossy, thin coating that sets beautifully. It makes the melted chocolate perfectly dippable.
A quick substitution tip. For a dairy-free version, a good plant-based butter substitute works perfectly in the dough. Just make sure it’s meant for baking.
Measuring carefully really does matter here. It’s the foundation for getting that signature thin, crisp texture just right.
How to Make Homemade Thin Mints
Alright, let’s get baking. This process is a fun little dance. We’ll make the dough, chill it, roll it super thin, and then give them that famous chocolate dunk. Follow these steps, and you’ll have a kitchen full of that amazing mint-chocolate aroma in no time.
Step 1: Cream the Butter and Sugar
Grab your stand mixer or a large bowl and a hand mixer. Add your softened butter and granulated sugar. Now, beat them together on medium-high speed. Don’t rush this. You want to mix for a full 2 minutes until the mixture turns noticeably pale, fluffy, and light. This step isn’t just about mixing. It’s about whipping in tiny air bubbles that will give your cookies a delicate texture.
Step 2: Add Wet Ingredients
Scrape down the sides of the bowl with a spatula to get everything incorporated. Crack in the large egg, and add the peppermint and vanilla extracts. Beat everything on medium speed just until the egg disappears and the extracts are fully blended in. The mixture might look a little curdled at first, but that’s okay. Just keep mixing until it’s smooth.
Step 3: Combine Dry Ingredients
In a separate bowl, whisk together your flour, cocoa powder, baking powder, and salt. This ensures the leavening and cocoa are evenly distributed. With your mixer on low speed, gradually add the dry ingredients to the wet bowl. Mix only until you see no more dry streaks of flour. The moment the dough comes together, stop. Overmixing here will develop the gluten and make your cookies tough instead of tender and crisp.
Step 4: Chill the Dough
Turn the dough out onto a piece of plastic wrap. Use your hands to gently press it into a flat, thick disk about 1-inch thick. Wrap it tightly. This chill time is non-negotiable. Pop it in the refrigerator for at least 1 hour. This hardens the butter back up, which is the magic that prevents your super-thin cookies from melting into puddles in the oven.
Step 5: Roll and Cut the Cookies
Preheat your oven to 350°F and line your baking sheets with parchment paper. Take about a teaspoon of cocoa powder and lightly dust your clean countertop and rolling pin. Place your chilled dough disk in the center. Roll it out, turning it occasionally, until it is incredibly thin. We’re talking about 1/16th of an inch. If it feels too firm and cracks, let it sit for 5 minutes. Use a 1.5 to 2-inch round cutter to stamp out your cookies. A thin spatula is your best friend for transferring these delicate wafers to the baking sheet.

Step 6: Bake to Crisp Perfection
Bake the cookies for 8 to 10 minutes. You’ll know they’re done when the edges look set and the surface of the cookie feels firm to a light touch. They will not look “wet” anymore. Remember, they will continue to crisp up dramatically as they cool. Let them rest on the baking sheet for 2 minutes, then move them to a wire rack to cool completely.
Step 7: Melt the Chocolate Coating
While the cookies cool, make your coating. Put your finely chopped dark chocolate and coconut oil in a microwave-safe bowl. Microwave on high power for 15 seconds, then take it out and stir well. Repeat this process, stirring after every 15-second burst, until the chocolate is completely smooth and liquid. This gentle method prevents the chocolate from seizing or burning.
Step 8: Dip and Set
This is the fun part, but patience is key. Make absolutely sure your cookies are room-temperature cool. Hold a cookie by its edge and dip one half into the melted chocolate. Gently shake it or tap it on the side of the bowl to let the excess drip back in. Place it on a clean sheet of parchment paper. Repeat with all cookies. Let them sit at room temperature until the chocolate hardens, about 30 minutes. You can pop the tray in the fridge for 10 minutes if you’re in a hurry.
Pro Tips for the Best Homemade Thin Mints
After making countless batches, I’ve picked up a few tricks that make the process smoother and the results even better. These are my kitchen-tested tips for perfect Homemade Thin Mints every single time.
- Divide for easier handling: After chilling, cut your dough disk in half. Roll out one portion while the other stays cold in the fridge. This prevents the dough from warming up too much and getting sticky as you work.
- Fix cracking dough: If the dough cracks around the edges when you start rolling, don’t add more flour. Just let it sit on the counter for 5 minutes. That slight warmth will make it more pliable.
- Be gentle with scraps: When you re-roll the dough scraps to cut more cookies, do it only once. Re-rolling too many times develops the gluten and can make those last cookies a bit tougher.
- Do a test bake: Ovens can vary. Before baking a whole sheet, bake one or two cookies. Check them at 8 minutes. This tells you if you need to adjust the time up or down for your perfect crispness.
- Master the dip: For a clean, even chocolate line, use a fork or a chocolate dipping tool. Gently lower the cookie onto the tines, dip, lift, and tap the fork on the bowl’s edge to shake off excess chocolate.
- Store them right: Once the chocolate is fully set, store your cookies in an airtight container with sheets of parchment paper between the layers. This keeps them crisp and prevents the chocolate from sticking or getting scratched.
My personal secret? I always sprinkle a tiny pinch of flaky sea salt over the wet chocolate on a few cookies. It creates an incredible sweet-salty contrast that is absolutely addictive.
Common Mistakes to Avoid
Even the best recipes can have a hiccup. I’ve made all these mistakes so you don’t have to. Here’s what to watch for to ensure your Homemade Thin Mints turn out perfectly crisp and coated.
- Not chilling the dough enough: If your dough feels soft or sticky when you try to roll it, it hasn’t chilled long enough. The butter needs to be firm. This is what prevents the thin wafers from spreading into one big cookie sheet in the oven. The fix is simple. Wrap the dough back up and return it to the fridge for another 30 minutes.
- Rolling the dough too thick: This is the most common reason cookies turn out soft instead of crisp. You need to roll it to an almost translucent 1/16-inch thinness. A good test. You should be able to slightly see the pattern of your countertop through the dough.
- Overbaking the cookies: It’s easy to do because they bake so fast. Overbaked cookies lose their chocolate flavor and can taste bitter. Bake them just until the tops feel firm and dry to a light touch, not until they are dark brown. They will crisp up significantly as they cool on the rack.
- Dipping warm cookies: If you dip a cookie that’s even slightly warm, the chocolate coating will melt, slide right off, and create a messy puddle. Patience is your best tool here. Let the cookies cool completely on the wire rack until they are room temperature before you start dipping.
Don’t worry if you slip up. Baking is a learning process, and even imperfect cookies still taste wonderful.
Delicious Variations
Once you master the classic Homemade Thin Mints, it’s fun to play with the flavors. This versatile dough and dipping method is your canvas. Here are a few of my favorite easy twists to keep things interesting.
- Citrus Swap: For a bright, sunny twist, replace the peppermint extract with pure orange extract. The combination of orange and dark chocolate is sophisticated and refreshing.
- Double Chocolate: Fold ½ cup of mini chocolate chips into the dough after mixing in the dry ingredients. You’ll get little pockets of melty chocolate in every crisp bite.
- Sweeter Finish: If dark chocolate is too intense for your crew, use a high-quality semi-sweet chocolate bar for the coating. It creates a sweeter, more familiar flavor that kids especially love.
- Festive Touch: Immediately after dipping a cookie, add a pinch of festive sprinkles, crushed candy canes, or a light dusting of edible glitter to the wet chocolate. It sets perfectly and makes them party-ready.
These variations are simple but make a big impact. They’re proof that this basic recipe can be your starting point for all sorts of delicious creations.
Serving Suggestions
These Homemade Thin Mints are incredibly versatile. Their classic flavor makes them a hit for any occasion, from a casual Tuesday to a fancy holiday spread. Here are my favorite ways to serve them up.
- For your next gathering: Arrange them on a simple platter for your book club or game night. They’re the perfect finger food that everyone recognizes and loves, guaranteed to spark happy conversations.
- As a heartfelt gift: Tuck a dozen into a clear cellophane bag and tie it with a pretty ribbon. It’s a lovely, personal gift that shows you care much more than any store-bought box.
- For an easy dessert: Place a few cookies alongside a scoop of high-quality vanilla ice cream. The warm cookie’s crispness against the cold, creamy ice cream is pure elegance with zero fuss.
- With your favorite drink: Dunk them in a cold glass of milk for the ultimate nostalgic treat, or enjoy a few with a hot cup of black coffee. The bitterness of the coffee beautifully balances the sweet, minty chocolate.
- On a holiday cookie tray: Their dark chocolate coating and crisp texture add wonderful variety and a crowd-pleasing classic to your Christmas or holiday assortment.
No matter how you serve them, these cookies shine. They work beautifully as a standalone treat or as the perfect sweet ending to a meal.
FAQs About Homemade Thin Mints
I get a few questions every time I share this Homemade Thin Mints recipe. Here are clear, quick answers to help you bake with confidence.
Can I freeze Homemade Thin Mints?
Absolutely. Freezing is the best way to keep a stash. Once the chocolate is fully set, layer the cookies between sheets of parchment paper in an airtight container. They freeze beautifully for up to 3 months. Thaw them at room temperature for about 15 minutes before serving.
Why did my cookies turn out soft?
Soft cookies usually mean the dough was rolled too thick or they were underbaked. For the signature crispness, you must roll the dough to a near-translucent 1/16-inch thickness. Bake them just until the tops feel firm and dry to a light touch, not until they darken.
What can I use instead of coconut oil in the coating?
If you don’t have coconut oil, use 1 teaspoon of vegetable shortening. Do not substitute butter or milk, as they contain water and will not create the same smooth, snappy coating that sets properly.
How many calories are in a Homemade Thin Mint?
Using the exact ingredients listed, one cookie is approximately 80-90 calories. For precise nutritional information, I recommend using a calculator with your specific brand of chocolate and butter.
How long do they stay fresh?
Stored correctly in an airtight container at room temperature, your Homemade Thin Mints will stay perfectly crisp and delicious for up to 1 week. Keep them in a cool, dry place away from direct sunlight.
Bake Your Batch of Homemade Thin Mints Today
There’s a special kind of joy that comes from pulling a tray of these crisp, chocolate-dipped cookies from your own kitchen. You now have a simple, reliable recipe to make that iconic mint-chocolate magic anytime you want. No more waiting for a specific season. I truly hope you give it a try.
I’d love to hear how your Homemade Thin Mints turn out. Share your results and any fun variations you try in the comments below. For more easy, family-friendly baking ideas that never skimp on flavor, be sure to follow me on Pinterest. Happy baking.
Print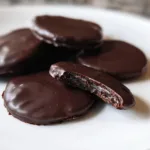
Homemade Thin Mints
- Total Time: 50 minutes
- Yield: 30 servings 1x
- Diet: Vegetarian
Description
Capture the irresistible crispness of Girl Scout Thin Mints year-round with this easy homemade recipe. These cookies feature a delicate chocolate flavor and a thin chocolate coating that’s utterly addictive.
Ingredients
- 10 tablespoons unsalted butter, softened
- 1 cup granulated sugar
- 1 large egg
- 1 teaspoon peppermint extract
- 1 teaspoon vanilla extract
- 1 ¾ cups all-purpose flour
- ⅓ cup unsweetened cocoa powder
- ¼ teaspoon baking powder
- ½ teaspoon salt
- 8 ounces dark chocolate, finely chopped
- 1 tablespoon coconut oil
Instructions
- In a large bowl, cream together the softened butter and granulated sugar until light and fluffy, about 2 minutes.
- Beat in the egg, peppermint extract, and vanilla extract until well combined.
- Gradually add the flour, cocoa powder, baking powder, and salt. Mix on low speed until just combined and no dry streaks of flour remain. Do not overmix.
- Shape the dough into a flat disk, wrap it tightly in plastic wrap, and refrigerate for at least 1 hour, or until firm enough to roll.
- Preheat your oven to 350°F. Line two baking sheets with parchment paper.
- Lightly dust a clean surface with cocoa powder. Roll out the chilled dough to a very thin thickness, about 1/16th of an inch. The dough will be delicate.
- Use a small round cookie cutter to cut out the cookies. Carefully transfer them to the prepared baking sheets, spacing them about 1 inch apart.
- Bake for 8-10 minutes, or until the edges are set and the cookies feel firm to the touch. They should be crisp.
- Transfer the cookies to a wire rack to cool completely.
- In a microwave-safe bowl, combine the chopped dark chocolate and coconut oil. Microwave in 15-second intervals, stirring well after each, until the chocolate is completely melted and smooth.
- Dip each cooled cookie halfway into the melted chocolate, allowing any excess to drip back into the bowl. Place the chocolate-coated cookies onto a clean sheet of parchment paper.
- Let the chocolate set completely at room temperature or in the refrigerator before stacking.
Notes
- Chilling the dough is crucial for easy rolling and preventing the cookies from spreading too much.
- Rolling the dough very thin is key to achieving the signature crispness of Thin Mints.
- Ensure the cookies are fully cooled before dipping in chocolate for the best results.
- Prep Time: 40 minutes
- Cook Time: 10 minutes
- Category: Dessert
- Method: Baking
- Cuisine: American
Nutrition
- Serving Size: 1 cookie
- Calories: 110
- Sugar: 9g
- Sodium: 45mg
- Fat: 6g
- Saturated Fat: 3.5g
- Unsaturated Fat: 2g
- Trans Fat: 0g
- Carbohydrates: 14g
- Fiber: 1g
- Protein: 1g
- Cholesterol: 15mg
Keywords: homemade thin mints, chocolate mint cookies, copycat recipe, dessert, baking