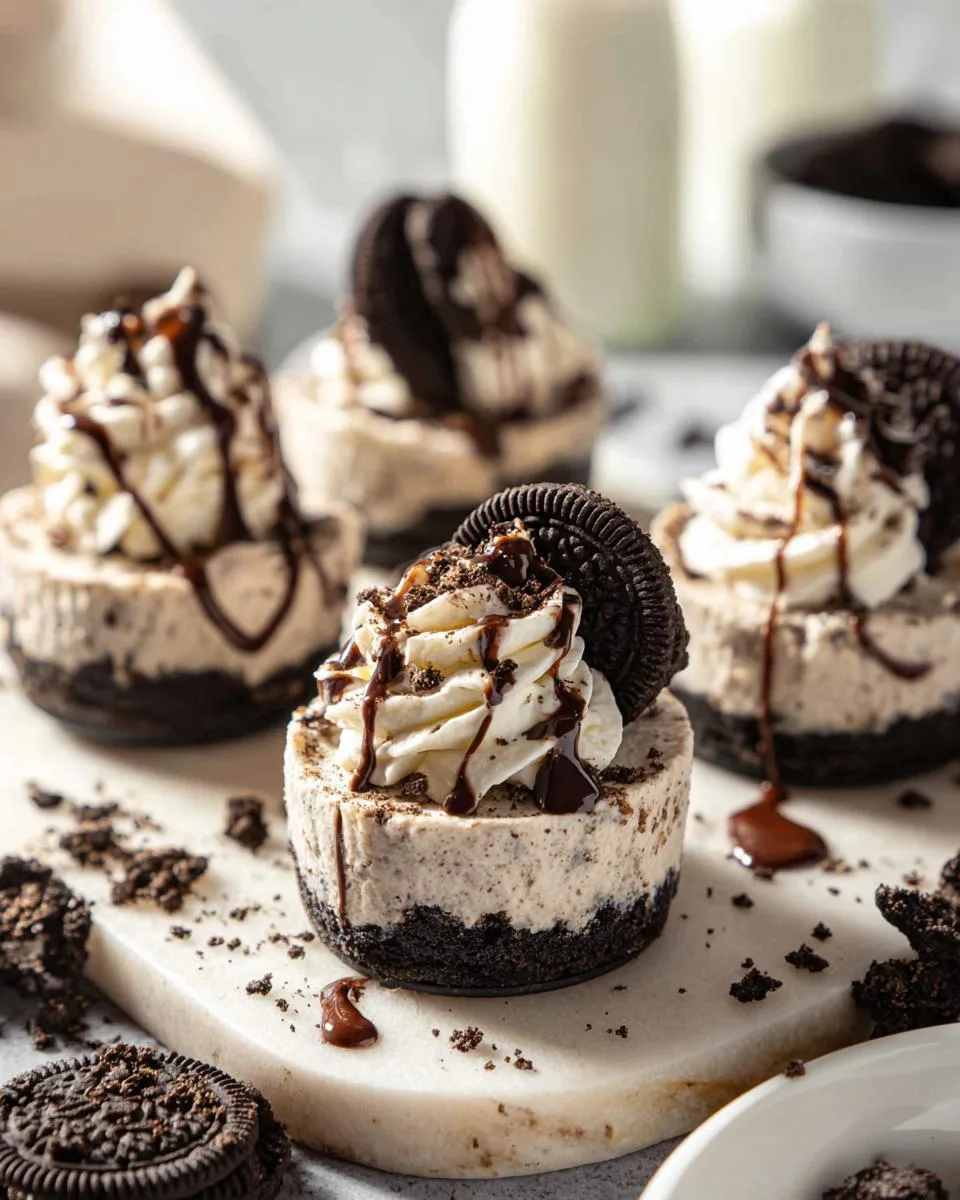
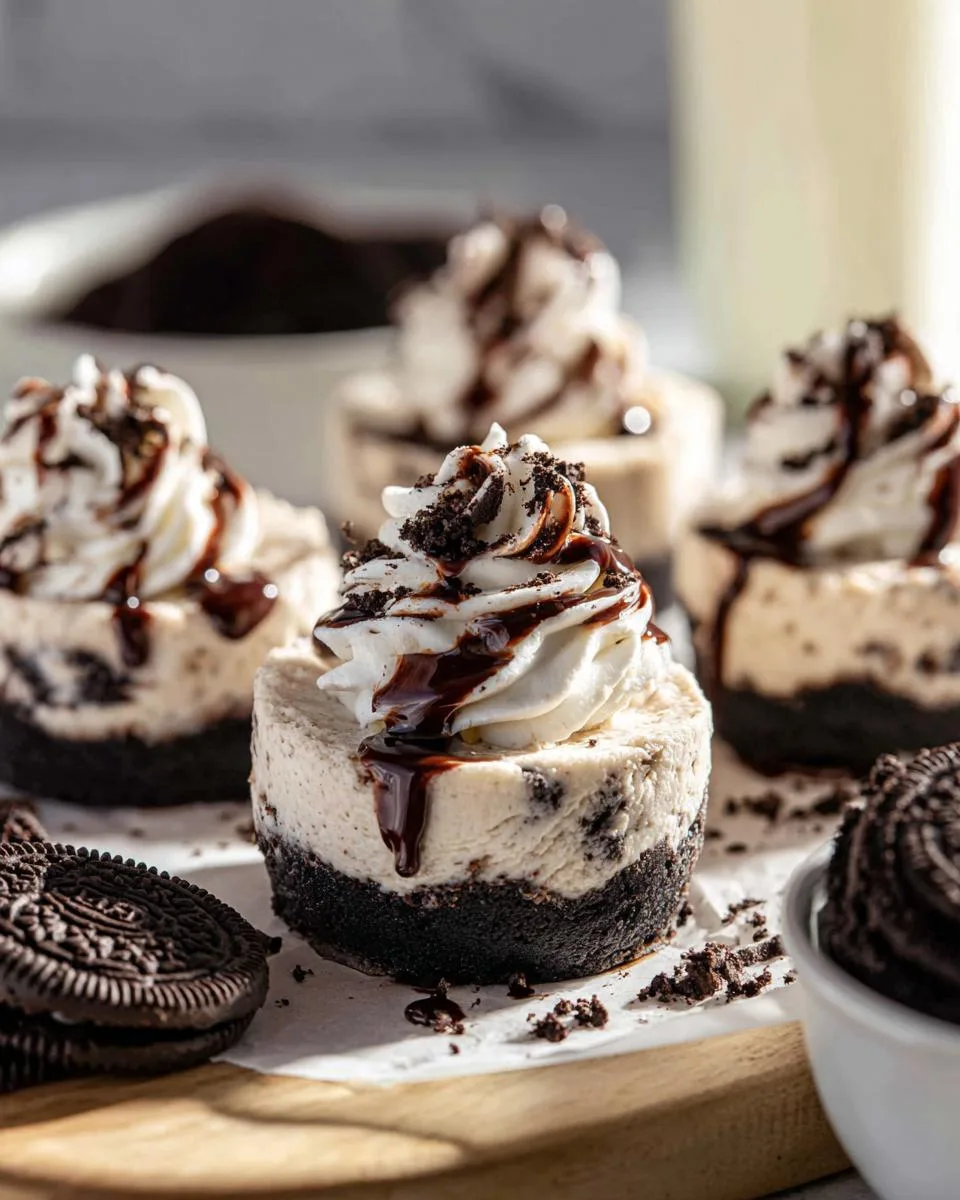
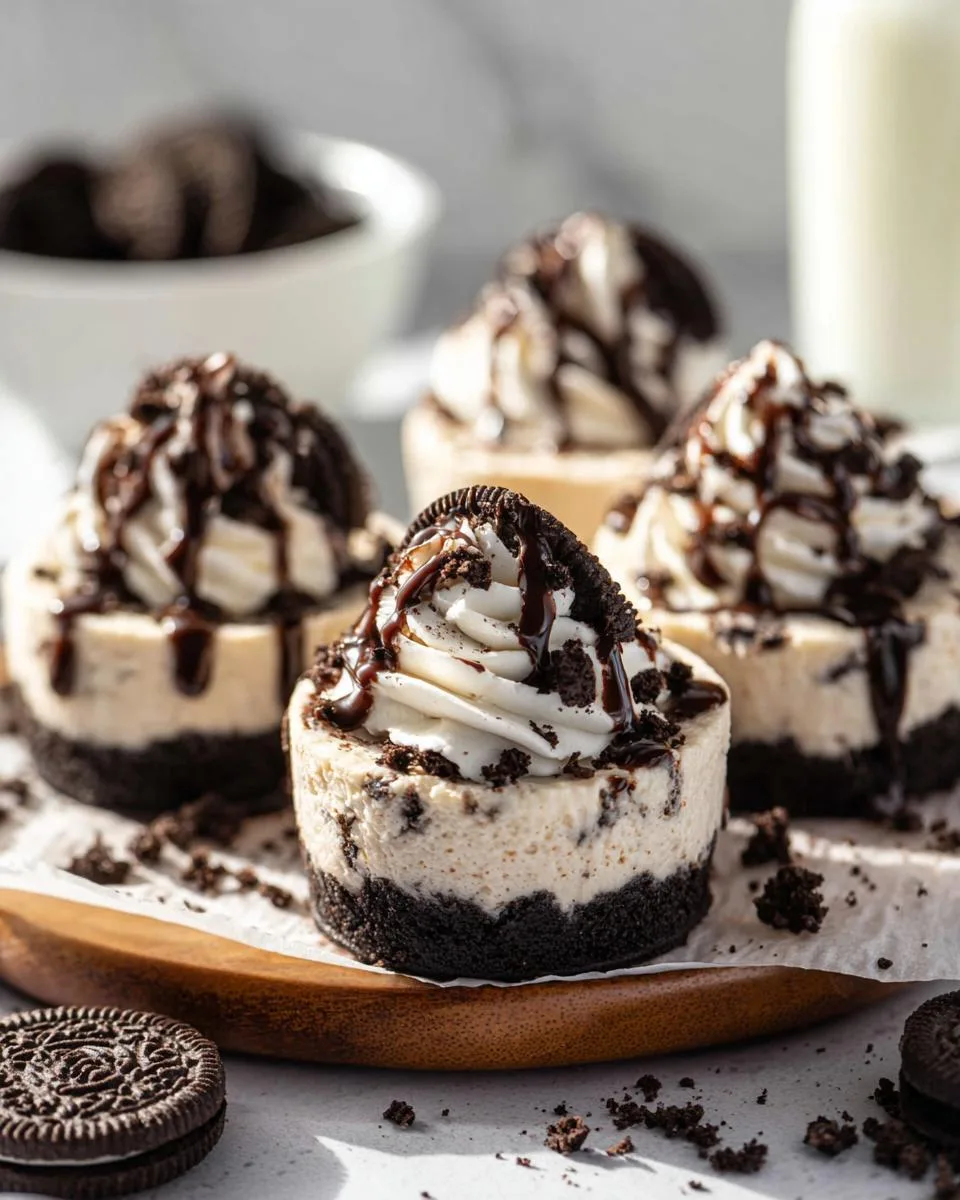
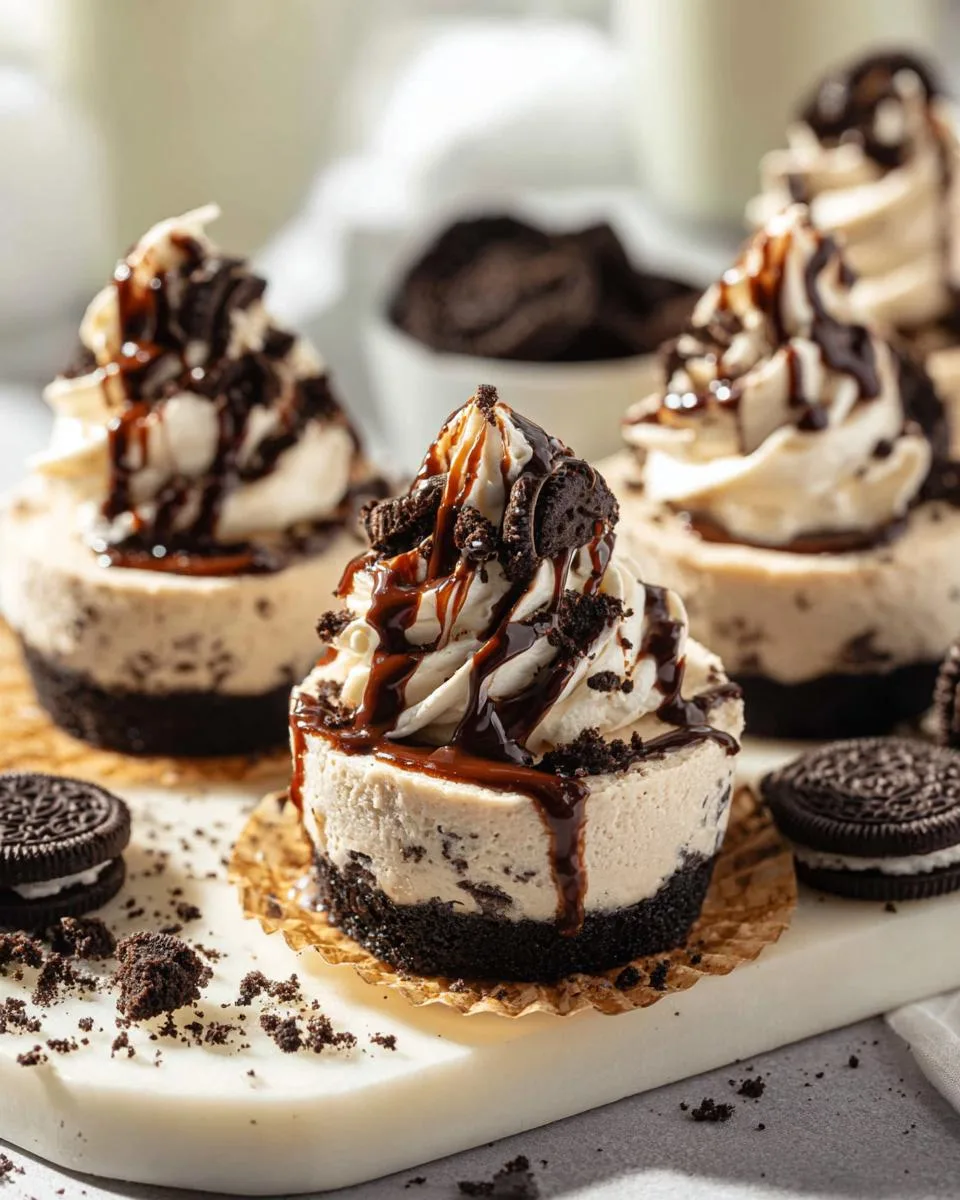
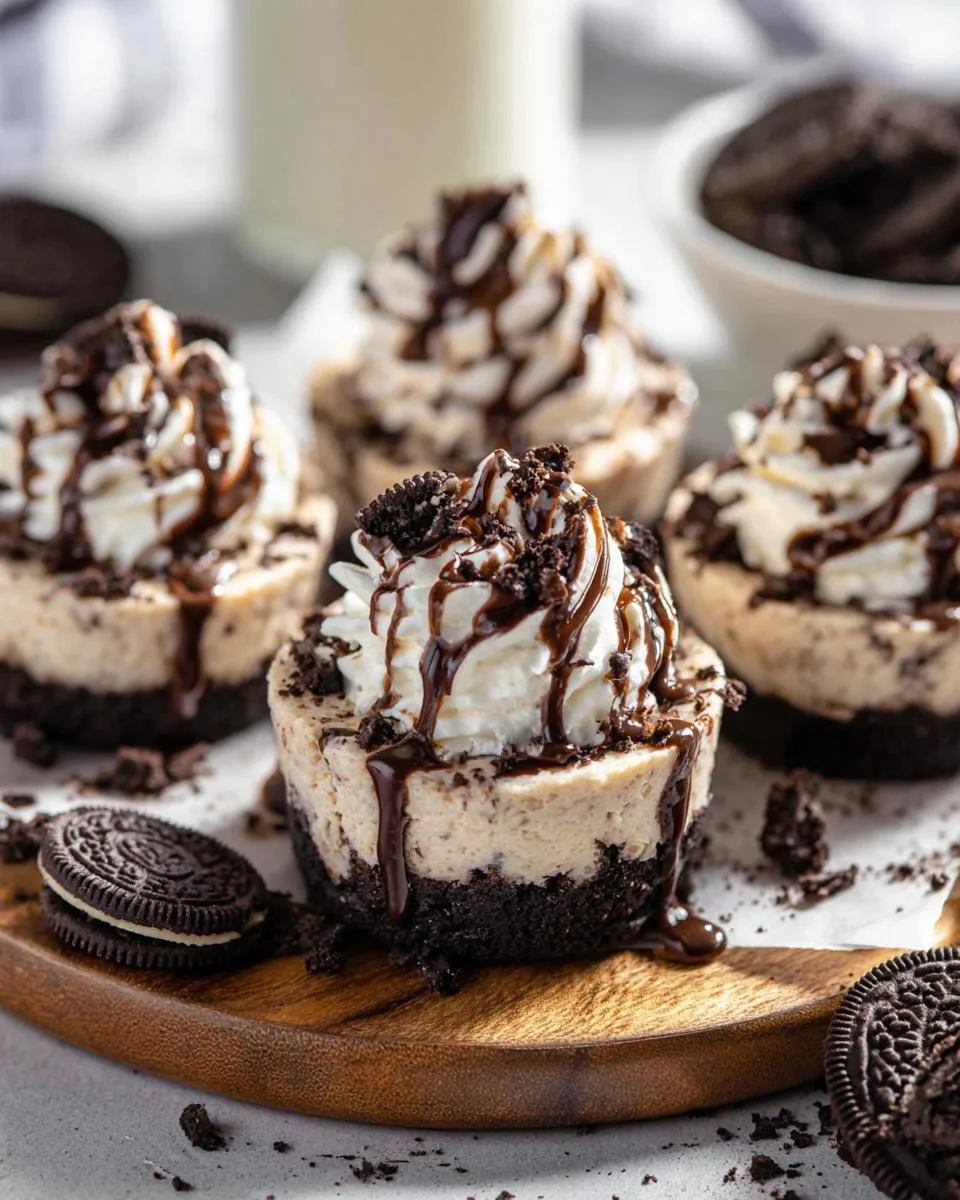
Got a craving for something sweet, but the oven feels like a bridge too far? I hear you. These Mini Oreo Cheesecakes are your delicious, no-bake answer. They combine a crunchy Oreo crust with a light, creamy filling for the perfect individual dessert.
This recipe is my go-to when I need a guaranteed crowd-pleaser without the stress. I’ve made them for book club, school bake sales, and just because Tuesdays. The secret to a great no-bake cheesecake isn’t complicated, it’s about patience and a gentle hand when folding. Let’s walk through the recipe together.
Table of Contents
Why You’ll Love These Mini Oreo Cheesecakes
Let me tell you why these little cups of joy are going to become a staple in your dessert rotation. They hit every mark for a perfect treat: easy, impressive, and downright delicious.
- No Bake Means No Stress: You don’t need to wrestle with an oven or worry about cracks. This is a stir-and-chill recipe, perfect for warm days or when you just want a sweet fix without the heat.
- Perfect Portion Control: Each one is its own little masterpiece. It’s so much easier to serve (and to sneak one for yourself!) than a whole pie. They’re ideal for parties where everyone gets their own.
- Family-Friendly Fun: Kids love helping crush the Oreos for the crust and folding in the extra cookie pieces. It’s a great way to get them involved in the kitchen without a lot of fuss.
- Make Ahead Magic: They need time to chill and set, which makes them a dream for planning. I always make them the night before a gathering. That “overnight” chill is my secret for the firmest, smoothest texture.
- The Flavor Balance: The crust gives a solid, chocolatey base. The filling is creamy and light from the Greek yogurt and Cool Whip, not overly dense. And those folded-in cookie bits? They add little bursts of texture and flavor that make every bite interesting.
In short, they deliver big Oreo cheesecake flavor with minimal effort. That’s a win in my kitchen.
Ingredients You’ll Need
Gathering your ingredients is the first step to success. Here’s everything you need, broken down into the crust and the filling. I’ll share my notes on why each one matters.
For the Oreo Crust
- 25 regular Oreo cookies: You’ll use these whole cookies to make the crust crumbs. Ingredient Note: No need to remove the cream filling. It helps bind the crust and adds flavor.
- 1/2 cup unsalted butter, melted: This is the glue for your crust. Ingredient Note: Using unsalted butter lets you control the saltiness. Melt it completely, but let it cool slightly so it doesn’t make the crumbs greasy.
For the No-Bake Filling
- 2 (8 ounce) packages cream cheese, softened: This is the heart of the filling. Ingredient Note: “Softened” is key. Leave it on the counter for an hour. If it’s too cold, you’ll get lumps, and your filling won’t be smooth.
- 1/4 cup plain Greek yogurt: This adds a slight tang and helps lighten the texture. Ingredient Note: Full-fat yogurt gives the best creaminess, but low-fat works too.
- 3/4 cup granulated sugar: Sweetens the filling perfectly.
- 1 teaspoon vanilla extract: For that classic, warm bakery flavor.
- 8 ounces Cool Whip, thawed: This makes the filling light and airy. Ingredient Note: Thaw it in the refrigerator overnight, not on the counter. If it’s too warm, it can deflate and make your filling runny.
- 1/2 cup crushed Oreo cookies: Measure this after crushing. These bits folded into the filling create wonderful texture.
For Garnishing (Optional)
- Whipped cream
- Chocolate syrup
One quick substitution tip: If you don’t have Cool Whip, you can use an equal amount of homemade whipped cream. Just whip 1 cup of heavy cream with 2 tablespoons of sugar until stiff peaks form, then fold it in gently.
That’s your shopping list. With these simple ingredients, you’re ready to build something amazing.
How to Make Mini Oreo Cheesecakes
Let’s get these beauties made. The process is simple, but a few key steps ensure they turn out perfect every time.
Step 1: Prepare Your Crust
First, line 18 cups of two standard muffin tins with paper cupcake liners. This gives you a clean, easy way to serve them later.
Now, grab your 25 Oreos. You can crush them in a food processor until they’re fine crumbs, or put them in a zip-top bag and use a rolling pin. I’ve done both, and the rolling pin method is great for letting the kids help. Pour the crumbs into a bowl.
Add your melted, slightly cooled butter to the crumbs. Mix it well until every crumb is moistened and the mixture looks like wet sand. This butter is what holds your crust together.
Scoop about 2 tablespoons of this mixture into each liner. Then, take a small glass or the bottom of a measuring cup and press down firmly. You want a compact, solid base. A loose crust will crumble when you add the filling. This is your foundation.
Step 2: Make the Creamy Filling
In a large bowl, combine your softened cream cheese, Greek yogurt, sugar, and vanilla extract. Beat this with an electric mixer on medium speed for 2 to 3 minutes. Stop and scrape down the sides of the bowl once or twice. You’re aiming for a completely smooth, creamy mixture with no lumps. If your cream cheese wasn’t soft enough, you’ll see little bits here. Just keep beating until they disappear.
Now, take your thawed Cool Whip. Gently fold it into the cream cheese mixture. “Fold” means you use a spatula to scoop from the bottom and bring it over the top, turning the mixture. Do this until just combined. Don’t overmix or beat it. You want to keep that light, airy texture.
Finally, fold in your ½ cup of crushed Oreo pieces. A few gentle turns will distribute them evenly without breaking them down too much.
Step 3: Assemble and Chill
Your filling is ready. Spoon about 3 tablespoons into each prepared crust cup. Fill them right to the top, then gently smooth the surface with the back of your spoon or a small spatula.
This is the most important step: chilling. Cover the tins loosely with plastic wrap or foil and refrigerate them for at least 6 hours. I always recommend overnight. This time allows the cheesecakes to firm up completely. If you try to serve them after just 2 or 3 hours, they’ll be too soft. Patience here gives you the perfect texture.
Step 4: Serve Your Mini Oreo Cheesecakes
When they’re fully set, they’re ready to enjoy. Carefully peel away the paper liners. If you used the optional garnishes, now’s the time. Add a dollop of whipped cream and a drizzle of chocolate syrup right before serving.
Store any leftovers in the refrigerator in an airtight container for up to 4 days. They hold their shape beautifully. Just keep them chilled until you’re ready for another sweet bite.
Pro Tips for the Best Mini Oreo Cheesecakes
A few simple tricks can take these from good to absolutely perfect. Here’s what I’ve learned from making them dozens of times.
- The Perfect Crust Press: Use a small, flat-bottomed glass or a measuring cup to press the crumbs. Apply firm, even pressure. A compact crust won’t crumble when you add the filling.
- Charlotte’s Secret for Smooth Filling: If your cream cheese feels a bit stiff after softening, beat it alone for a minute first. Then add the yogurt and sugar. This guarantees a silky, lump-free base.
- Fold Gently, Don’t Mix: When adding the Cool Whip, use a spatula and a gentle folding motion. Overmixing or using the electric mixer here will deflate the filling, making it dense instead of light and fluffy.
- Chill Time is Non-Negotiable: The 6-hour minimum chill is essential for structure. Overnight is ideal. If they seem soft after 6 hours, give them more time. They firm up beautifully with patience.
- Refresh Your Leftovers: If you have cheesecakes a few days later, the crust can soften. For a fresh feel, sprinkle a few new Oreo crumbs on top right before serving.
- Easy Release Trick: If the paper liner sticks after chilling, gently warm the outside of the liner with your hands for a few seconds before peeling it off.
Follow these tips, and you’ll have a flawless, crowd-pleasing dessert every single time.
Common Mistakes to Avoid
Even simple recipes have little pitfalls. Knowing what to watch for makes you a confident cook. Here are the common hiccups with these cheesecakes and how to fix them.
- Lumpy Filling: This happens if your cream cheese is still too cold. It doesn’t blend smoothly. How to fix it: Let your cream cheese soften on the counter for a full hour. If you see lumps while mixing, just keep beating until they disappear.
- Runny or Soft Cheesecakes: This is usually from under-chilling or using warm Cool Whip. How to fix it: Thaw Cool Whip in the fridge, never on the counter. Then, give your cheesecakes the full 6+ hours in the fridge. They need that time to set up firm.
- A Crust That Crumbles: You didn’t press it firmly enough. How to fix it: Really press down with your glass or measuring cup. You want a compact, solid layer that acts like a cookie tile.
- Dense, Heavy Filling: You overmixed when adding the Cool Whip. How to fix it: Fold gently with a spatula. Stop once it’s just combined. This keeps the air in the Cool Whip, making the filling light.
Don’t panic if something goes a bit sideways. Most issues are easy to solve with a little patience or a quick fix.
Delicious Variations
The beauty of this recipe is how easily you can dress it up for any occasion. A simple swap can turn these classic cheesecakes into something new and exciting.
- Peanut Butter Paradise: For the crust, use peanut butter Oreos. Then, add ¼ cup of creamy peanut butter to the filling when you beat the cream cheese. Fold in chopped Reese’s Pieces instead of plain Oreo bits. It’s a rich, nutty twist.
- Mint Chocolate Freshness: Swap in mint Oreos for both the crust and the folded-in pieces. Add ½ teaspoon of peppermint extract (not mint extract) to the filling along with the vanilla. Top with a dark chocolate drizzle. Perfect for holiday gatherings.
- Berry Swirl Delight: Keep the original Oreo crust. Before adding the filling to the cups, gently fold in ⅓ cup of seedless raspberry or strawberry jam/preserves. Don’t overmix. You’ll get pretty pink swirls and a fruity flavor.
- Cookies & Cream Explosion: Double the cookie fun. Use Oreos for the crust. For the filling, fold in ½ cup of mini chocolate chips along with the crushed Oreos. Top each cheesecake with a whole mini Oreo cookie before chilling.
- Lemon Zest Brightness: Add a surprising citrus note. Use the original Oreo crust. Add the zest of one lemon and 1 tablespoon of lemon juice to the cream cheese mixture when beating. It cuts through the richness beautifully.
Feel free to play around. These variations let you customize the treat to match your mood or your party theme.
Serving Suggestions
These mini cheesecakes are perfect on their own, but pairing them thoughtfully can turn a simple dessert into a special moment. Here are my favorite ways to serve them.
- Weeknight Treat: Serve one or two on a small plate after dinner. The individual portion makes it feel like a special, guilt-free indulgence without any leftovers tempting you.
- Party Platter Perfection: Arrange them on a large tray or cake stand for a birthday, baby shower, or potluck. Their uniform size looks elegant and makes serving effortless.
- Summer Cookout Cool-Down: After burgers and hot dogs, these chilled desserts are a refreshing, sweet finale. Keep them in the fridge until just before serving to beat the heat.
- Coffee or Tea Companion: Pair one with a cup of hot coffee or tea for a cozy afternoon break. The rich chocolate and creamy cheese balance beautifully with a warm beverage.
- Kid-Friendly Dessert Bar: Set up a toppings station with extra whipped cream, chocolate syrup, sprinkles, and fresh berries. Let the kids (or adults!) decorate their own cheesecake for a fun, interactive treat.
They truly shine as a standalone dessert, but they also pair wonderfully with lighter fare like a fruit salad for a balanced sweet spread.
FAQs About Mini Oreo Cheesecakes
Can I make these ahead of time?
Absolutely. They are a perfect make-ahead dessert. Prepare them the day before your event and let them chill overnight in the refrigerator. This ensures they are fully set and firm for serving.
What can I use instead of Cool Whip?
You can substitute with homemade whipped cream. Whip 1 cup of heavy cream with 2 tablespoons of sugar until stiff peaks form. Gently fold it into the cream cheese mixture just like you would with Cool Whip.
How do I know when the cheesecakes are set?
The cheesecakes are fully set when they are firm to the touch and no longer look glossy or wet on top. After the minimum 6-hour chill, gently press the center with your finger; it should feel solid and not jiggly or soft.
How long do they last in the fridge?
Store them in an airtight container in the refrigerator for up to 4 days. The crust may soften slightly over time, but the flavor remains delicious. For the best texture, enjoy them within 2-3 days.
What is the calorie count per cheesecake?
Based on the ingredients listed, one Mini Oreo Cheesecake is approximately 227 calories. Please note: Nutritional values can vary based on specific brands used and any optional garnishes like whipped cream or syrup.
Your Next Easy Dessert Adventure
You’ve just unlocked the secret to no-bake dessert magic. These Mini Oreo Cheesecakes give you creamy, crunchy joy without turning on your oven. They’re perfect for sharing and even better for savoring one by yourself. I hope this recipe brings a little sweetness to your table.
If you make them, I’d love to hear how it goes. Did your kids help crush the cookies? Did you try a fun variation? Leave a comment and tell me all about it. For more easy, family-friendly ideas that turn simple ingredients into something special, come follow along on Pinterest. Your next kitchen adventure is waiting.
Print
No-Bake Mini Oreo Cheesecakes
- Total Time: 380 minutes
- Yield: 18 servings 1x
- Diet: Vegetarian
Description
No bake Mini Oreo Cheesecakes are creamy, individual treats with a cookie crust. They are simple to make and require chilling to set.
Ingredients
- 3 cups Oreo cookie crumbs (about 25 regular Oreo cookies)
- 1/2 cup unsalted butter, melted
- 2 (8 ounce) packages cream cheese, softened
- 1/4 cup plain Greek yogurt
- 3/4 cup granulated sugar
- 1 teaspoon vanilla extract
- 8 ounces Cool Whip, thawed
- 1/2 cup crushed Oreo cookies
- Whipped cream, for topping (optional)
- Chocolate syrup, for topping (optional)
Instructions
- Line 18 cups of two standard muffin tins with paper cupcake liners.
- Place about 25 Oreo cookies in a food processor and pulse until they are fine crumbs. Add the melted butter and pulse again until the crumbs are moistened.
- Spoon about 2 tablespoons of the crumb mixture into each cupcake liner. Press the crumbs down firmly to create a base.
- In a medium bowl, beat the softened cream cheese, Greek yogurt, granulated sugar, and vanilla extract until the mixture is smooth and creamy, about 2 to 3 minutes.
- Gently fold the thawed Cool Whip into the cream cheese mixture until just combined.
- Fold in the 1/2 cup of crushed Oreo cookies.
- Spoon about 3 tablespoons of the cheesecake filling into each cupcake liner, filling it to the top. Smooth the tops gently.
- Refrigerate the cheesecakes for at least 6 hours, or preferably overnight, until they are firm.
Notes
- For the cleanest crust, press the crumbs firmly into the liners.
- Ensure cream cheese is fully softened for a smooth, lump-free filling.
- Chilling time is crucial for the cheesecakes to set properly.
- Top with whipped cream and chocolate syrup if you want before serving.
- Prep Time: 20 minutes
- Cook Time: 0 minutes
- Category: Dessert
- Method: No Bake
- Cuisine: American
Nutrition
- Serving Size: 1 mini cheesecake
- Calories: 227 kcal
- Sugar: 18g
- Sodium: 180mg
- Fat: 15g
- Saturated Fat: 8g
- Unsaturated Fat: 5g
- Trans Fat: 0g
- Carbohydrates: 22g
- Fiber: 0.5g
- Protein: 3g
- Cholesterol: 35mg
Keywords: oreo cheesecake, no bake dessert, mini cheesecake, easy dessert