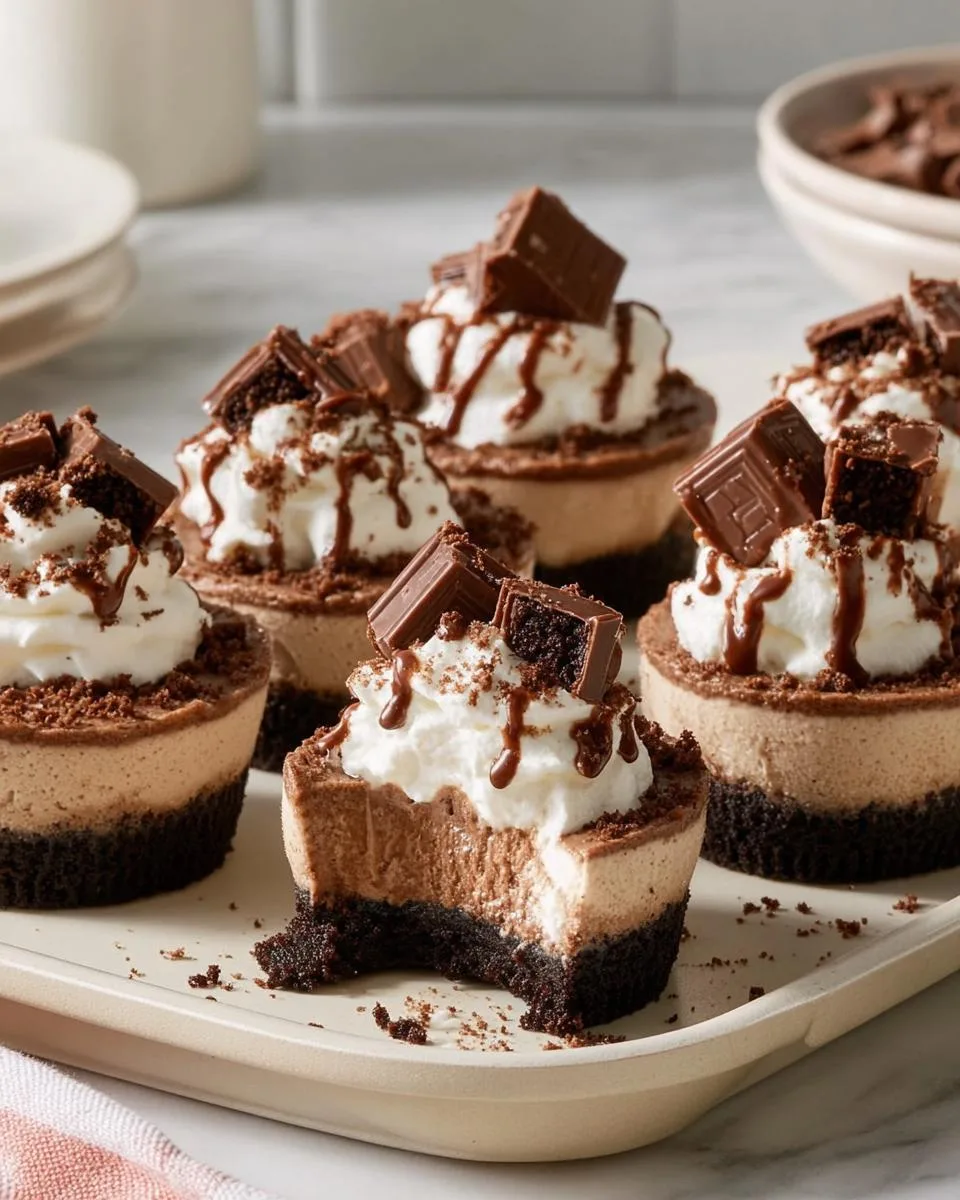
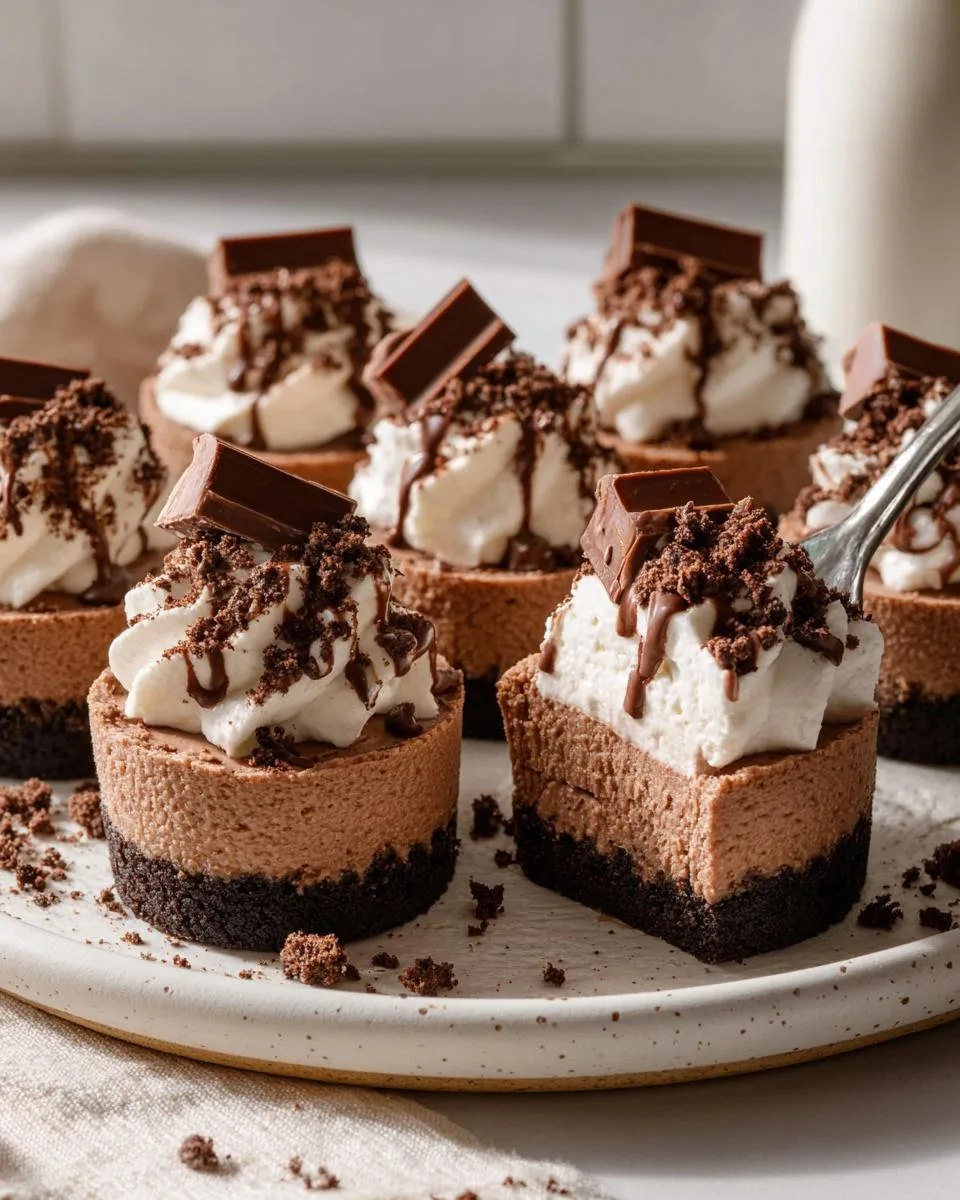
Do you ever need a dessert that feels fancy but is secretly simple? These mini chocolate cheesecakes are my ultimate party trick. They look like you spent hours, but the oven stays off.
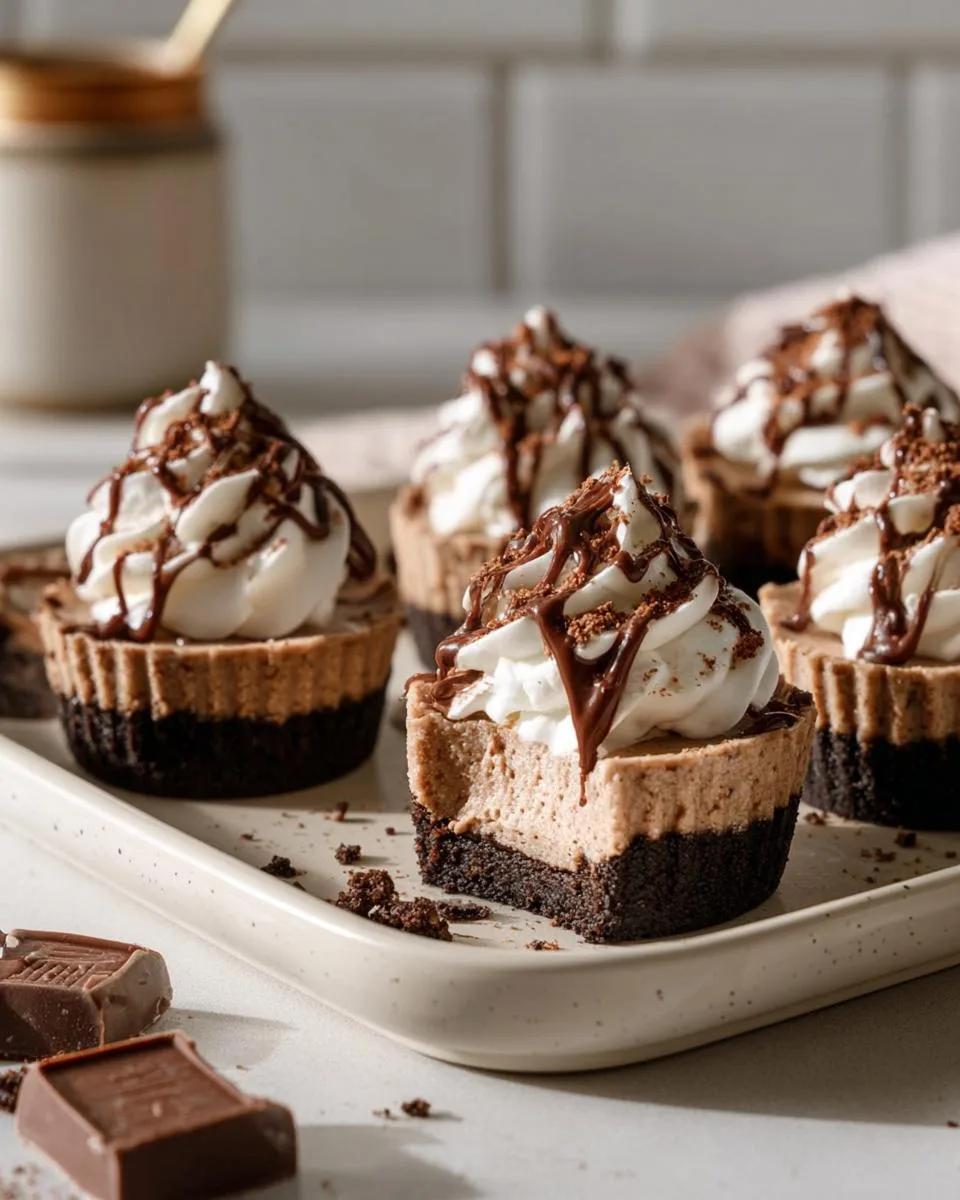
The secret to perfect mini chocolate cheesecakes isn’t complicated, it’s about a creamy, mousse-like filling and a crisp cookie crust. I started making them for family potlucks here in Charlotte, where a dessert needs to travel well and please a crowd. Now, they’re my go-to for everything from quiet dinners to big celebrations. Everyone loves that rich chocolate and creamy cheesecake combo in a perfect, personal size.
This no-bake dessert recipe is a lifesaver. You get all the decadence of a classic cheesecake without any stress over water baths or cracks. Let’s walk through how easy it really is.
Table of Contents
Why You’ll Love These Mini Chocolate Cheesecakes
I promise this recipe will become your new dessert best friend. It solves so many common problems with one simple, delicious solution.
- No-bake bliss: You skip the oven entirely. This means no worrying about a water bath, no watching for cracks, and no chance of over-baking. Your kitchen stays cool, and your stress level stays low.
- Perfect portions: Each one is a complete, personal treat. No slicing, no mess, and no fighting over who got the bigger piece. They are so easy to serve at parties or pack for lunches.
- Make-ahead magic: They actually need that long chill time in the fridge. You can make them a full day or even two ahead of your event. This frees you up to enjoy your guests.
- Universal crowd-pleaser: The combination of rich, dark chocolate and tangy, creamy cheesecake is a winner every single time. I have never brought a single one back home from a gathering.
- Beginner-friendly: If you can use a mixer and a spatula, you can make these. The steps are clear and straightforward, with no fancy techniques required.
- Your creative canvas: Start with this classic chocolate version, then make it your own. Switch up the crust, add different extracts, or go wild with toppings. I will share some of my favorite ideas later.
In short, these mini chocolate cheesecakes deliver maximum joy for minimal effort. Let’s gather what you need.
Ingredients You’ll Need
Great ingredients are the foundation of any fantastic dessert. For these perfect mini chocolate cheesecakes, you do not need a long list, just a few key players. Here is your simple shopping list, broken into two easy parts.
For the Crust:
- 24 chocolate sandwich cookies, finely crushed (about 2 cups of crumbs). I use a food processor for a fine, even crumb, but a zip-top bag and a rolling pin work just as well.
- 6 tablespoons unsalted butter, melted. This acts as the glue for our crisp, chocolatey base.
For the Filling & Topping:
- 16 ounces (two 8-oz blocks) full-fat cream cheese, softened to room temperature. This is non-negotiable. Full-fat cream cheese gives you that rich, stable texture we love. Let it sit out for 1-2 hours until it’s soft to the touch.
- ½ cup granulated sugar. Just the right amount of sweetness to balance the chocolate.
- 1 teaspoon pure vanilla extract. It deepens all the other flavors.
- 5 ounces semi-sweet chocolate, chopped, melted, and slightly cooled. Use good baking chocolate. Let it cool for about 5 minutes after melting so it doesn’t melt the cream cheese.
- 2 tablespoons full-fat sour cream, at room temperature. Another full-fat must. It adds a lovely tang and helps create a super creamy, smooth filling.
- 1 cup heavy whipping cream, cold. Keep this in the fridge until the very second you need it. Cold cream whips up faster and holds its shape better.
- Optional garnishes: A little extra whipped cream, chocolate shavings, or mini chocolate chips for serving.
Ingredient Note: For the crust, classic Oreo cookies (cream filling and all) are perfect. If you prefer, you can swap them for 1.5 cups of graham cracker crumbs mixed with 5 tablespoons of melted butter. The most important tip? Make sure your cream cheese and sour cream are truly at room temperature. This is the secret to a perfectly smooth, lump-free filling every single time.
How to Make Mini Chocolate Cheesecakes
Making these no-bake mini chocolate cheesecakes is a simple, fun process. Just follow these clear steps for perfect results every time.
Step 1: Prepare the Crust and Pan
Start by lining a 24-cup mini muffin tin with paper liners. This makes removal so easy. In a medium bowl, mix the finely crushed chocolate cookies with the melted butter. Keep mixing until the crumbs are evenly coated and the mixture holds together when pinched, just like wet sand. Firmly press one tablespoon of this mixture into the bottom of each liner. I use a small glass or a measuring spoon to really pack it down. Pop the whole pan into the freezer for 15 minutes. This quick chill firms up the crust so it stays crisp when we add the filling.
Step 2: Make the Chocolate Cream Cheese Base
Now, grab your perfectly softened cream cheese. Using an electric mixer on medium speed, beat it in a large bowl until it is completely smooth, with no lumps in sight. This takes about 1-2 minutes. Add the granulated sugar and vanilla extract. Beat again for another 1-2 minutes, until the mixture looks fluffy and light. Scrape down the sides of the bowl. With the mixer on low speed, pour in the melted, slightly cooled chocolate and the room-temperature sour cream. Mix just until everything is combined and the batter is a uniform, glossy, dark brown. Avoid overmixing at this stage.
Step 3: Fold in the Whipped Cream
This step creates that dreamy, mousse-like texture. Pour the cold heavy whipping cream into a separate, chilled metal bowl. Using a clean mixer, whip it on high speed until stiff peaks form. You will know it’s ready when you lift the beaters and the cream stands straight up. Now, take about one-third of this whipped cream and gently fold it into the chocolate base. Use a wide spatula and a gentle turning motion to combine them. This “lightens” the thick base. Then, add the rest of the whipped cream. Fold gently and patiently until you see no more white streaks. Stop as soon as the mixture is one color. Overmixing here will deflate your filling.
Step 4: Assemble and Chill the Mini Chocolate Cheesecakes
Your filling should be thick, fluffy, and hold its shape on a spoon. Spoon or pipe it evenly into the chilled crusts, filling each cup almost to the top. Smooth the tops gently with the back of a small spoon or an offset spatula. Loosely cover the entire pan with plastic wrap. This is the most important step. Refrigerate the cheesecakes for at least 4 to 6 hours, but I truly recommend overnight. This long chill allows them to set fully, firm up perfectly, and lets the flavors meld beautifully.
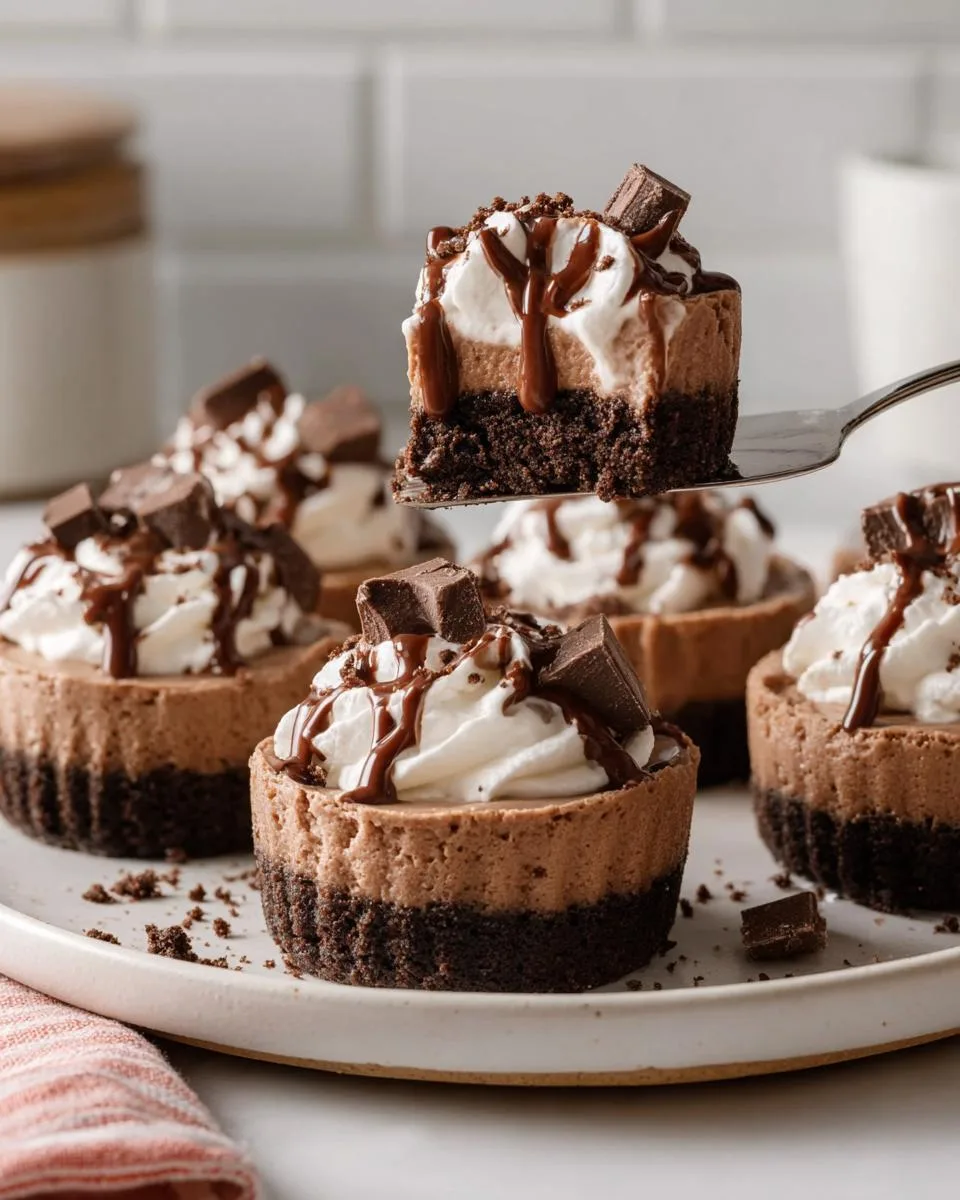
Step 5: Garnish and Serve
Once fully chilled, your mini chocolate cheesecakes are ready. They will feel firm to a gentle touch. Add your garnishes right before serving. A small dollop of extra whipped cream and a sprinkle of chocolate shavings or mini chips looks beautiful. You can use a butter knife to gently help lift them out of the liners if needed. Serve them straight from the fridge for the best texture and enjoy.
Pro Tips for the Best Mini Chocolate Cheesecakes
A few simple tricks can take your mini chocolate cheesecakes from good to absolutely incredible. These are the little things I’ve learned in my own kitchen that make a big difference.
- Test your cream cheese softness: Don’t just guess. Press your finger into the block. It should leave a deep indentation easily. If it’s still firm in the middle, give it more time. Soft cream cheese blends into a perfectly smooth, lump-free filling.
- Cool chocolate correctly: After melting, let the chocolate sit for 5-7 minutes. It should feel just warm to the touch, not hot. This prevents it from melting the cream cheese and making the batter too thin or greasy.
- Chill everything for the whip: Pop your metal mixing bowl and beaters in the freezer for 10 minutes before whipping the cream. Cold tools help the heavy cream whip up faster and hold those beautiful stiff peaks that give the filling its airy lift.
- Master the gentle fold: Use a wide silicone spatula. Cut down through the center of the bowl, sweep along the bottom, and fold the mixture over onto itself. Turn the bowl slightly and repeat. Stop the moment the last streak of white disappears.
- Charlotte’s secret for easy serving: After chilling, gently run a small butter knife around the very top edge of each paper liner. This breaks any seal and lets you lift the mini chocolate cheesecakes out cleanly, with no tearing.
- Refresh leftovers perfectly: If you have any left after a day or two, the crust can soften. For a quick fix, pop them in the freezer for 15 minutes before serving. It gives the crust a delightful crispness again.
Common Mistakes to Avoid
Even the simplest recipes have little pitfalls. Avoiding these common mistakes is the key to perfect, no-fuss mini chocolate cheesecakes every single time.
- Using cold cream cheese: Why it happens: You’re in a hurry. How to fix it: Plan ahead. Let the blocks sit on your counter for 1-2 hours until they are soft all the way through. Cold cream cheese will never blend smoothly, leaving you with a lumpy, grainy filling.
- Adding hot chocolate to the filling: Why it happens: You mix the melted chocolate right away. How to fix it: Let it cool. Pour your melted chocolate into a cool bowl and let it sit for 5-7 minutes. It should be just warm, not hot. Hot chocolate will melt the cream cheese, causing a thin, greasy batter that won’t set properly.
- Overmixing after adding whipped cream: Why it happens: You want to be thorough. How to fix it: Be gentle. Fold with a spatula, don’t stir with a spoon. Stop the very second the last white streak disappears. Overmixing knocks out all the air you whipped in, resulting in a dense, heavy filling instead of a light, mousse-like one.
- Skipping the long chill: Why it happens: You want to taste them right away. How to fix it: Trust the process. Four hours is the bare minimum. Overnight is ideal. The filling needs this time to firm up completely. If you try to serve them too soon, they will be soft, messy, and won’t hold their beautiful shape.
Delicious Variations
One of my favorite things about this mini chocolate cheesecake recipe is how easily it becomes a brand new dessert. Start with the classic base, then let your imagination run wild. Here are a few of my family’s most-requested twists.
- Mint Chocolate Delight: Add ¼ teaspoon of pure peppermint extract to the cream cheese mixture along with the vanilla. The flavor is refreshing and perfect for the holidays. Top each finished cheesecake with a thin chocolate mint piece or a sprinkle of crushed candy canes.
- Salted Caramel Swirl: After filling the cups, drizzle about ½ teaspoon of salted caramel sauce over the top of each cheesecake. Use a toothpick to gently swirl it into the chocolate filling just once or twice. The sweet-salty combo is absolutely irresistible.
- Peanut Butter Cup Surprise: This is a crowd favorite. After spooning the filling into the crusts, press one mini peanut butter cup, point-side down, into the center of each unbaked cheesecake. Push it down until it’s almost submerged. Chill as usual. You get a gooey, peanut buttery center in every bite.
- Simple Berry Swirl: For a fruity twist, gently warm a few tablespoons of seedless raspberry or strawberry jam. After filling the cups, dot the top of each cheesecake with about ½ teaspoon of jam. Use a toothpick to swirl it gently for a beautiful marbled effect before chilling.
These are just a starting point. Try crushed Oreos in the filling, a white chocolate drizzle, or a sprinkle of sea salt. Your perfect mini chocolate cheesecake is waiting to be created.
Serving Suggestions
These mini chocolate cheesecakes are the ultimate versatile treat. Their perfect single-serving size makes them fit for any occasion. Here are my favorite ways to serve them.
- An elegant dinner finale: Plate two or three on a nice dish with a drizzle of chocolate sauce. Serve them with strong coffee or a glass of cold milk. The rich chocolate and creamy filling feel luxurious after a special meal.
- The potluck superstar: They are made for sharing. Arrange them on a platter, cover with plastic wrap, and they travel perfectly. No slicing required means you just set them down and watch them disappear. Everyone gets their own perfect little dessert.
- A DIY dessert bar centerpiece: For a birthday or holiday, set out the plain cheesecakes with small bowls of toppings. Let guests customize with crushed toasted nuts, colorful sprinkles, a warm berry sauce, or a bowl of extra whipped cream. It’s fun, interactive, and easy for you.
- With a pop of fresh fruit: The rich chocolate loves a bright, tangy partner. Serve each cheesecake with a few fresh raspberries or a sliced strawberry on the side. The berry juice cuts through the richness beautifully for a balanced bite.
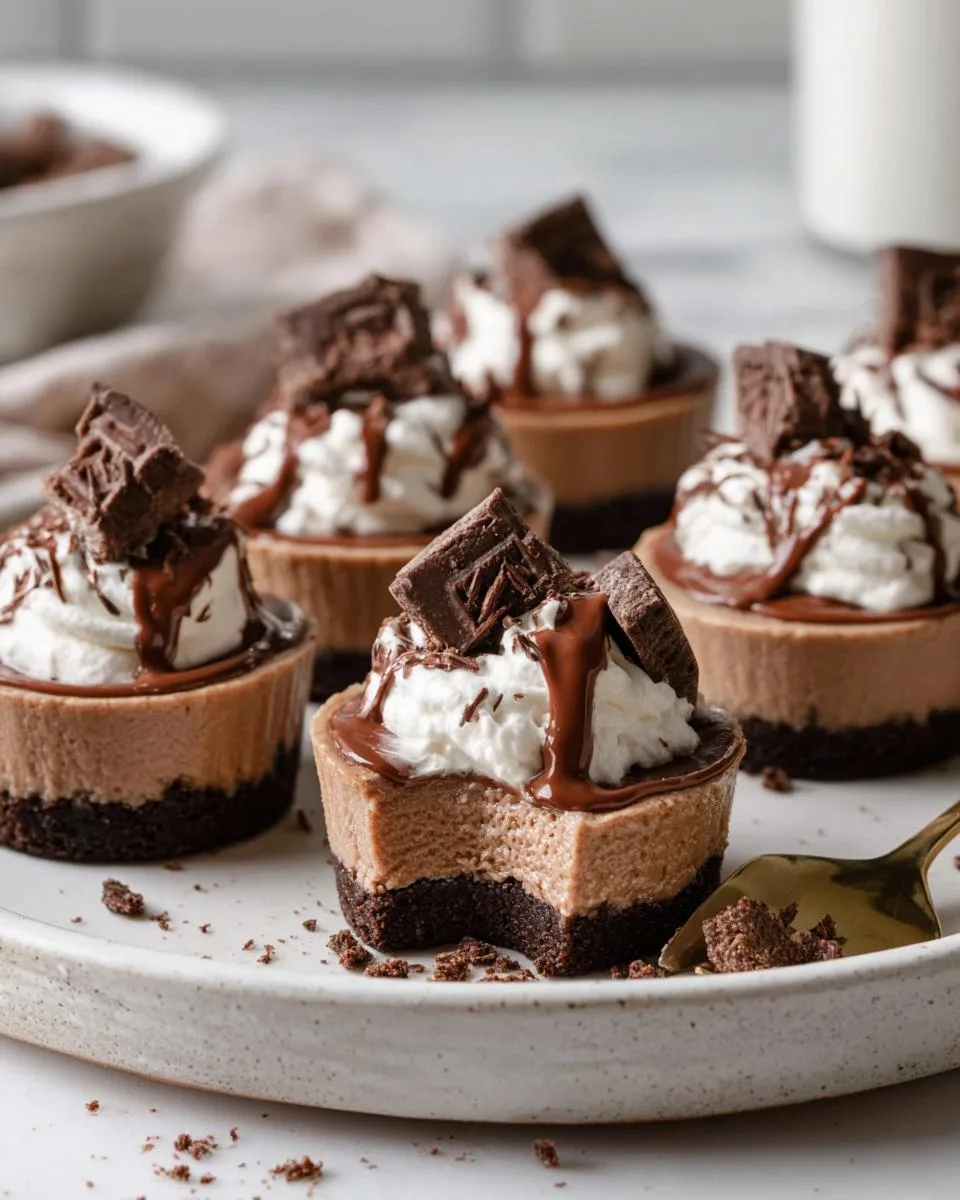
- Pure and simple: Honestly, they need no accompaniment at all. Straight from the fridge, these mini chocolate cheesecakes are a complete, decadent treat. Sometimes, the best way to serve them is just on their own, one delicious bite at a time.
FAQs About Mini Chocolate Cheesecakes
Can I make these in a regular muffin tin?
Yes, you absolutely can. Use a standard 12-cup muffin tin lined with paper liners. This recipe will yield about 12 larger cheesecakes. You will need to increase the chill time to at least 6 hours, and overnight is still best for a perfect set.
How long do they last in the fridge?
Stored properly in an airtight container, these mini chocolate cheesecakes stay fresh in the refrigerator for up to 5 days. For the best texture, I recommend enjoying them within 3 days. The crust will gradually soften, but they will still taste delicious.
Can I freeze mini chocolate cheesecakes?
Absolutely, they freeze beautifully. First, freeze them uncovered on a baking sheet until solid, about 2 hours. Then, transfer them to a freezer-safe bag or container. They will keep for up to 2 months. Thaw them overnight in the refrigerator before serving.
My filling is runny. What happened?
A runny filling usually has two causes. First, your cream cheese or sour cream may have been too warm, which thins the batter. Second, the heavy cream might not have been whipped to stiff peaks. Always use cold cream and a chilled bowl, and whip until the cream holds a firm peak when you lift the beater.
What are the nutrition facts?
Nutritional values depend on the specific brands you use. As a general estimate, one mini chocolate cheesecake (without extra whipped cream or heavy garnishes) contains approximately 180-220 calories, 14g of fat, 14g of carbs, and 3g of protein.
Your New Favorite Mini Dessert
These easy, no-bake mini chocolate cheesecakes are your new secret weapon. They deliver rich, decadent flavor with minimal effort and maximum make-ahead convenience. I truly hope this recipe brings as much joy to your table as it has to mine.
I would love to hear how your mini chocolate cheesecakes turn out. Did you try a fun variation? Did your family go crazy for them? Share your stories or photos in the comments below. For more simple, impressive dessert ideas that never fail, be sure to follow me on Pinterest. Now, go enjoy your perfect, personal bite of chocolate bliss.
Print
No-Bake Mini Chocolate Cheesecakes
- Total Time: 6 hours 30 minutes
- Yield: 24 mini cheesecakes 1x
- Diet: Vegetarian
Description
Decadent mini chocolate cheesecakes with a crisp cookie crust, luscious chocolate filling, and whipped cream topping.
Ingredients
- 24 chocolate sandwich cookies, finely crushed
- 6 tablespoons unsalted butter, melted
- 16 ounces cream cheese, softened
- ½ cup granulated sugar
- 1 teaspoon vanilla extract
- 5 ounces semi-sweet chocolate, melted
- 2 tablespoons sour cream
- 1 cup heavy whipping cream, cold
Instructions
- Mix crushed cookies and melted butter until moistened.
- Press mixture into lined mini muffin tin cups.
- Chill crusts in freezer for 15 minutes.
- Beat softened cream cheese until smooth.
- Add sugar and vanilla, beat until fluffy.
- Mix in melted chocolate and sour cream.
- Whip cold cream until stiff peaks form.
- Fold whipped cream into chocolate mixture.
- Spoon filling into chilled crusts.
- Refrigerate cheesecakes for 4-6 hours or overnight.
- Top with whipped cream and chocolate before serving.
Notes
- Use softened cream cheese for smooth filling.
- Avoid overmixing after adding whipped cream.
- Chill overnight for best texture and flavor.
- Prep Time: 30 minutes
- Cook Time: 0 minutes
- Category: Dessert
- Method: No-Bake
- Cuisine: American
Nutrition
- Serving Size: 1 mini cheesecake
- Calories: 280
- Sugar: 18g
- Sodium: 150mg
- Fat: 22g
- Saturated Fat: 13g
- Unsaturated Fat: 7g
- Trans Fat: 0g
- Carbohydrates: 20g
- Fiber: 1g
- Protein: 3g
- Cholesterol: 55mg
Keywords: chocolate cheesecake, mini cheesecake, no-bake dessert, chocolate dessert