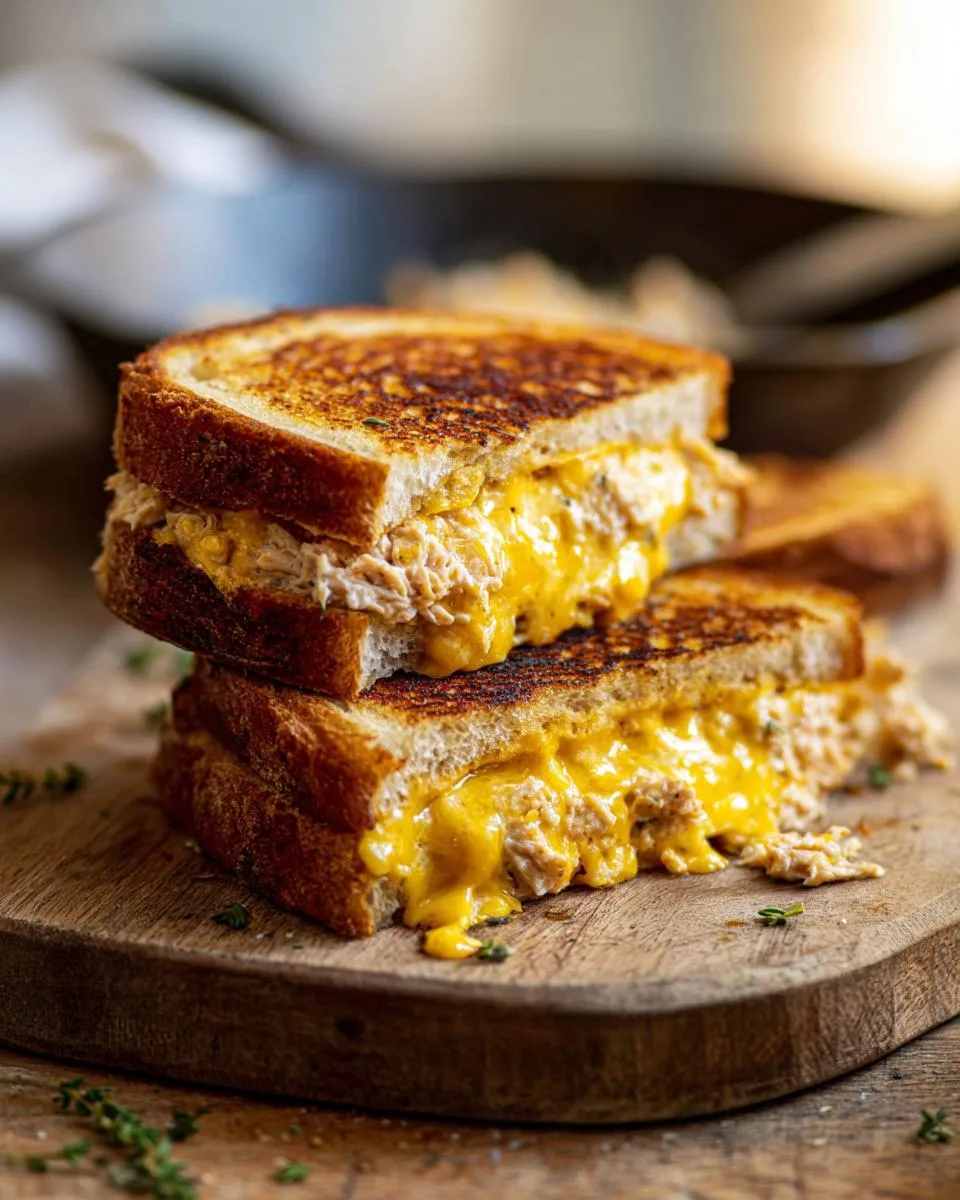
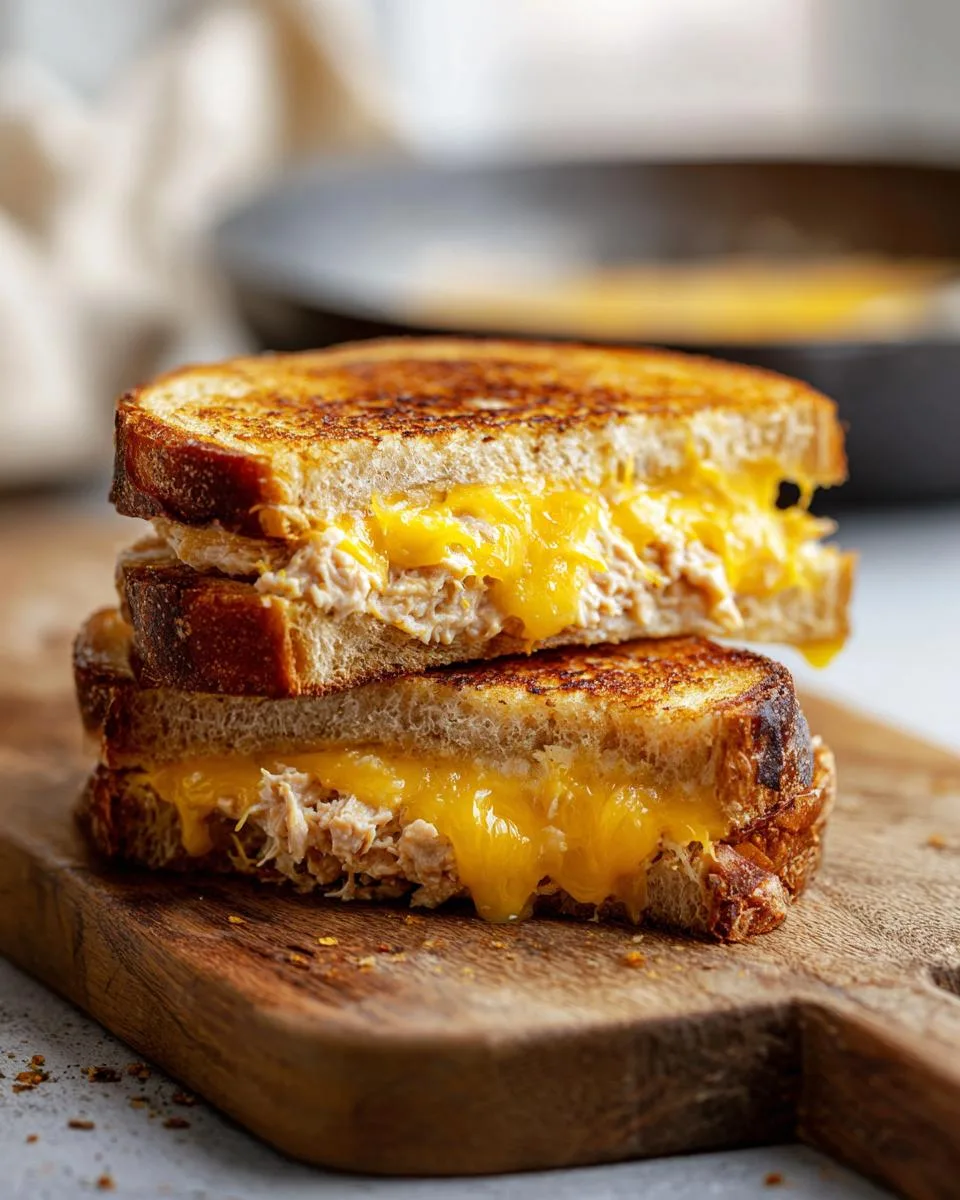
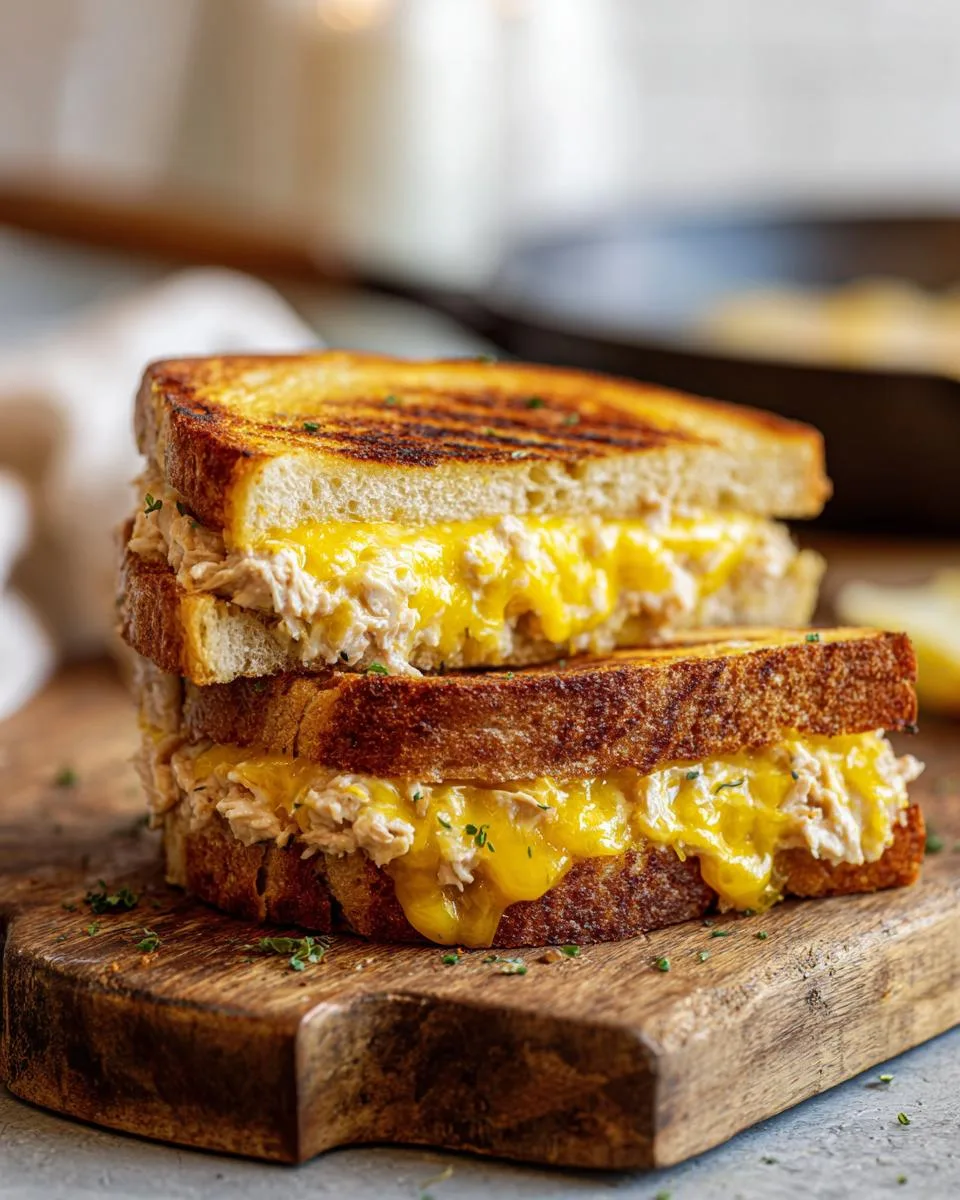
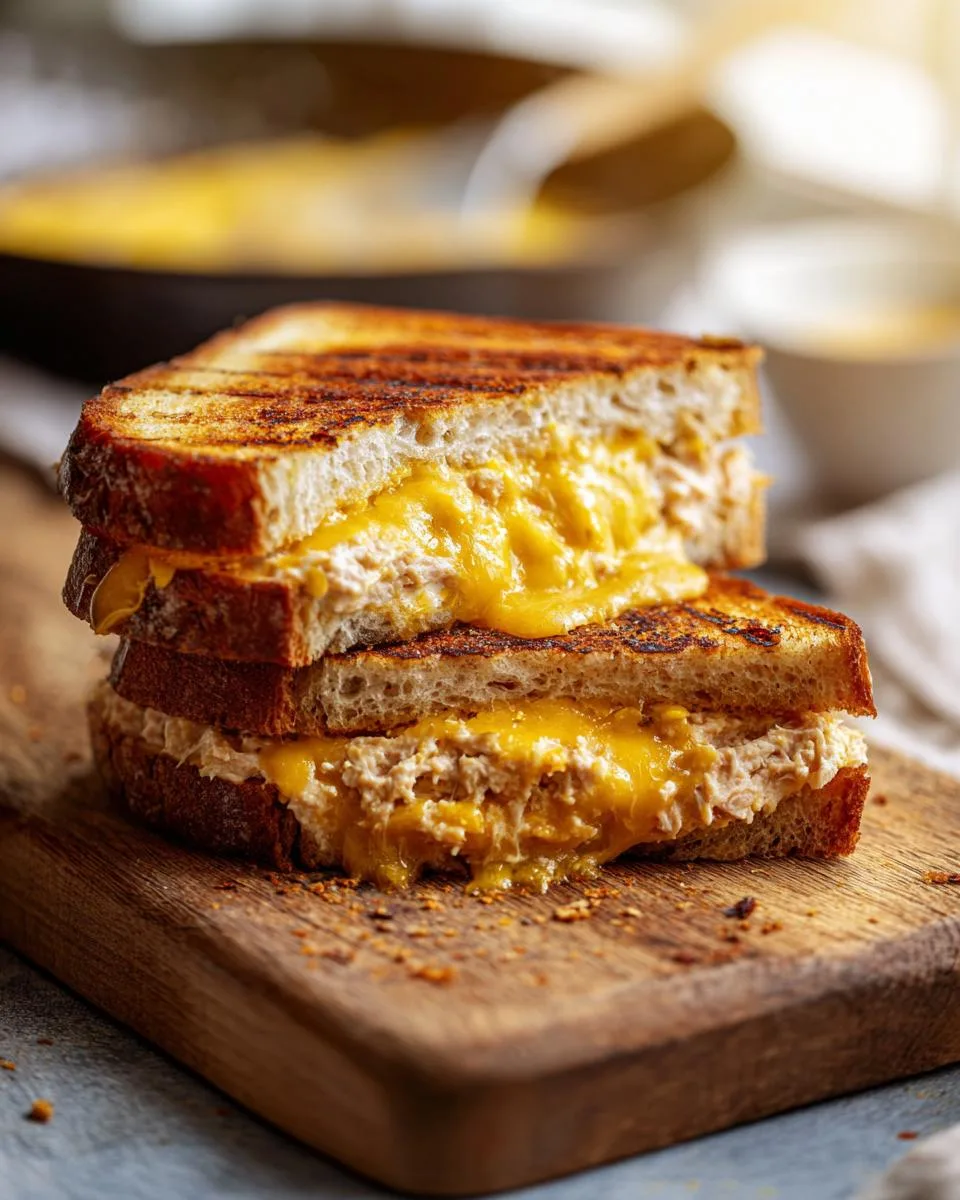
Do you ever stand in front of the fridge, hungry and short on time, willing a quick lunch to appear? The classic 4-Ingredient Tuna Melt is my answer. This nostalgic comfort food delivers incredible flavor with stunning simplicity. It’s the ultimate proof that a few pantry staples can create something truly special.
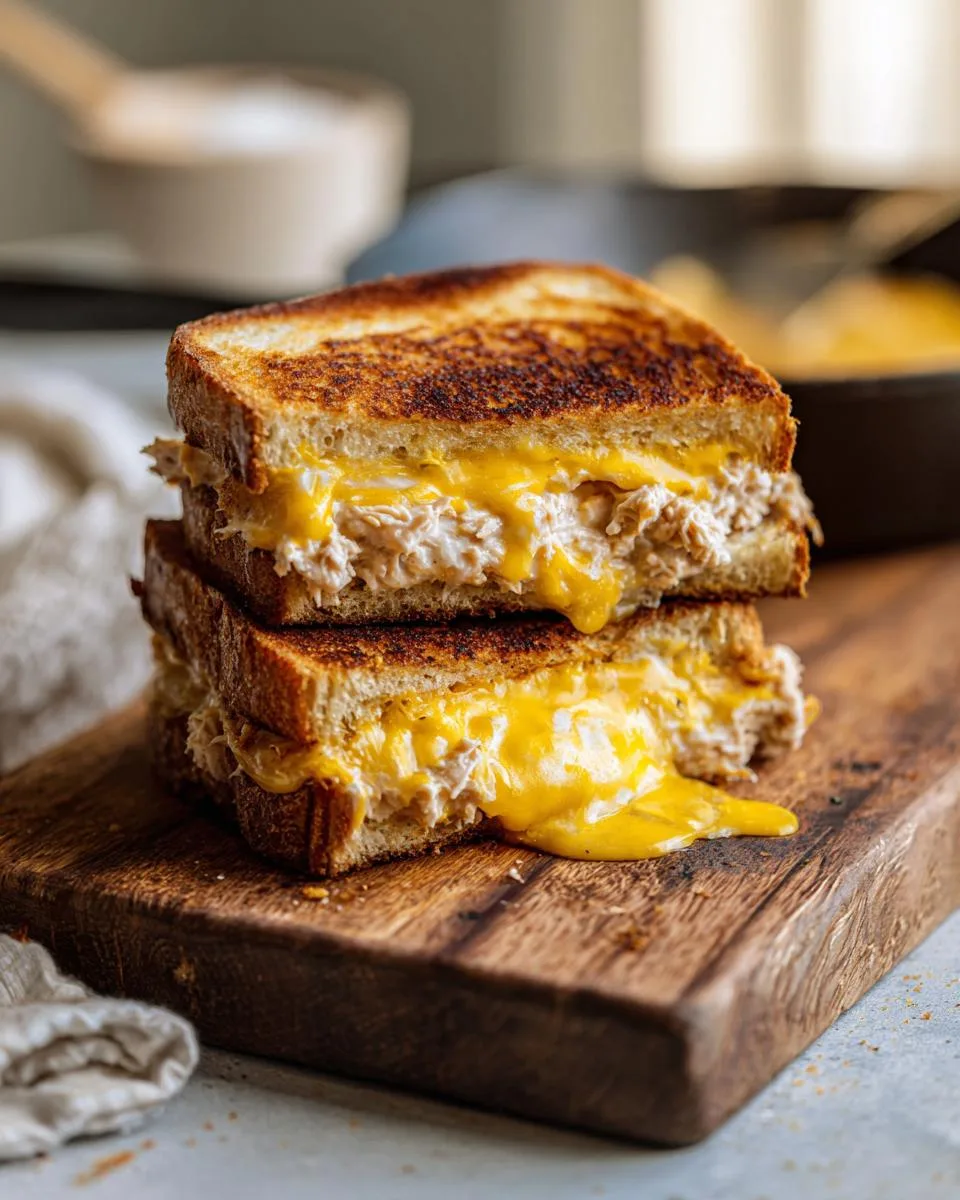
I have made this sandwich more times than I can count, perfecting that golden-brown, crispy crust and the perfectly gooey, melted cheese center. The secret to a great tuna melt isn’t a long list of ingredients, it’s about technique and embracing the simple joy of a hot, cheesy sandwich. I promise you a foolproof method that works every single time. Let’s break it down step by step.
Table of Contents
Why You’ll Love This 4-Ingredient Tuna Melt
This recipe is the hero of busy days. It turns a few pantry staples into a warm, satisfying meal in minutes. Here is exactly why it will become your new favorite.
- Pantry-Friendly: You only need four simple ingredients. You probably have them in your kitchen right now.
- Incredibly Fast: From hungry to eating in about 13 minutes. It is faster than waiting for delivery.
- Perfect Texture: You get a crispy, golden-brown bread shell with a creamy, hot tuna and melted cheese center. Every bite is a perfect mix.
- Budget-Friendly Comfort: This sandwich feels like a treat but costs very little to make. It is a smart, delicious meal.
- Foolproof Method: The steps are simple and forgiving. It is a perfect recipe for new cooks or anyone needing a sure win.
This 4-Ingredient Tuna Melt is my family’s favorite quick lunch fix. It is reliable, delicious, and always hits the spot.
Ingredients You’ll Need
This recipe is all about simplicity. Each ingredient plays a starring role in creating that perfect, gooey sandwich.
- 1 (5-ounce) can tuna in water, drained very well: I always choose tuna packed in water. Oil-packed tuna can make the salad too oily. Drain the can, then use a fork to press the tuna against the side of the bowl to squeeze out every bit of extra liquid. A dry tuna salad means a crispy sandwich.
- 1/4 cup mayonnaise: This is the glue that holds everything together. I recommend full-fat mayonnaise for the best creaminess and flavor. For a richer taste, try a high-quality brand. The mayo should coat the tuna flakes evenly.
- 4 slices sandwich bread: Your favorite everyday bread works perfectly. White, wheat, or sourdough are all great choices. Just avoid overly thick slices like artisan bread, as they might not cook through evenly in the skillet.
- 4 slices yellow cheese: This is where you can choose your melt. American cheese melts seamlessly into that classic, smooth blanket. Mild cheddar adds a touch more flavor. Provolone or Swiss cheese are also delicious swaps if you prefer them.
That’s truly all you need. With just these four items from your fridge and pantry, you are minutes away from a hot, satisfying meal.
How to Make a 4-Ingredient Tuna Melt
Let’s get cooking. The magic happens in a hot skillet, and patience is your best friend here. Follow these simple steps for a perfect sandwich every time.
Step 1: Make the Tuna Salad
Take your well-drained tuna and put it in a small bowl. Use a fork to flake it apart. This breaks up any big chunks and gives you a nice, even texture. Now, add your mayonnaise. Stir everything together until the tuna is completely coated and the mixture looks creamy. It should hold together when you scoop it. If it seems a bit dry, add another teaspoon of mayo. This is your only chance to season it, so make it creamy to your liking.
Step 2: Assemble the Sandwiches
Lay your four slices of bread on a clean counter or cutting board. Divide the tuna salad evenly between two of the slices. Spread it out, pushing it close to the edges. You want every bite to have that creamy tuna. Now, take your cheese. Place two slices on top of each tuna-covered bread slice. Let them overlap a little in the middle. This creates a full cheese blanket that will melt over everything. Finally, place the remaining plain slices of bread on top to close the sandwiches. Give them a gentle press with your hand to help them stick together.
Step 3: Cook to Golden Perfection
Place a large skillet or frying pan on your stove. Turn the heat to medium. Let the pan heat up for a minute until it feels hot. Do not add any oil or butter. A dry pan is perfect for getting that crispy crust. Put both assembled sandwiches into the hot skillet. Let them cook undisturbed for about 3 to 4 minutes. You will see the bottom slice of bread start to turn a beautiful golden brown. Use your spatula to lightly press down on each sandwich. This helps the bread make full contact with the pan for even cooking and browning.
Step 4: Flip and Finish
Carefully flip each sandwich over. The first side should now be crisp and a deep golden color. Cook the second side for another 3 to 4 minutes. Watch for the same golden brown color on the bread. You should also see melted cheese starting to ooze out a little from the edges. That is your sign that it is done. If the bread seems to be getting dark too quickly, just turn the heat down a little. This allows the cheese inside to melt fully without burning the outside. When both sides are crispy and the cheese is melted, your sandwiches are ready.
Pro Tips for the Best Tuna Melt
These are my tried-and-true kitchen secrets for a tuna melt that is crispy, creamy, and absolutely perfect. They make all the difference.
- Dry Your Tuna Thoroughly: This is the most important step. After draining the can, use a fork to press the tuna firmly against the side of the bowl. Squeeze out every drop of liquid. A wet tuna salad will steam inside the sandwich and make the bread soggy instead of crispy.
- Warm Your Mayo: Let your mayonnaise sit out of the fridge for about 10 minutes before you mix it. Room-temperature mayo blends with the tuna much more smoothly, creating a creamier, more cohesive salad.
- Patience with Medium Heat: Do not crank the heat to high. A steady medium heat is your friend. It gives the cheese ample time to melt into a gooey blanket before the bread crust burns. If you see the bread browning too fast in under 3 minutes, lower the heat slightly.
- The Gentle Press: When the sandwich is in the skillet, use your spatula to press down gently once or twice. This ensures the bread has full contact with the hot pan for even, golden browning across the entire surface.
- Let It Rest: After cooking, transfer your beautiful tuna melt to a plate and let it sit for just one minute. This brief rest allows the molten cheese to set slightly. It makes slicing the sandwich cleaner and prevents the hot filling from squirting out when you take your first bite.
Follow these simple tips, and you will master the art of the perfect, crispy tuna melt.
Common Mistakes to Avoid
Even a simple sandwich can have pitfalls. Knowing these common mistakes helps you avoid them and guarantees a perfect tuna melt every time.
- Soggy Tuna Salad: This happens when you use undrained tuna or add wet ingredients like relish. Always drain your tuna can thoroughly. Then, use a fork to press the tuna against the bowl’s side. Squeeze out every bit of extra liquid. A dry salad is the key to a crispy sandwich.
- Burnt Bread, Cold Center: This is a sign your heat is too high. You want a medium heat. This gives the bread time to turn golden brown while the cheese inside melts fully. If the bread browns in under 3 minutes, lower the heat.
- Skimpy Cheese Coverage: One slice of cheese is not enough. Use two slices per sandwich. Let them overlap slightly in the middle. This creates a full, melty blanket that covers all the tuna.
- Dry Tuna Mixture: A dry mix makes a bland sandwich. Start with the recommended 1/4 cup of mayonnaise. If your mixture looks crumbly or doesn’t hold together, add another teaspoon of mayo. It should be creamy and spreadable.
Don’t panic if you make a mistake. Cooking is forgiving. Just adjust next time for an even better sandwich.
Delicious Variations
The basic recipe is a classic, but you can easily dress it up. These simple twists add new flavors and textures without complicating your quick lunch.
- Spicy Kick: For a bit of heat, add one teaspoon of sriracha or a pinch of red pepper flakes directly to your tuna and mayo mixture. Stir it in well before assembling your sandwich.
- Crunchy Add-In: Mix in one to two tablespoons of finely diced celery or red onion with the tuna salad. This adds a fresh, crisp texture that contrasts beautifully with the creamy filling.
- Diner-Style: Before cooking, spread a thin layer of softened butter on the outside of each bread slice. This creates an extra rich, deeply golden, and crispy crust as it cooks in the skillet.
- Open-Faced: Skip the top slice of bread. Spoon the tuna salad onto a single slice of toasted bread, top with two cheese slices, and broil on high for 2 to 3 minutes until the cheese is bubbly and golden. It’s perfect for a lighter meal.
Feel free to play around. One of my favorite quick changes is adding a few pickle chips right on top of the tuna before the cheese. It’s a little tangy surprise.
Serving Suggestions
This tuna melt is a complete meal in one hand. Serve it hot, straight from the skillet, when the cheese is at its most glorious and oozy state.
For a classic, quick weeknight dinner, pair it with a handful of crunchy potato chips or some crisp carrot sticks. The salty chips contrast perfectly with the creamy sandwich. If you want a more rounded lunch, serve it alongside a simple green salad tossed with a light vinaigrette. The fresh salad cuts through the richness beautifully.
On a cozy weekend, nothing beats the classic combo. A cup of creamy tomato soup is the perfect companion. The tangy, warm soup and the crispy, cheesy sandwich are pure comfort. This sandwich is substantial and satisfying on its own, so feel free to enjoy it solo when you need a quick, filling fix.
FAQs About the 4-Ingredient Tuna Melt
Can I use a different cheese?
Absolutely. While American cheese gives you that classic, seamless melt, other cheeses work wonderfully. Provolone, Swiss, or gouda are all excellent choices with more flavor. Just know that these cheeses melt a bit slower. To help them, place a lid over your skillet for about one minute after flipping the sandwich. The trapped heat will help the cheese get perfectly gooey.
How do I store leftovers?
This sandwich is best enjoyed hot and fresh. The crispy bread can soften if stored. However, you can easily store the tuna salad mixture separately. Keep any unused tuna salad in a sealed container in the refrigerator for up to two days. When you are ready, just assemble a fresh sandwich with new bread and cheese.
Can I make this in an air fryer?
Yes, you can. Assemble your sandwich as usual. Then, lightly spray or brush the outside of the bread with a little oil. This helps it crisp up. Place it in your air fryer basket and cook at 370°F for 6 to 8 minutes. Flip the sandwich halfway through the cooking time. Check for that golden brown color and melted cheese at the edges to know it is done.
What are the nutrition facts?
One complete sandwich is approximately 350 calories. The exact nutrition facts can vary. They depend on the specific brands of tuna, mayonnaise, bread, and cheese you choose. For the most accurate count, check the labels on your own ingredients.
Can I add other ingredients to the tuna salad?
Of course. The four-ingredient version is a fantastic base. For more flavor, you can mix in a tablespoon of sweet pickle relish, a squeeze of lemon juice, or a sprinkle of dried dill. Just remember, if you add extra wet ingredients like relish, your tuna salad might be less dry. This could affect how crispy your final sandwich becomes.
Make Your 4-Ingredient Tuna Melt Tonight
This 4-Ingredient Tuna Melt proves that the best meals often come from the simplest recipes. In just minutes, you get a hot, crispy, and deeply satisfying sandwich. I hope this becomes your new go-to for hungry days and cozy lunches. Did you try it? I would love to hear how yours turned out. Share your version in the comments below. For more easy, family-friendly recipe ideas, find me on Pinterest.
Print
4-Ingredient Tuna Melt
- Total Time: 13 minutes
- Yield: 2 servings 1x
- Diet: Low Lactose
Description
Melted cheese meets creamy tuna in this easy classic sandwich. Perfect for a quick lunch or comforting dinner.
Ingredients
- 1 (5-ounce) can tuna, drained well
- 1/4 cup mayonnaise
- 4 slices sandwich bread
- 4 slices yellow cheese (American or mild cheddar recommended)
Instructions
- In a small bowl, flake the drained tuna with a fork. Add the mayonnaise and stir until the tuna is evenly coated and creamy. Taste and add more mayonnaise if you prefer a looser consistency.
- Lay the four slices of bread on a clean surface. Divide the tuna mixture evenly between two bread slices, spreading it close to the edges.
- Top the tuna on each sandwich with two slices of yellow cheese, slightly overlapping them to fully cover the tuna.
- Place the remaining two slices of bread on top of the cheese to complete the sandwiches. Gently press down.
- Heat a large skillet over medium heat. Place the assembled sandwiches into the dry skillet. Cook for 3 to 4 minutes until the bottom bread is golden brown and crisp. Press lightly with a spatula.
- Carefully flip each sandwich. Cook the second side for another 3 to 4 minutes until golden brown, crunchy, and the cheese is fully melted.
Notes
- For extra creamy tuna salad, ensure your mayonnaise is at room temperature before mixing.
- Don’t rush the cooking process. Medium heat allows cheese to melt thoroughly without burning bread.
- American cheese provides a classic smooth melt. Mild cheddar adds more flavor.
- Prep Time: 5 minutes
- Cook Time: 8 minutes
- Category: Sandwich
- Method: Pan-frying
- Cuisine: American
Nutrition
- Serving Size: 1 sandwich
- Calories: 350 kcal
- Sugar: 2g
- Sodium: 500mg
- Fat: 18g
- Saturated Fat: 6g
- Unsaturated Fat: 10g
- Trans Fat: 0g
- Carbohydrates: 28g
- Fiber: 2g
- Protein: 20g
- Cholesterol: 45mg
Keywords: tuna melt sandwich quick lunch easy recipe