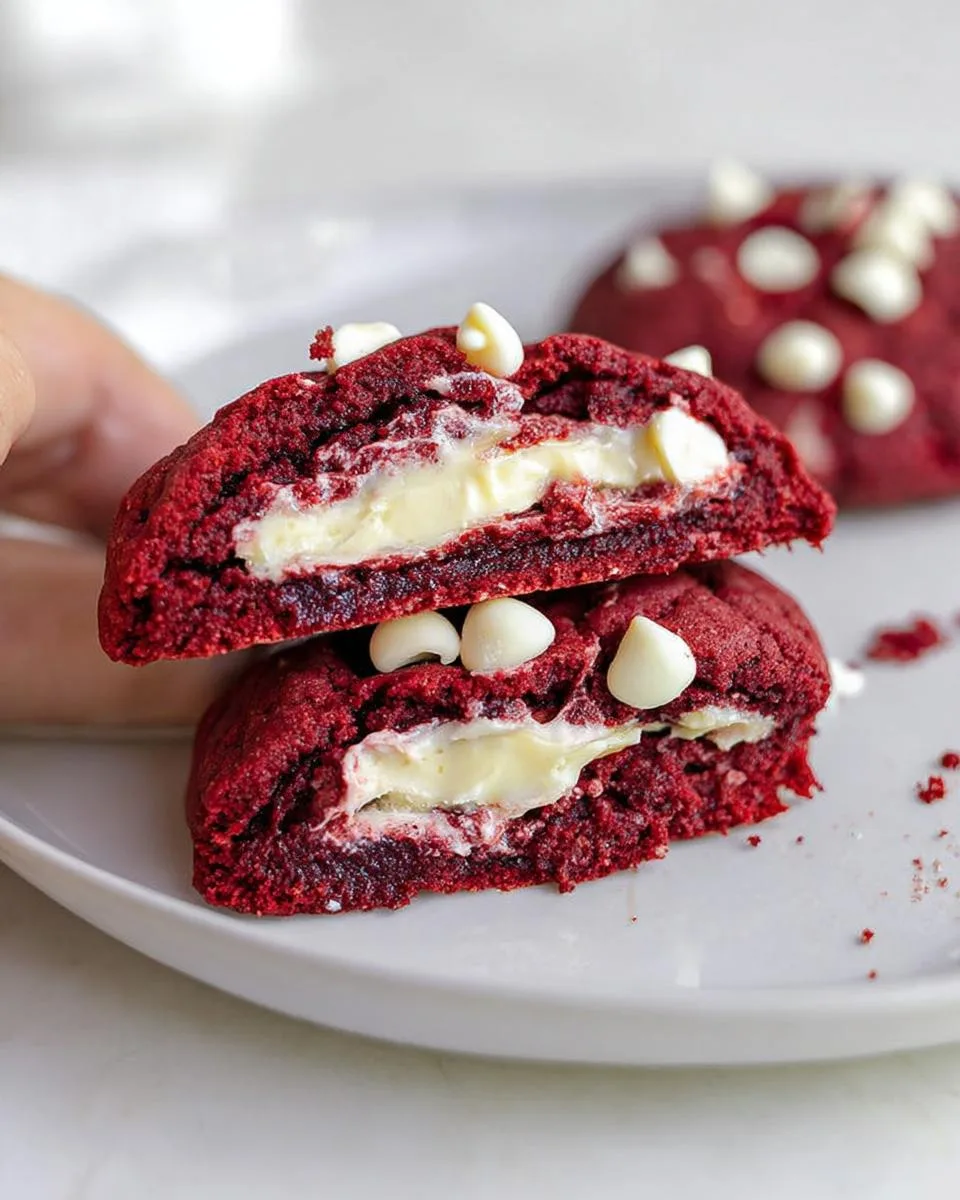
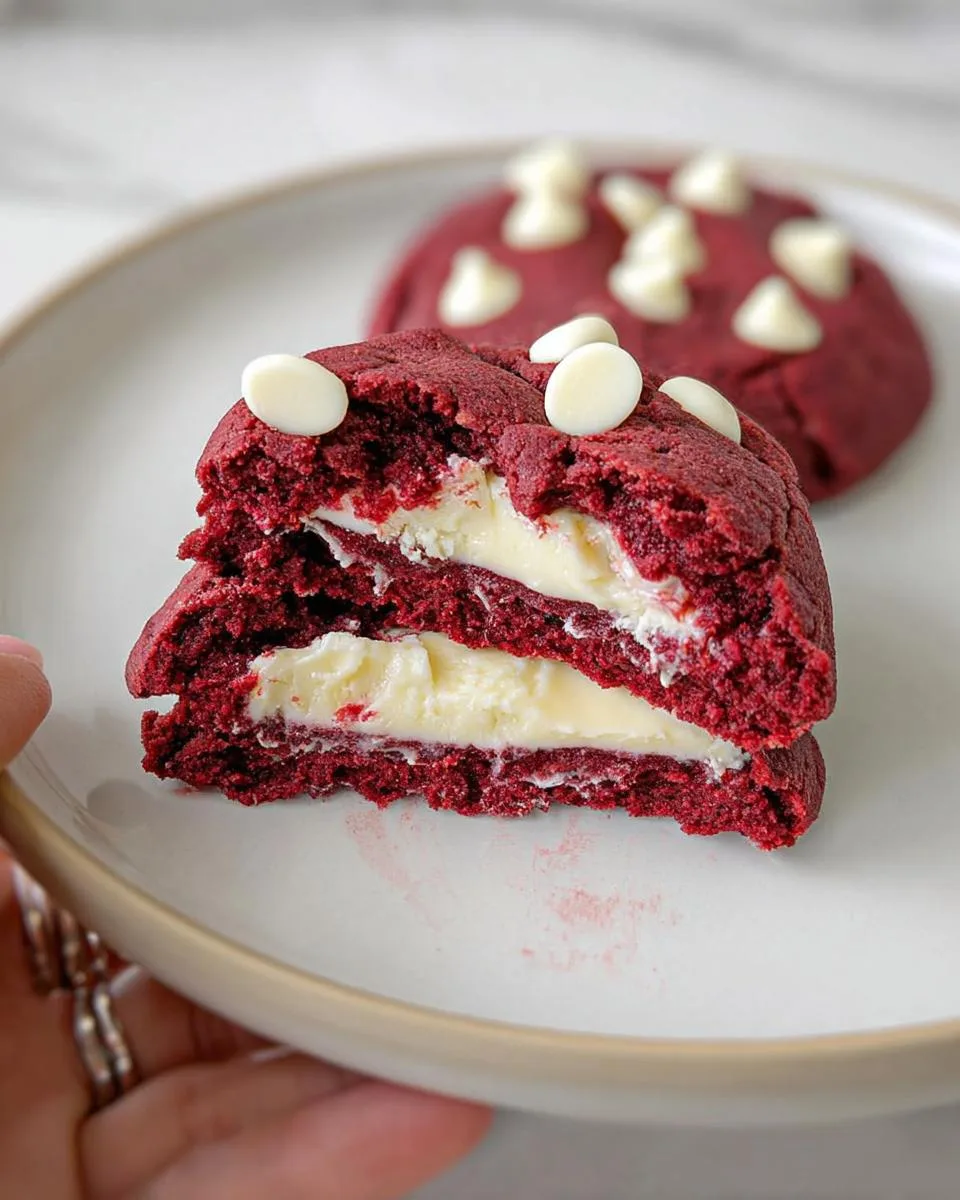
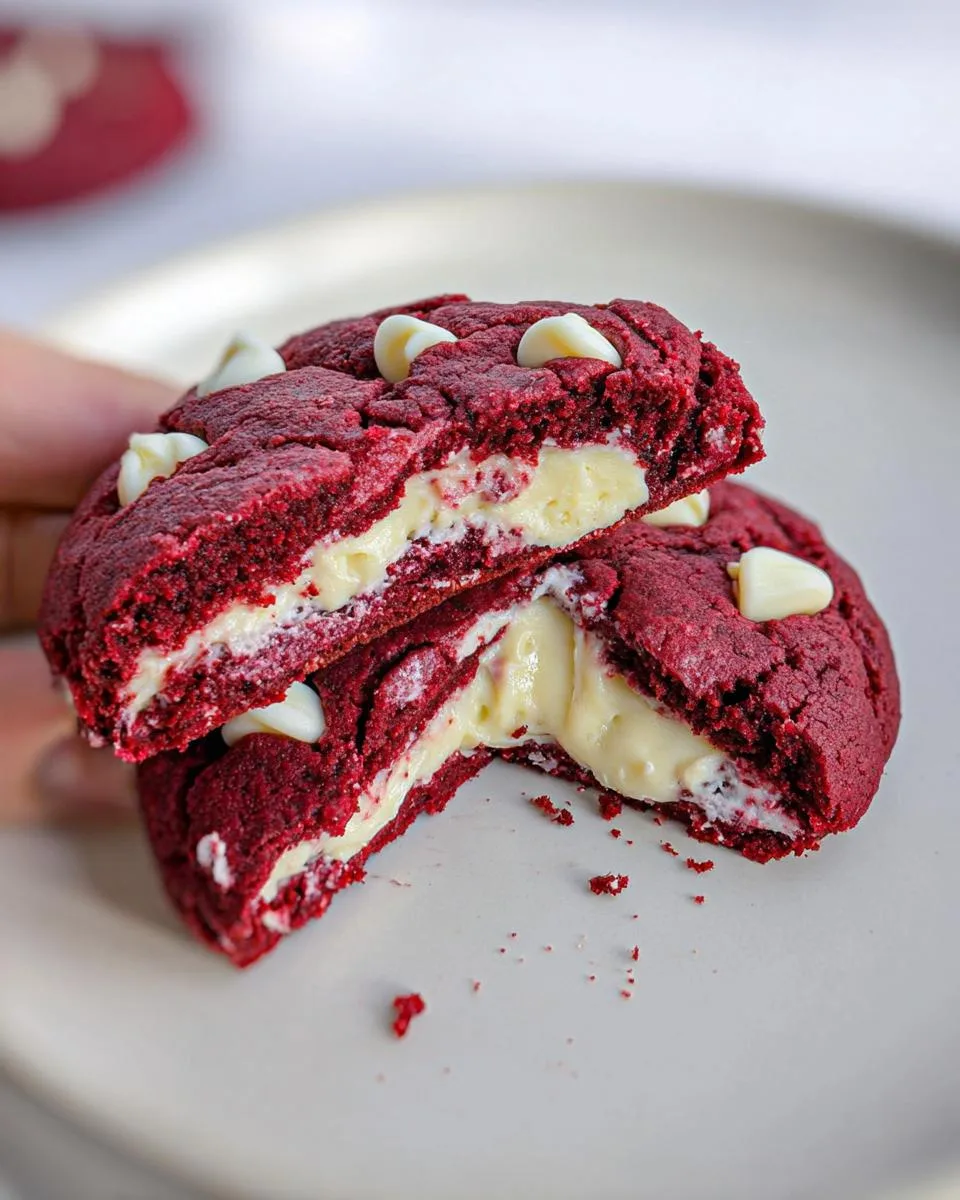
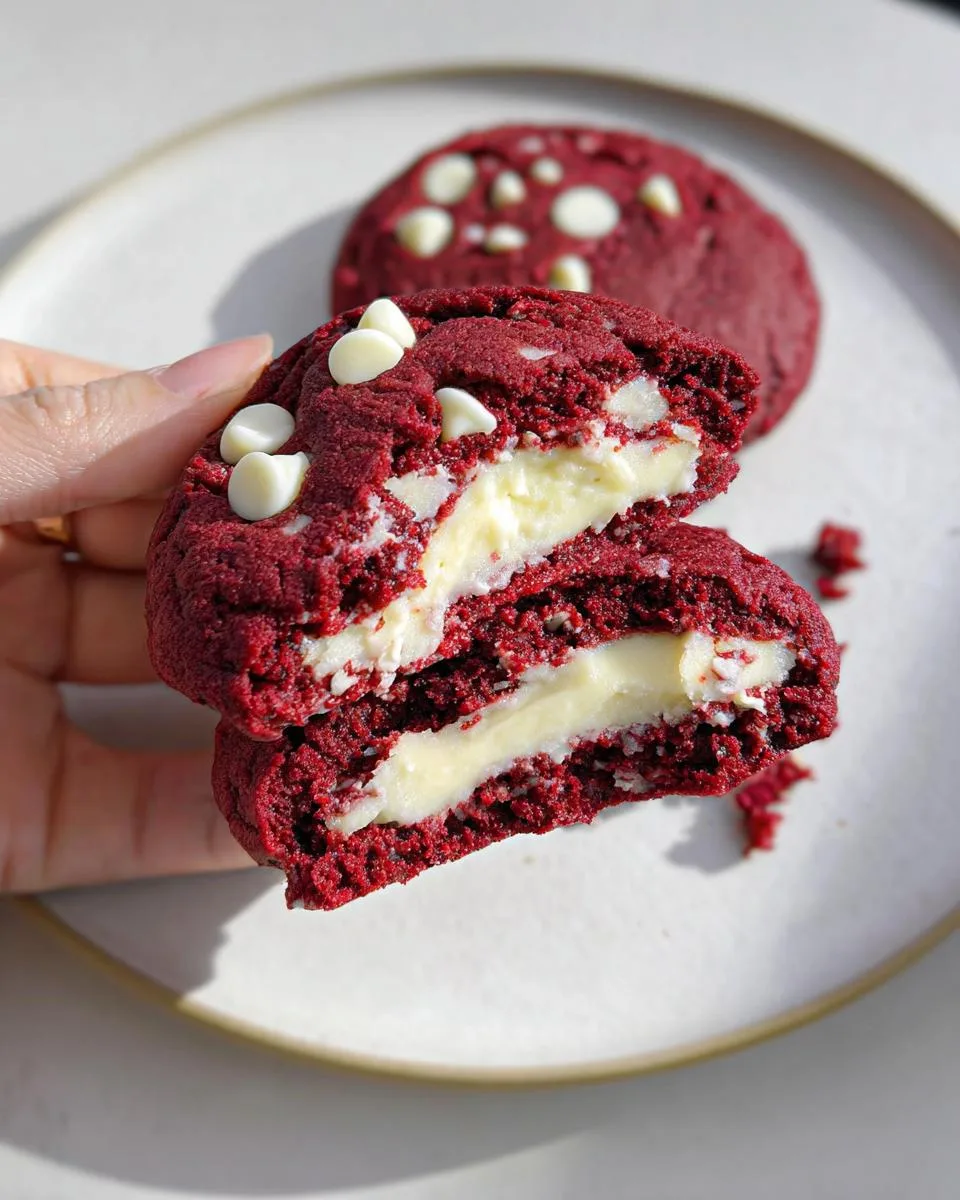
Ever have one of those afternoons where you just need a rich, decadent dessert, but you don’t want the sugar crash or the guilt? I get it. That exact craving led me straight to this kitchen experiment, and the result is my absolute favorite single-serve treat: the Cheesecake Stuffed Red Velvet Protein Cookie.
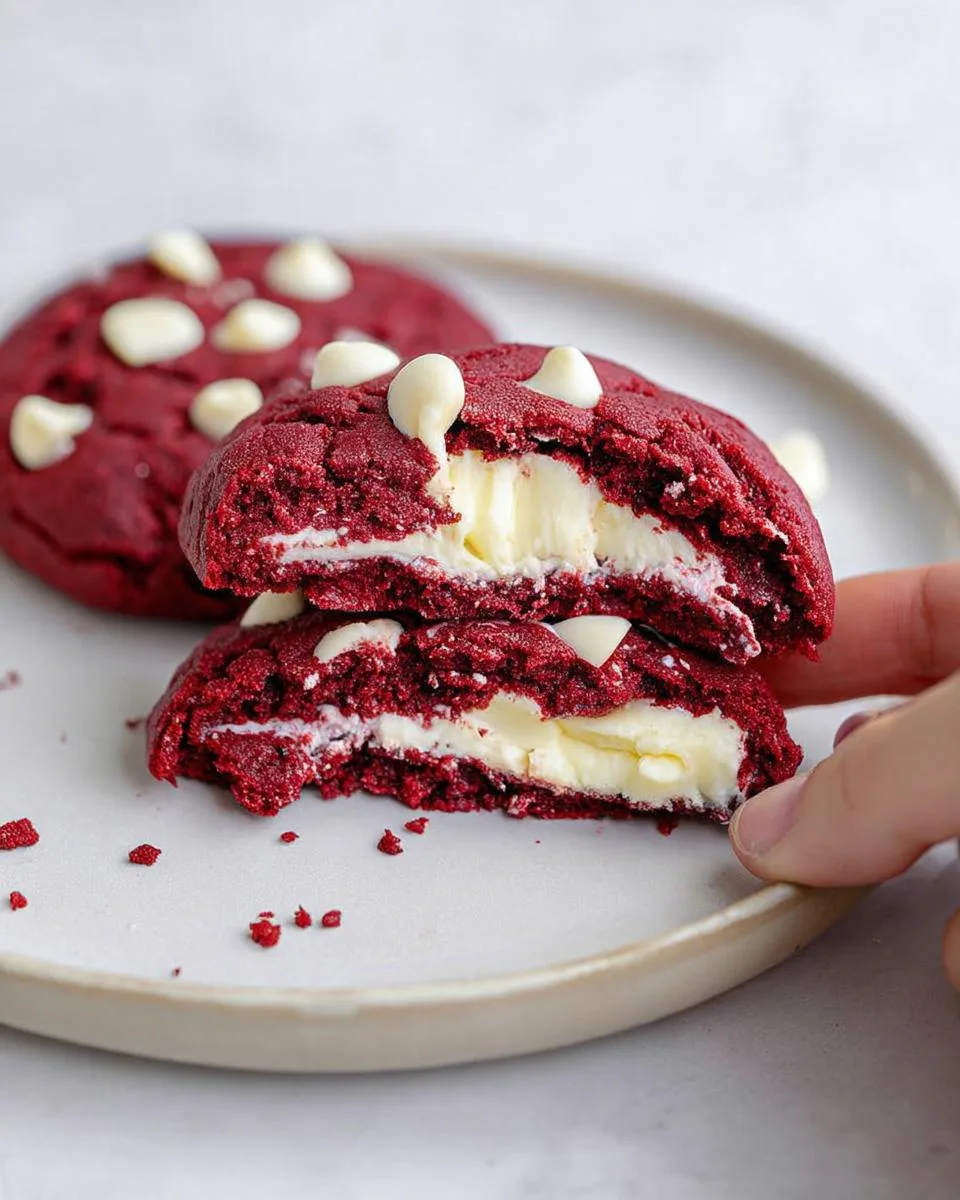
This isn’t just a cookie. It’s a protein-packed, gluten-free marvel with a secret, creamy cheesecake heart. It feels like a total indulgence, but it’s cleverly built with good-for-you ingredients. The best part? You can make one perfect cookie, ready in under 25 minutes, with no fancy skills required. It’s egg-free, sugar-free, and easily made vegan, so it’s a dessert that truly welcomes everyone.
The secret to this cheesecake stuffed cookie isn’t complicated, it’s about embracing that moment of wanting something special and making it happen, simply. Here’s what you need to know before you start.
Table of Contents
Why You’ll Love This Cheesecake Stuffed Red Velvet Protein Cookie
Let me tell you why this cookie has become my go-to treat for those “I need something sweet, but good for me” moments. It ticks every single box.
- Just for you: It’s a single-serving dessert. No temptation to eat a whole batch, just one perfect, satisfying cookie made exactly for you.
- Protein powerhouse: We pack it with protein from three sources: protein powder in the dough and filling, plus Greek yogurt. It keeps you full and fuels your body.
- True red velvet joy: You get that classic flavor from rich cocoa powder and a subtle hint of peanut butter. It’s nostalgic and completely delicious.
- A creamy surprise inside: The hidden cheesecake filling is the best part. Cutting into that soft, creamy center feels like discovering a secret.
- Incredibly fast: From bowl to baked in under 25 minutes. It’s faster than ordering delivery, and so much better for you.
- Fits your diet: It’s naturally gluten-free and egg-free. With a few simple swaps, you can easily make a vegan protein cookie, too.
- Perfect any time: I love it as a post-workout reward or a smart way to end a busy day. It’s the healthy dessert that doesn’t taste healthy at all.
Honestly, it’s the cookie I make when I want to treat myself right, without any regret. Now, let’s gather your simple ingredients.
Ingredients You’ll Need
Gathering your ingredients is the first step to cookie magic. These are simple, wholesome items that come together to create something decadent and nutritious. I love that most are pantry staples.
- For the Red Velvet Cookie Dough:
- 1/4 cup oat flour: This is our gluten-free base. It gives the cookie a soft, chewy structure. Make sure to use certified gluten-free oats if needed.
- 2 tbsp chocolate protein powder: This builds flavor and protein. I use a whey-casein blend, but your favorite plant-based powder works perfectly.
- 1 tbsp unsweetened cocoa powder: For that essential, rich red velvet chocolate taste.
- 1 tbsp powdered peanut butter: Like PB2. It adds a nutty hint without all the oil, keeping the cookie light.
- 1/4 tsp baking powder & 1/8 tsp baking soda: Our little leavening team for the perfect cookie rise.
- 3 tbsp unsweetened almond milk: Any plant-based milk you have works here. It brings the dough together.
- 1 tbsp non-fat plain Greek yogurt: This adds moisture, protein, and a slight tang. For vegan, use a thick plant-based yogurt.
- 1 tsp liquid red food coloring: For that iconic, cheerful red color. Gel coloring works too, and you might need less.
- For the Cheesecake Filling:
- 1 tbsp reduced-fat cream cheese, softened: Softened is key! Take it out of the fridge 30 minutes early for a lump-free, creamy filling.
- 1 tsp non-fat plain Greek yogurt: This thins the cream cheese just enough to make it spreadable.
- 1 tsp vanilla protein powder: It sweetens and thickens the filling, turning it into a true protein cheesecake center.
- For Topping:
- 1 tbsp sugar-free white chocolate chips: The perfect sweet finish. Chopped sugar-free chocolate bars are a great substitute.
See? Nothing scary. With these ingredients lined up on your counter, you are just minutes away from your incredible cheesecake stuffed cookie.
How to Make a Cheesecake Stuffed Red Velvet Protein Cookie
Alright, let’s get baking. This process is simple, but a few key moves make all the difference. I’ll walk you through each step, just like I’m right there in the kitchen with you.
Step 1: Prep and Mix the Dry Ingredients
First, get your oven ready. Preheat it to 350°F (175°C). Line a baking sheet with parchment paper. This prevents sticking and makes cleanup a breeze. Now, grab a medium bowl. Add your oat flour, chocolate protein powder, cocoa powder, powdered peanut butter, baking powder, and baking soda. Give it a good whisk. You want everything combined with no dry, powdery lumps. This ensures your cookie bakes evenly.
Step 2: Create the Red Velvet Cookie Dough
Time for the fun part, the color. Pour in the 3 tablespoons of almond milk, the 1 tablespoon of Greek yogurt, and your red food coloring. Start stirring. The mix will come together into a thick, vibrant red batter. It should be moldable, like playdough. If it feels dry or crumbly, don’t worry. Just add more almond milk, one teaspoon at a time, until it holds together.
Step 3: Make the Protein Cheesecake Filling
In a separate small bowl, combine your softened cream cheese, the 1 teaspoon of Greek yogurt, and the vanilla protein powder. Now, stir vigorously with a spoon or small whisk. Keep going until it’s completely smooth and creamy, with no streaks of protein powder. This is your secret cheesecake heart.
Step 4: Assemble Your Stuffed Cookie
This is where the magic happens. Spoon a little more than half of your red velvet batter onto the center of your prepared baking sheet. Use the back of your spoon to gently pat and shape it into a flat disc, about 4 inches wide. Next, spread the cheesecake filling over the center of this disc, leaving a small border of cookie dough around the edge.
Now, dollop the remaining cookie batter on top. Gently spread and press it to cover the filling completely. Seal the edges well by pressing them together with your fingers. You should have a neat, round, stuffed cookie disc.
Step 5: Add Toppings and Bake
Almost there. Sprinkle the sugar-free white chocolate chips evenly over the top. Pop your creation into the preheated oven. Bake for 12 to 13 minutes. You’ll know it’s done when the edges look set and the top feels dry to a light touch. The cookie will still be soft. Remember, it continues to cook a bit as it cools, so don’t overbake it looking for a hard cookie.
Step 6: Cool and Serve
Patience is key for the perfect texture. Let the cookie cool on the baking sheet for 5 full minutes. This lets it firm up enough to handle. Then, carefully slide the parchment paper onto a wire rack to let it cool completely. This final cooling step is crucial. It allows the warm, creamy cheesecake center to set up beautifully. Enjoy it slightly warm for a gooier center, or at room temperature for the full, set cheesecake experience.
Pro Tips for the Best Cheesecake Stuffed Cookie
A few simple tricks will take your protein cookie from good to absolutely incredible. These are the little things I’ve learned from making this recipe countless times.
- Soften that cream cheese: Take it out of the fridge 30 minutes before you start. Room-temperature cream cheese blends seamlessly into a smooth, lump-free cheesecake filling.
- Measure flour lightly: Always spoon your oat flour into the measuring cup and level it off with a knife. Do not pack it down. This guarantees a soft, chewy cookie instead of a dry, dense one.
- Go for gel food coloring: For a truly vibrant red velvet color, use a gel-based food coloring. You’ll only need a tiny drop, and the color stays bold without adding extra liquid to your dough.
- Seal the edges tightly: When you place the top layer of dough, press it down gently and pinch the edges together to fully encase the filling. A good seal keeps the creamy center from bubbling out while it bakes.
- Trust the bake time: Set your timer for 12 minutes. The cookie is done when the top looks dry and the edges are just set. It will still be very soft. It continues to firm up as it cools on the hot pan, so pulling it out on time prevents a dry cookie.
- Cool completely for the perfect texture: I know it’s tempting, but let the cookie cool on a wire rack. Those 15 minutes allow the warm, soft cheesecake center to set up into that dreamy, creamy consistency we all love.
Follow these tips and you’ll nail the perfect cheesecake stuffed cookie every single time. Now, let’s talk about what to watch out for.
Common Mistakes to Avoid
We all make little kitchen mistakes. I certainly have. Knowing what to watch for will help you get your cookie perfect on the first try. Here are the common slip-ups and how to fix them.
- Using cold cream cheese: This is the number one issue. Cold cream cheese won’t blend smoothly, leaving you with a chunky, grainy filling. Fix it by taking your cream cheese out of the fridge about 30 minutes before you start baking. You want it soft and spreadable.
- Over-measuring the flour: Packing oat flour into the measuring cup adds too much, which soaks up all the moisture. This leads to a dry, crumbly dough that’s hard to work with. Fix it by using the spoon-and-level method. Lightly spoon the flour into your cup, then sweep off the excess with a knife.
- Not sealing the edges: If you leave gaps, the creamy cheesecake filling will bubble out and bake onto your parchment paper. Fix it by taking an extra moment to press the top layer of dough all the way to the edges of the bottom layer. Gently pinch and smooth to create a complete seal.
- Overbaking: It’s easy to do because the cookie will still look soft. Overbaking dries it out. Fix it by setting a timer for 12 minutes. The cookie is done when the top looks matte and feels dry to a light touch, even if the center seems soft. It will set as it cools.
- Skipping the cooling time: Cutting in too soon means a runny, messy center. The heat needs to dissipate for the filling to set. Fix it by letting the cookie cool on the baking sheet for 5 minutes, then transferring it to a wire rack to cool completely. Your patience will be rewarded with the perfect creamy texture.
Don’t panic if one happens. Just note it for next time. Now, let’s play with some fun flavors.
Delicious Variations
Once you master the classic, the kitchen becomes your playground. This cheesecake stuffed cookie recipe is a fantastic base for endless creativity. Here are a few of my favorite twists to make it your own.
- Chocolate Chip Bliss: For extra pockets of melty chocolate, fold 1 tablespoon of sugar-free chocolate chips directly into the red velvet cookie dough before you shape it.
- Peanut Butter Lover’s Dream: Swap the chocolate protein powder in the dough for vanilla. Then, mix a teaspoon of creamy, natural peanut butter right into the cheesecake filling. It’s incredibly rich and satisfying.
- Funfetti Birthday Cake: Omit the cocoa powder and use vanilla protein powder for a blondie-like base. After you seal the cookie, press a few rainbow sprinkles into the top before baking for a festive look.
- Cool Mint Chocolate: Add one small drop of peppermint extract to the cookie dough along with the wet ingredients. Use sugar-free dark chocolate chips on top for that classic, refreshing combination.
- Ultimate Double Chocolate: Boost the chocolate flavor by stirring 1 tablespoon of cacao nibs or extra sugar-free chocolate chips into the dough. It’s deep, rich, and perfect for true chocoholics.
Don’t be afraid to experiment. The best part about a single-serve recipe is there’s no risk. You can try a new variation every week.
Serving Suggestions
This cheesecake stuffed cookie is fantastic all on its own, but I love dressing it up for different occasions. Here are my favorite ways to serve it.
- Classic Comfort: Enjoy it slightly warm with a tall, cold glass of unsweetened almond milk. The warm, creamy center and cold milk is my favorite after-dinner ritual.
- Decadent Sundae: Crumble it over a bowl of vanilla protein ice cream. The soft cookie and cool ice cream with that cheesecake ripple is an incredible dessert.
- Post-Workout Fuel: Let it cool completely, then pack it in a small container. It’s the perfect, satisfying hand-held snack to enjoy after the gym.
- Afternoon Pick-Me-Up: Serve it at room temperature with a hot cup of black coffee. The rich coffee beautifully balances the sweet, creamy cookie flavors.
- Special Celebration: For a birthday or treat, mix 1 tablespoon of vanilla protein powder with a teaspoon of milk to make a thick glaze. Drizzle it over the cooled cookie for a pretty, protein-packed finish.
Whether it’s a quick snack or a mini celebration, this cookie fits the moment perfectly.
FAQs About Cheesecake Stuffed Red Velvet Protein Cookies
Can I make this cookie vegan?
Absolutely. Use a plant-based protein powder, a thick vegan yogurt like coconut or soy, and vegan cream cheese. Just double-check that your sugar-free white chocolate chips are also vegan-friendly.
How do I store this cookie?
Because of the dairy-based filling, you must store it in the refrigerator. Keep it in an airtight container for up to 3 days. You can enjoy it cold, or let it sit for 10 minutes to take the chill off.
Can I freeze it?
Yes, it freezes beautifully. Let the cookie cool completely, then wrap it tightly in plastic wrap. Place it in a freezer bag for up to 1 month. Thaw it overnight in the refrigerator before enjoying.
My batter is too wet. What should I do?
Different protein powders absorb liquid differently. If your batter is sticky and won’t hold a shape, add a pinch more oat flour at a time until it becomes a soft, moldable dough you can easily spread.
What are the nutrition facts?
This is a close estimate. One cookie has about 250 calories, 25 grams of protein, 25 grams of carbs, and 6 grams of fat. For exact numbers, please calculate using your specific brand of ingredients, as protein powder and yogurt nutrition can vary.
Bake Your Perfect Cheesecake Stuffed Cookie Today
So, what are you waiting for? You now have everything you need to make your own incredible Cheesecake Stuffed Red Velvet Protein Cookie. It’s the high-protein, single-serve hero that tackles any sweet craving with smart ingredients and a whole lot of joy. It’s simple, endlessly customizable, and ready in just over 20 minutes. I’d love to hear how your kitchen adventure goes.
When you make it, please leave a star rating and tell me all about it in the comments below. For more easy, healthy dessert ideas that taste like a treat, follow along with me on Pinterest. Now, go preheat that oven. Your perfect cookie is waiting.
Print
Cheesecake Stuffed Red Velvet Protein Cookie
- Total Time: 23 minutes
- Yield: 1 cookie 1x
- Diet: Gluten Free
Description
A single-serve red velvet protein cookie with a creamy cheesecake center. It is gluten-free, sugar-free, and egg-free.
Ingredients
- 1/4 cup oat flour
- 2 tablespoons chocolate protein powder
- 1 tablespoon unsweetened cocoa powder
- 1 tablespoon powdered peanut butter
- 1/4 teaspoon baking powder
- 1/8 teaspoon baking soda
- 3 tablespoons unsweetened almond milk, or other plant-based milk
- 1 tablespoon non fat plain Greek yogurt
- 1 teaspoon liquid red food coloring
- 1 tablespoon reduced fat cream cheese, softened
- 1 teaspoon non fat plain Greek yogurt
- 1 teaspoon vanilla protein powder
- 1 teaspoon sugar-free white chocolate chips or chopped sugar-free white chocolate
Instructions
- Preheat your oven to 350°F. Line a baking sheet with parchment paper.
- In a medium bowl, combine the oat flour, chocolate protein powder, cocoa powder, powdered peanut butter, baking powder, and baking soda. Whisk to combine.
- Add the almond milk, 1 tablespoon of Greek yogurt, and red food coloring to the dry ingredients. Stir until a thick cookie batter forms.
- In a separate small bowl, mix together the softened cream cheese, 1 teaspoon of Greek yogurt, and vanilla protein powder until smooth.
- Spoon half of the red velvet cookie batter onto the prepared baking sheet and gently spread it into a disc shape with a spoon.
- Carefully spread the cheesecake filling evenly over the batter disc, leaving a small border around the edges.
- Top with the remaining cookie batter, gently spreading it to cover the filling and seal the edges. Shape the cookie into a rounded disc.
- Sprinkle the sugar-free white chocolate chips or chopped white chocolate over the top of the cookie.
- Bake for 12 to 13 minutes, or until the edges are set and the top feels dry to the touch.
- Let the cookie cool on the baking sheet for a few minutes before transferring it to a wire rack to cool completely.
Notes
- Ensure your cream cheese is softened to achieve a smooth cheesecake filling.
- If your batter seems too thick, add almond milk one teaspoon at a time until desired consistency is reached.
- For a vegan version, use a vegan protein powder and vegan alternative for Greek yogurt and cream cheese.
- Prep Time: 10 minutes
- Cook Time: 13 minutes
- Category: Dessert
- Method: Baking
- Cuisine: American
Nutrition
- Serving Size: 1 cookie
- Calories: 250 kcal
- Sugar: 0g
- Sodium: 300mg
- Fat: 8g
- Saturated Fat: 3g
- Unsaturated Fat: 4g
- Trans Fat: 0g
- Carbohydrates: 25g
- Fiber: 5g
- Protein: 20g
- Cholesterol: 10mg
Keywords: protein cookie, red velvet, cheesecake, single serve, gluten free, sugar free, egg free, healthy dessert