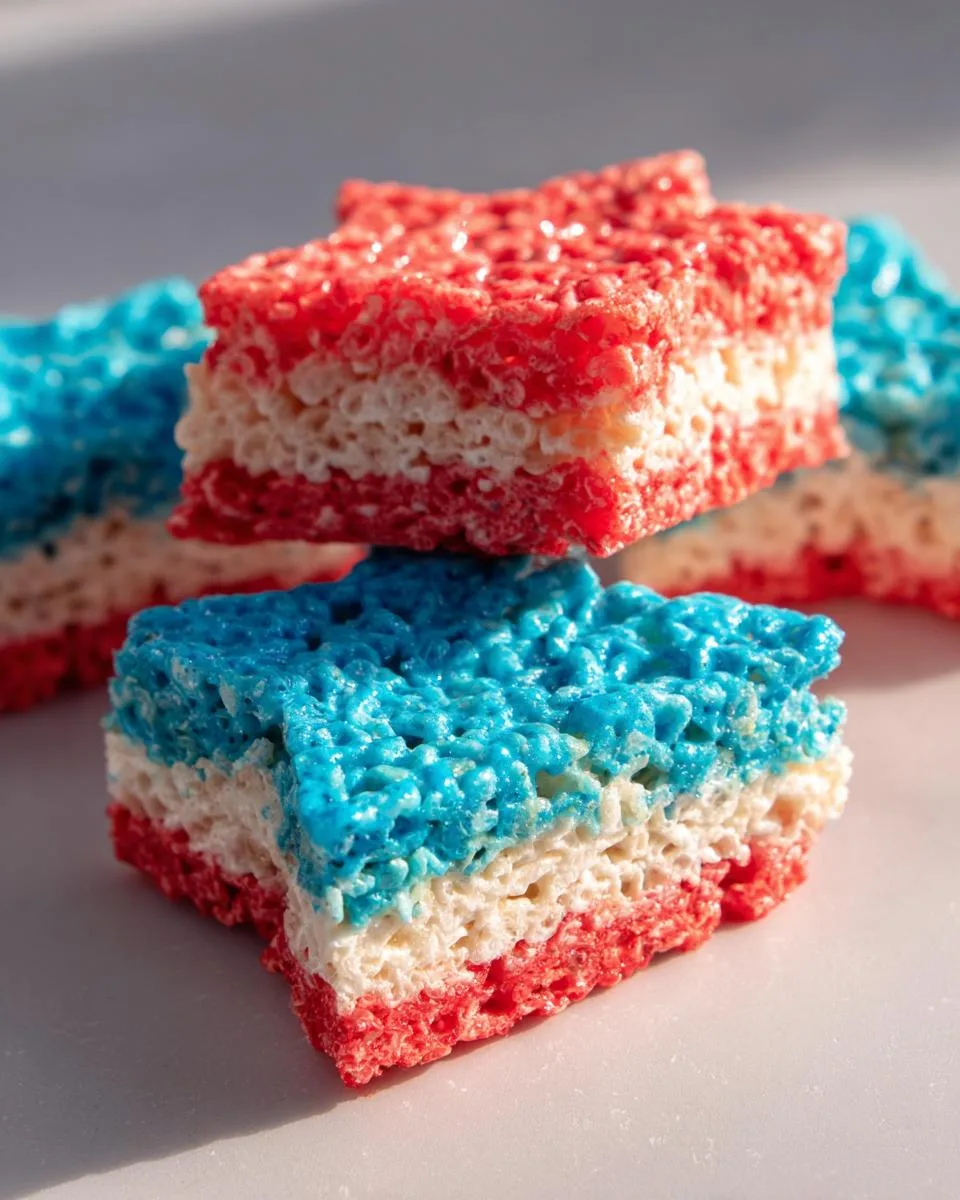
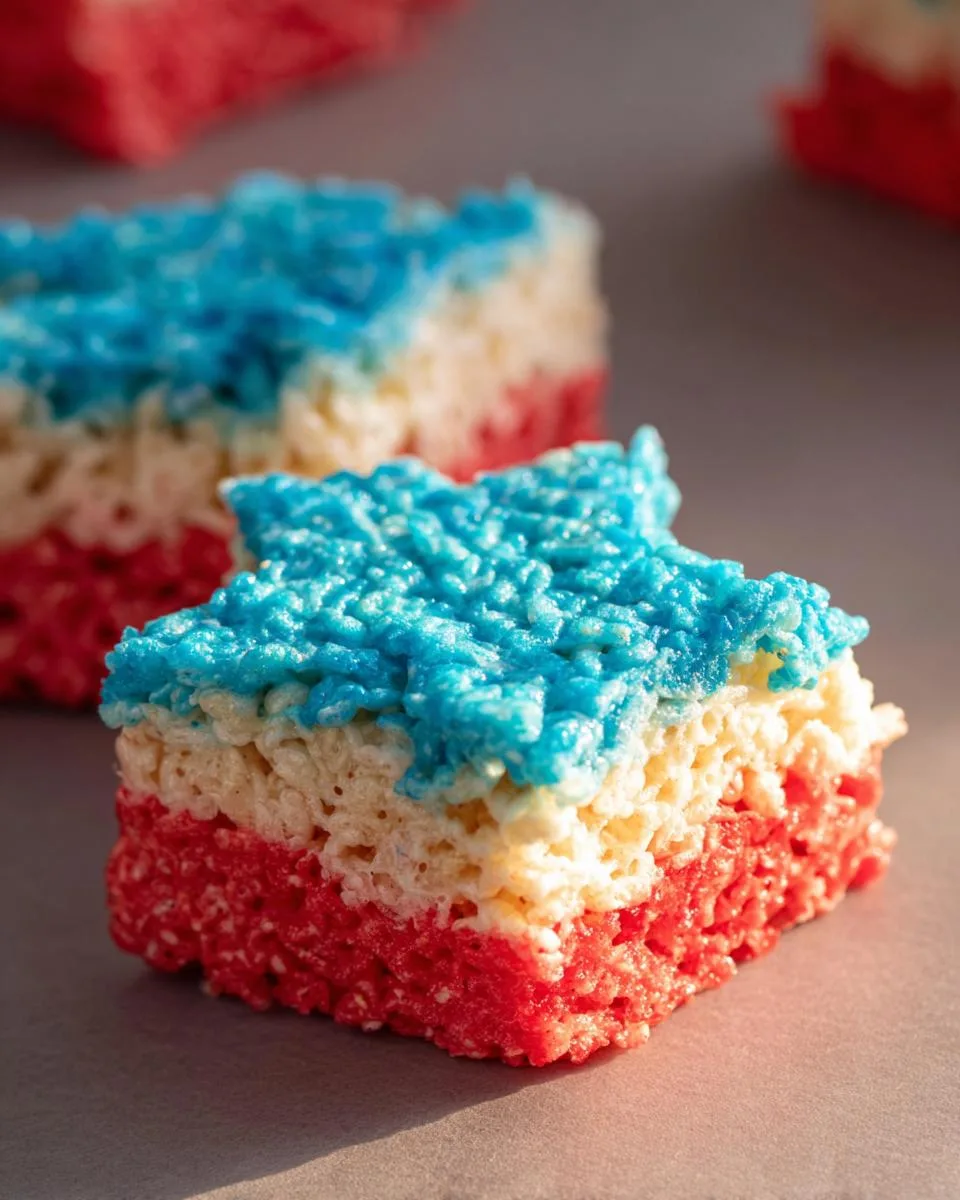
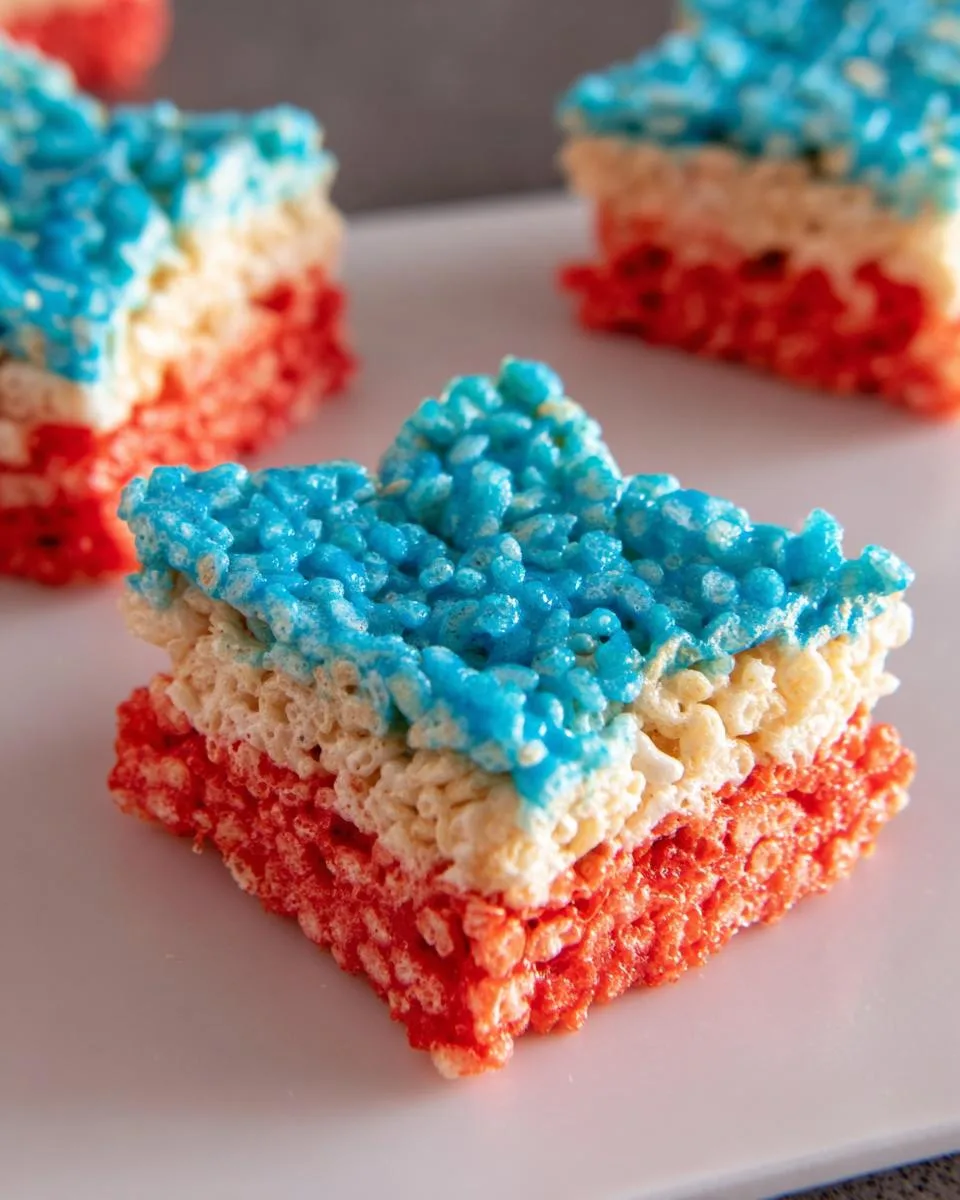
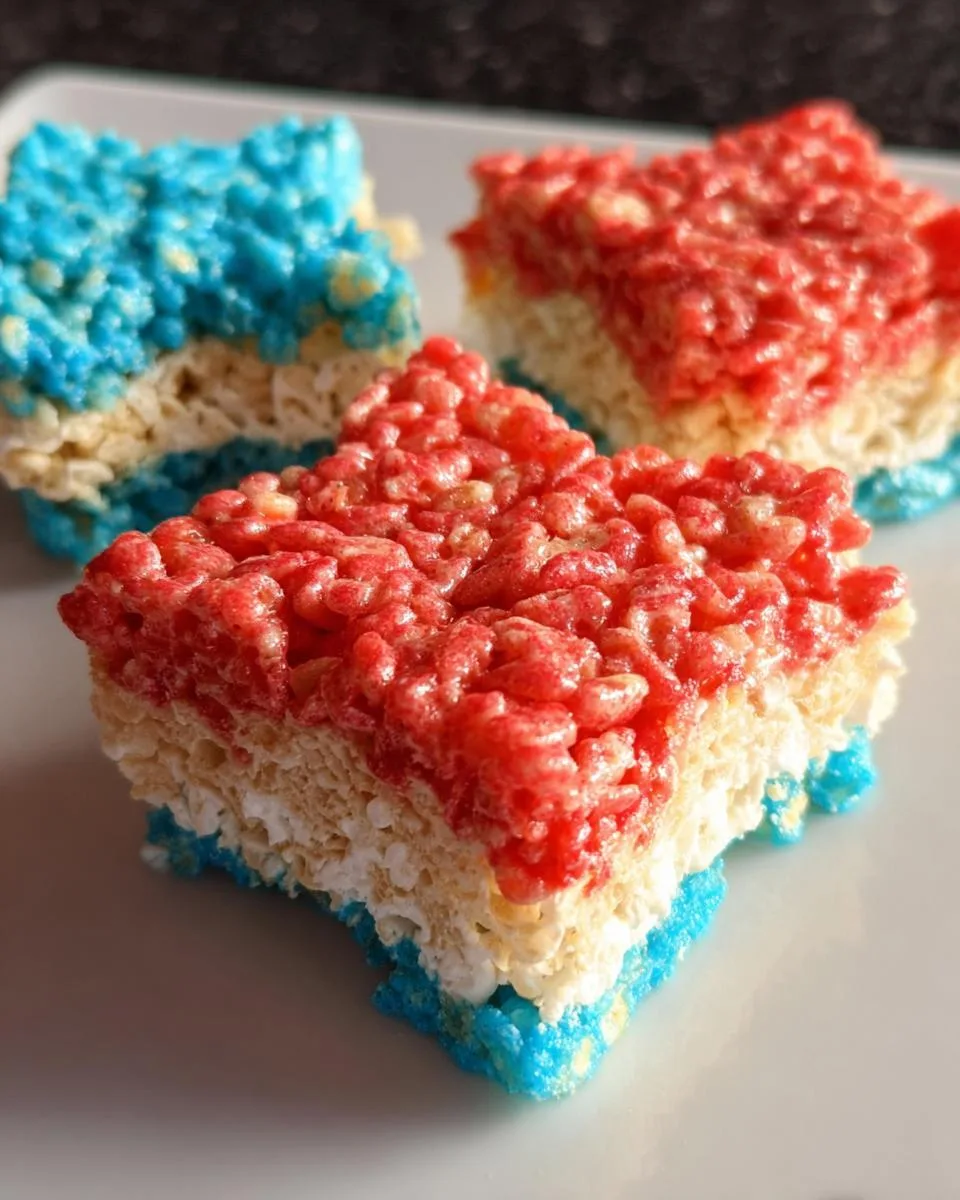
Need a show-stopping dessert that’s fun, easy, and perfectly patriotic? These Patriotic Rice Krispie Treats are your answer. With vibrant red, white, and blue layers, they’re a guaranteed crowd-pleaser for the Fourth of July, Memorial Day, or any summer gathering.
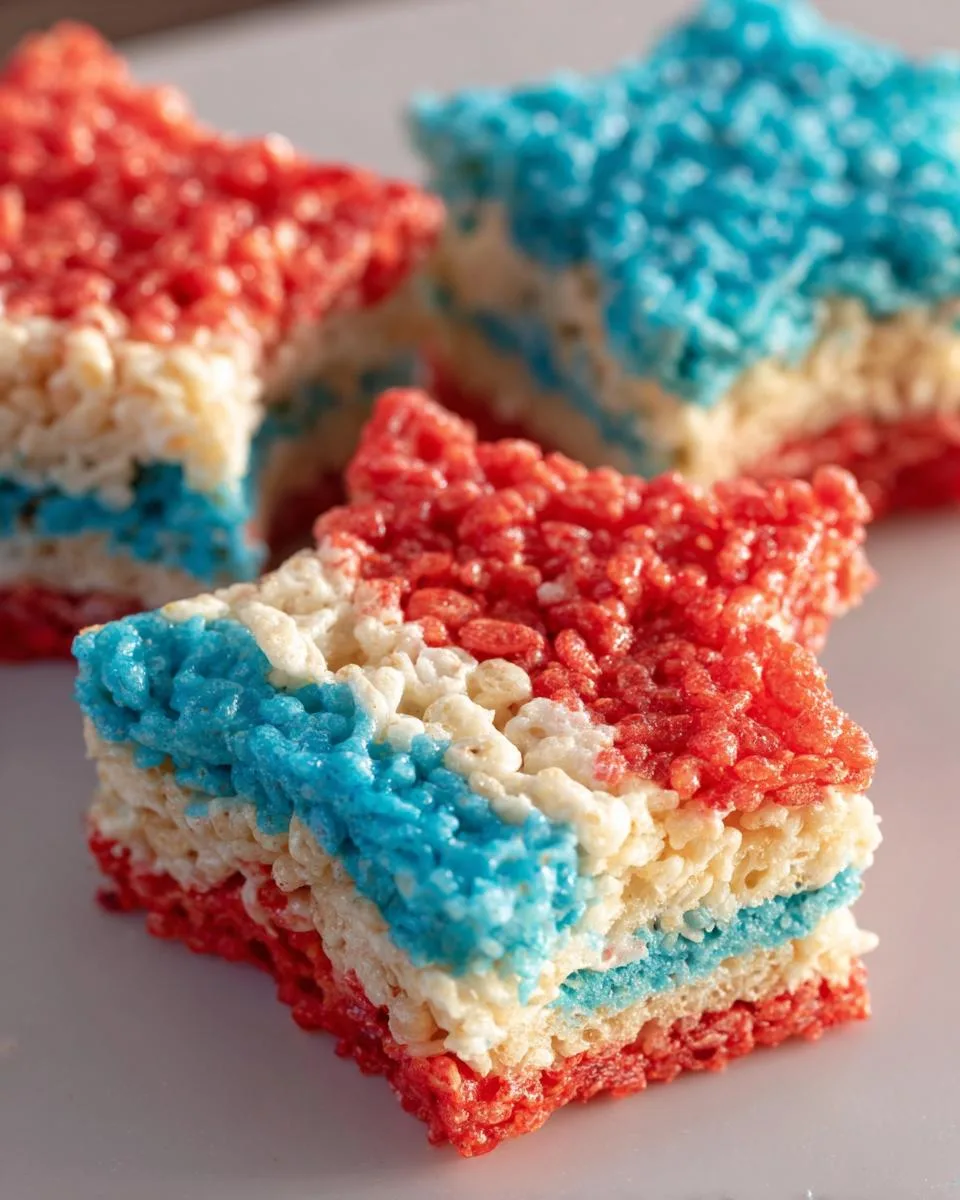
I love how these treats turn a classic childhood favorite into something special for a celebration. The secret to perfect Patriotic Rice Krispie Treats isn’t complicated, it’s about bold colors and clean layers. They always remind me of backyard barbecues with my family, where something simple and sweet brings everyone together.
Let’s walk through how to make this colorful, no-bake dessert step by step.
Table of Contents
Why You’ll Love These Patriotic Rice Krispie Treats
Let me tell you exactly why this recipe is about to become your go-to for every flag-waving holiday. It checks every box for a busy home cook who still wants to make something amazing.
- Instant Party Vibes: The bold red, white, and blue layers are pure joy on a plate. They create a festive atmosphere the moment you set them out.
- No-Bake & Kid-Friendly: You can make the whole thing without turning on your oven. This is a lifesaver in the summer heat and a perfect project to do with little helpers.
- Pantry Staples: Butter, marshmallows, cereal. You probably have the core ingredients right now. The special items, like clear vanilla, are easy finds.
- Bright & Tasty Colors: Using clear vanilla and gel food coloring gives you those stunning layers without a weird artificial aftertaste. The flavor is pure, sweet nostalgia.
- Endlessly Adaptable: Go classic with simple squares or break out the star-shaped cookie cutters for extra fun. It’s your celebration, make it your own.
- The Ultimate Crowd-Pleaser: This recipe combines a beloved classic with a colorful twist. It’s the dessert that disappears first from the picnic table, every single time.
Trust me, after one bite, you’ll see why these treats are a celebration all by themselves.
Ingredients You’ll Need
This stunning dessert comes from just a handful of simple ingredients. The key is organization. You’ll be making three separate batches, so pre-measuring everything into three portions is your secret to smooth, stress-free layering.
- 1 ½ cups unsalted butter, divided
Ingredient Note: I always use unsalted butter. It lets you control the salt level and lets the sweet, toasty marshmallow flavor shine through perfectly. - 30 cups mini marshmallows, divided
Ingredient Note: Mini marshmallows are the MVP here. They melt faster and more evenly than the big ones, giving you a smooth, lump-free base for each colorful layer. - 24 cups crispy rice cereal, divided
Ingredient Note: A classic like Rice Krispies gives that perfect snap. Make sure your box is fresh for the best texture. - 1 ½ teaspoons clear vanilla extract, divided
Ingredient Note: Clear vanilla is my non-negotiable tip for the white layer. It keeps it brilliantly white instead of giving it a tan tint. - Red gel food coloring
- Blue gel food coloring
Ingredient Note: Gel food coloring is essential. It gives you vibrant, bold colors without adding extra liquid that can make your treats soggy. A little goes a long way.
A quick substitution tip? If you only have salted butter, you can use it. Just know your final treats will have a slightly saltier flavor. Now, get your three bowls ready and let’s make some magic.
How to Make Patriotic Rice Krispie Treats
Making these three stunning layers is easier than you think. The trick is to keep your pre-measured ingredients organized and work while each batch is still warm and pliable. Follow these steps for perfect, clean layers every time.
Step 1: Prepare the Pan and Make the Red Layer
First, grab your 9×13 inch baking pan. Lightly grease it with butter or cooking spray. For the cleanest removal, I always line mine with parchment paper, leaving a few inches hanging over the sides. This creates handles to lift the whole slab out later.
Now, for the red layer. In a large pot, melt ½ cup of unsalted butter over low heat. Patience is key here. Once the butter is fully melted, add your first 10-cup portion of mini marshmallows. Stir continuously with a sturdy spatula until the marshmallows are about 95% melted and smooth. You should see very few solid pieces remaining.
Take the pot off the heat. Stir in ½ teaspoon of clear vanilla extract. Now, add your red gel food coloring. Start with a few drops, mix well, and add more until you get a bold, vibrant red. Immediately pour in 8 cups of crispy rice cereal. Gently fold until every single piece is coated in that glossy, red marshmallow mixture.
Quickly transfer the mixture to your prepared pan. Use a buttered spatula or your buttered hands to press it down firmly and evenly into one solid layer. A good, firm press now means your bars won’t crumble later.
Step 2: Create the White Middle Layer
Give your pot a quick wash and dry it well. You don’t want any red color bleeding into your pristine white layer.
Repeat the process: melt another ½ cup of butter over low heat. Add the next 10 cups of mini marshmallows and ½ teaspoon of clear vanilla. Stir until the mixture is completely smooth and lump-free. You won’t be adding any coloring here.
Remove the pot from the heat and fold in 8 cups of cereal. The mixture will be very warm and sticky. Gently scoop it on top of your set red layer. Spread it as evenly as you can, then press it down firmly to bind it to the red layer beneath it. You now have two beautiful layers.
Step 3: Finish with the Blue Layer and Set
One more quick wash of the pot for our grand finale. Melt the final ½ cup of butter. Add the last 10 cups of marshmallows and the final ½ teaspoon of vanilla. Stir until nearly melted.
This is your moment for blue. Take the pot off the heat and add blue gel food coloring, mixing until you achieve a deep, royal blue. Fold in the last 8 cups of cereal.
Spread this final blue mixture over the white layer. Press it down firmly and smooth the top. Now, the hardest part: walk away. Let the pan cool completely at room temperature for at least 1 hour. This allows the marshmallow to set so you get clean cuts.
Once fully cooled, use the parchment paper “handles” to lift the entire block onto a cutting board. Use a sharp knife for squares or press down firmly with star-shaped cookie cutters for a festive touch. Your masterpiece is ready.
Pro Tips for the Best Patriotic Rice Krispie Treats
A few simple tricks will take your treats from good to absolutely perfect. These are the little things I’ve learned after making countless batches.
- Butter is Your Best Friend: Always butter your spatula or your hands before pressing a layer. This prevents the sticky marshmallow from clinging and gives you a smooth, clean top.
- Fold, Don’t Stir: When you add the cereal, use a gentle folding motion. Over-stirring or mashing will crush the crispy rice, and you’ll lose that wonderful light texture.
- Charlotte’s Secret for Sharp Layers: Press each layer down with firm, even pressure. I use the flat bottom of a buttered measuring cup. This compacts the layer so it holds its own and creates a distinct line against the next color.
- The Warm-Up Trick: If your mixture starts to set up in the pot before you can spread it, don’t panic. Just return it to the lowest heat for 10-15 seconds, stirring gently. It will become perfectly pliable again.
- Patience is a Virtue: Let the whole pan cool at room temperature for a full hour. Cutting into warm Rice Krispie Treats is a recipe for squished, gooey edges. Waiting ensures you get those crisp, clean cuts every time.
Follow these tips, and you’ll have a stunning, professional-looking dessert that tastes just as good as it looks.
Common Mistakes to Avoid
Even the simplest recipes have a few pitfalls. Knowing what to watch for is the best way to guarantee perfect Patriotic Rice Krispie Treats on your first try.
- Using Liquid Food Coloring: This is the most common misstep. Liquid coloring adds extra moisture to your marshmallow mixture. The result? Soggy treats and pale, washed-out colors. Gel food coloring is concentrated and won’t change your texture, giving you those bold, dry layers you want.
- High Heat: Impatience with the melting step leads to trouble. High heat will scorch your butter and marshmallows, creating a grainy, burnt-tasting base. Always use low heat and stir patiently for a perfectly smooth, glossy mixture every time.
- Not Pressing Firmly: A gentle pat won’t cut it. If you don’t press each layer down with firm, even pressure, the layers won’t bind together properly. You’ll end up with crumbly bars that fall apart. Use good force with a buttered tool to compact the cereal.
- Cutting Too Soon: I know it’s tempting. But if you slice into these treats while they’re still warm, the marshmallow is like glue. You’ll get messy, squished edges instead of clean cuts. Let them cool at room temperature for the full hour so they can set completely.
Don’t panic if you make a mistake. Just note it for next time. Cooking is all about learning, and even imperfect treats still taste wonderful.
Delicious Variations
Once you master the classic layered bars, have fun making them your own. These simple twists add extra personality and flavor to your Patriotic Rice Krispie Treats.
- Sprinkle Fun: Right after you press down the final blue layer, scatter red, white, and blue sprinkles over the top. Gently press them in so they stick as the treats cool. It adds a fantastic crunchy texture and even more festive color.
- Chocolate Drizzle: Melt some white chocolate chips and let them cool slightly. Once your treats are fully set and cut, use a spoon or a piping bag to drizzle the chocolate back and forth over the top. It looks elegant and adds a creamy flavor contrast.
- Different Shapes: Instead of squares, use cookie cutters. Star-shaped cutters are perfect for the Fourth of July. Press down firmly through all three cooled layers for a clean shape. Save the scraps for a fun, colorful snack mix.
- Flavor Twist: Add a subtle fruity note. When you mix the vanilla into the red layer, add ¼ teaspoon of raspberry extract. For the blue layer, add ¼ teaspoon of blueberry extract. It’s a lovely surprise that pairs perfectly with the sweet marshmallow.
Mixing and matching these ideas is the best part. Your guests will love seeing your creative touch on this classic dessert.
Serving Suggestions
These Patriotic Rice Krispie Treats are the star of any table. For a stunning presentation, arrange your cut bars or star shapes on a simple white platter. This really makes the bold colors pop. They pair perfectly with fresh berries and a dollop of whipped cream for an easy red, white, and blue dessert parfait.
They’re the ultimate portable treat. Wrap individual bars in parchment paper for a festive picnic or pack them for a Fourth of July barbecue. Long after the holiday, they make a fun lunchbox surprise or after-school snack. For a party platter, I love mixing classic squares with star-shaped cutouts. It adds a playful, professional touch that always gets compliments. However you serve them, they bring a smile.
FAQs About Patriotic Rice Krispie Treats
Can I use regular liquid food coloring?
I don’t recommend it. Gel food coloring is essential for vibrant layers. Liquid food coloring adds extra moisture, which can make your treats soggy and produce dull, pastel colors instead of bold red and blue.
How do I store these treats?
Store them in an airtight container at room temperature for up to 3 days. If you stack them, place a sheet of parchment paper between the layers to prevent them from sticking together.
Can I make these ahead of time?
Absolutely. You can make them one day ahead. They taste best the day they are made but will stay fresh and delicious if stored properly overnight.
Can I freeze Patriotic Rice Krispie Treats?
Yes, freezing works great. Wrap the whole block or individual pieces tightly in plastic wrap, then place them in a freezer bag. They will keep for up to 6 weeks. Thaw at room temperature for about an hour before serving.
What are the nutritional facts?
The estimated nutrition per serving is about 611 calories. For the most accurate count, I recommend calculating with your specific ingredient brands using a trusted online nutrition calculator.
Make Your Celebration Sweet
These Patriotic Rice Krispie Treats are more than just a dessert. They are a simple, joyful way to bring people together and celebrate the moment. Their bright layers are guaranteed to bring smiles, and that classic, nostalgic taste is always a hit. I truly hope this easy recipe becomes a happy staple for your festive gatherings for years to come.
Did you make them? I’d love to hear how yours turned out. Share your photos and tell me all about it in the comments below. For more easy, family-friendly dessert ideas that never skimp on flavor or fun, follow me on Pinterest. Now, go enjoy your sweet celebration.
Print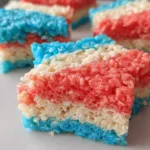
Patriotic Rice Krispie Treats
- Total Time: 100 minutes
- Yield: 8 servings 1x
- Diet: Vegetarian
Description
Celebrate any patriotic holiday with these easy, no-bake Rice Krispie Treats. They feature vibrant red, white, and blue layers for a fun and delicious festive touch.
Ingredients
- 1 ½ cups unsalted butter, divided
- 30 cups mini marshmallows, divided
- 24 cups crispy rice cereal, divided
- 1 ½ teaspoons clear vanilla extract, divided
- Red gel food coloring
- Blue gel food coloring
Instructions
- Lightly grease a 9×13 inch baking pan with cooking spray or butter. For easier removal, you can also line the pan with parchment paper, leaving some overhang on the sides.
- In a large pot, melt 1/2 cup of butter over low heat. Once melted, add 10 cups of mini marshmallows and stir continuously until they are almost completely melted.
- Turn the heat to low. Stir in 1/2 teaspoon of clear vanilla extract. Add red gel food coloring a few drops at a time, mixing well until you reach a vibrant red color. Remove from heat.
- Immediately add 8 cups of crispy rice cereal to the red marshmallow mixture. Stir gently until the cereal is fully coated.
- Pour the red cereal mixture into the prepared pan. Press it down firmly and evenly using a buttered spatula or the back of a buttered spoon.
- Clean the pot and repeat steps 2 through 4 for the white layer. Melt another 1/2 cup of butter with 10 cups of marshmallows and 1/2 teaspoon of vanilla extract. Stir until smooth and then mix in 8 cups of crispy rice cereal.
- Carefully spread the white cereal mixture over the red layer in the pan. Press down to make it even.
- In the clean pot, melt the remaining 1/2 cup of butter over low heat. Add the last 10 cups of mini marshmallows and 1/2 teaspoon of vanilla extract. Stir until almost melted. Add blue gel food coloring a few drops at a time until a deep blue color is achieved. Remove from heat.
- Mix in the final 8 cups of crispy rice cereal until well coated.
- Gently spread the blue cereal mixture over the white layer. Press down firmly and smooth the top layer.
- Let the treats cool completely at room temperature for at least 1 hour.
- Once cooled, use the parchment paper overhang to lift the entire block out of the pan. Place on a cutting board.
- Using a sharp knife or star shaped cookie cutters, cut the Rice Krispie treats into desired shapes. If using cookie cutters, press down firmly.
Notes
- Using gel food coloring provides more vibrant colors than liquid food coloring.
- For easier pressing, lightly butter your hands or a spatula when handling the warm mixture.
- If the cereal mixture starts to harden before you can spread it, you can briefly warm it over very low heat.
- Prep Time: 25 minutes
- Cook Time: 15 minutes
- Category: Dessert
- Method: No-Bake
- Cuisine: American
Nutrition
- Serving Size: 1 serving
- Calories: 611 kcal
Keywords: patriotic rice krispie treats, no-bake dessert, holiday treat, red white and blue, fourth of july