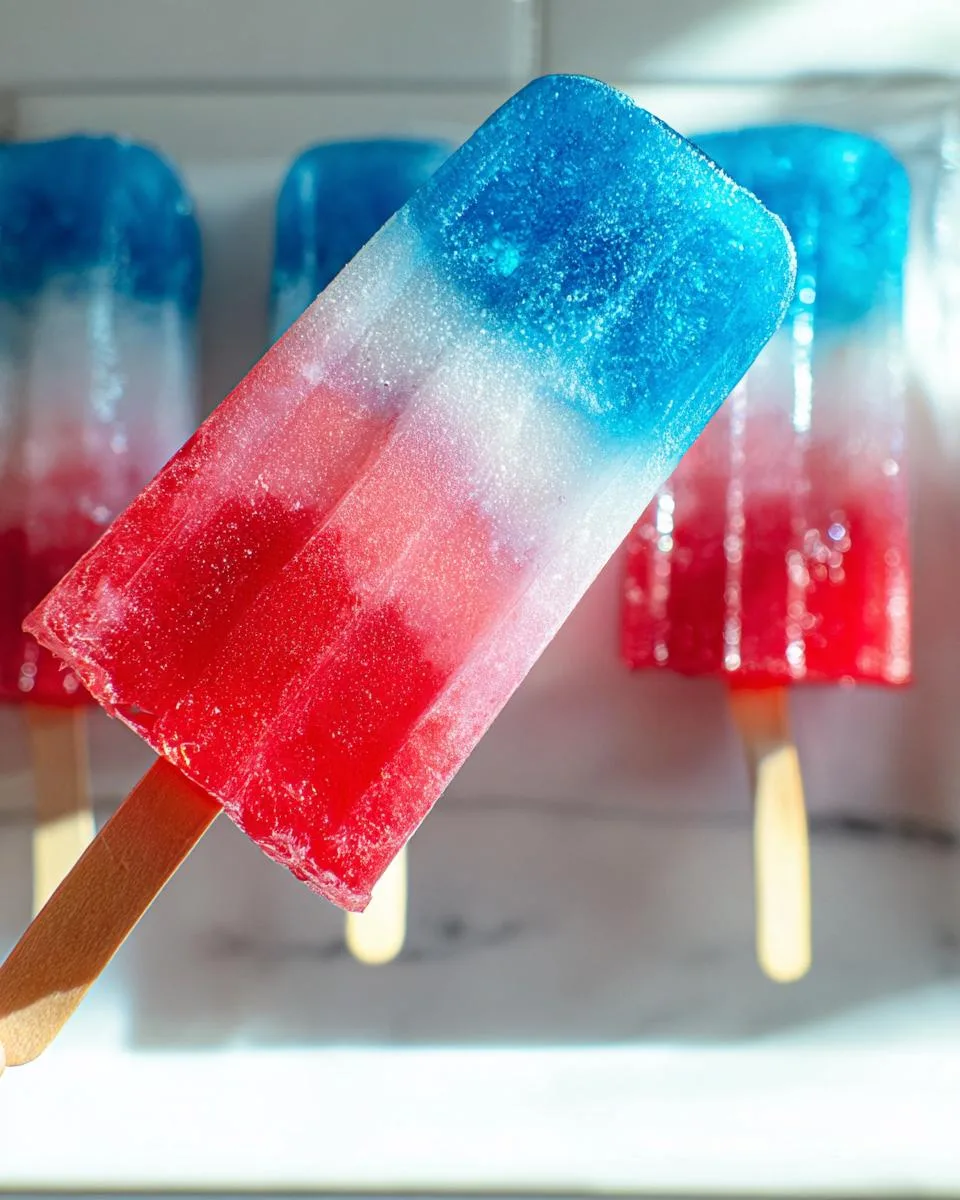
When the summer heat hits and you need a show-stopping treat, these Red White and Blue Popsicles are your answer. They are the perfect, no-fuss patriotic dessert for any celebration.
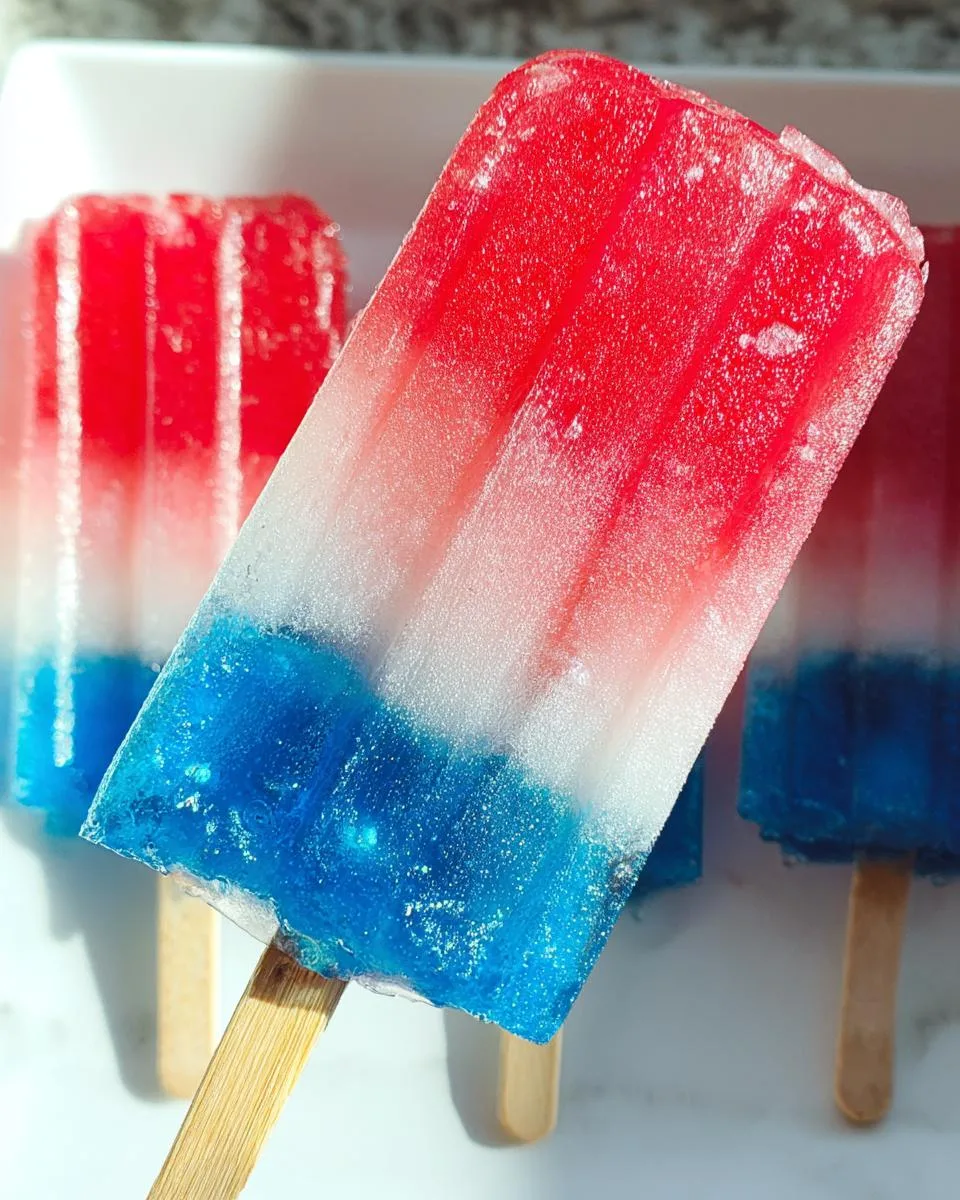
This recipe creates stunning layered popsicles with clean lines and a refreshing fruity flavor. I love making these for our neighborhood Fourth of July party. The secret to perfect red white and blue popsicles isn’t complicated, it’s all about patience between layers. Let’s walk through the simple steps to make them.
Table of Contents
Why You’ll Love This Red White and Blue Popsicles Recipe
Honestly, this recipe feels like a little bit of kitchen magic. It turns a few juice boxes and a packet of powder into the most festive frozen treat. Here is exactly why it has become my go for every summer gathering.
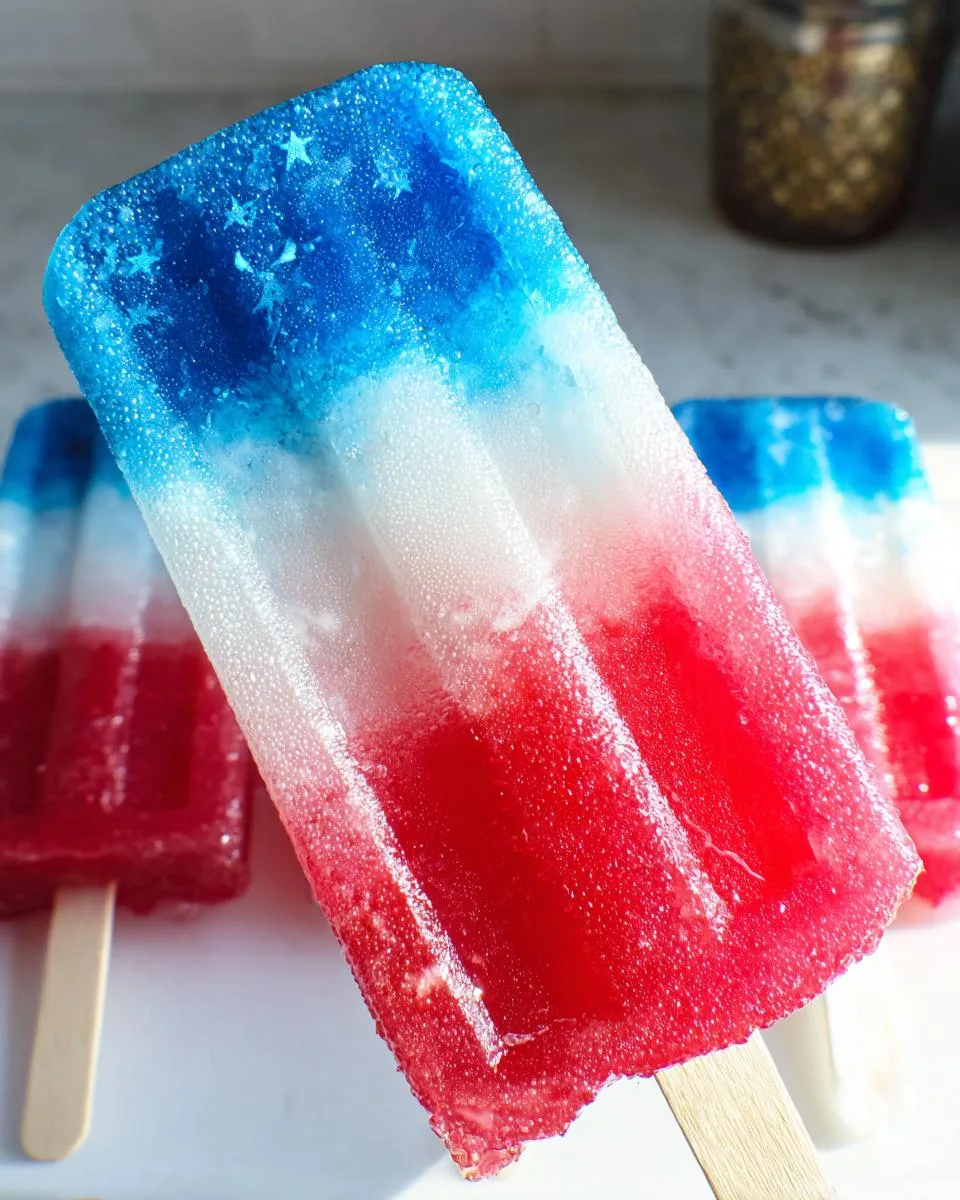
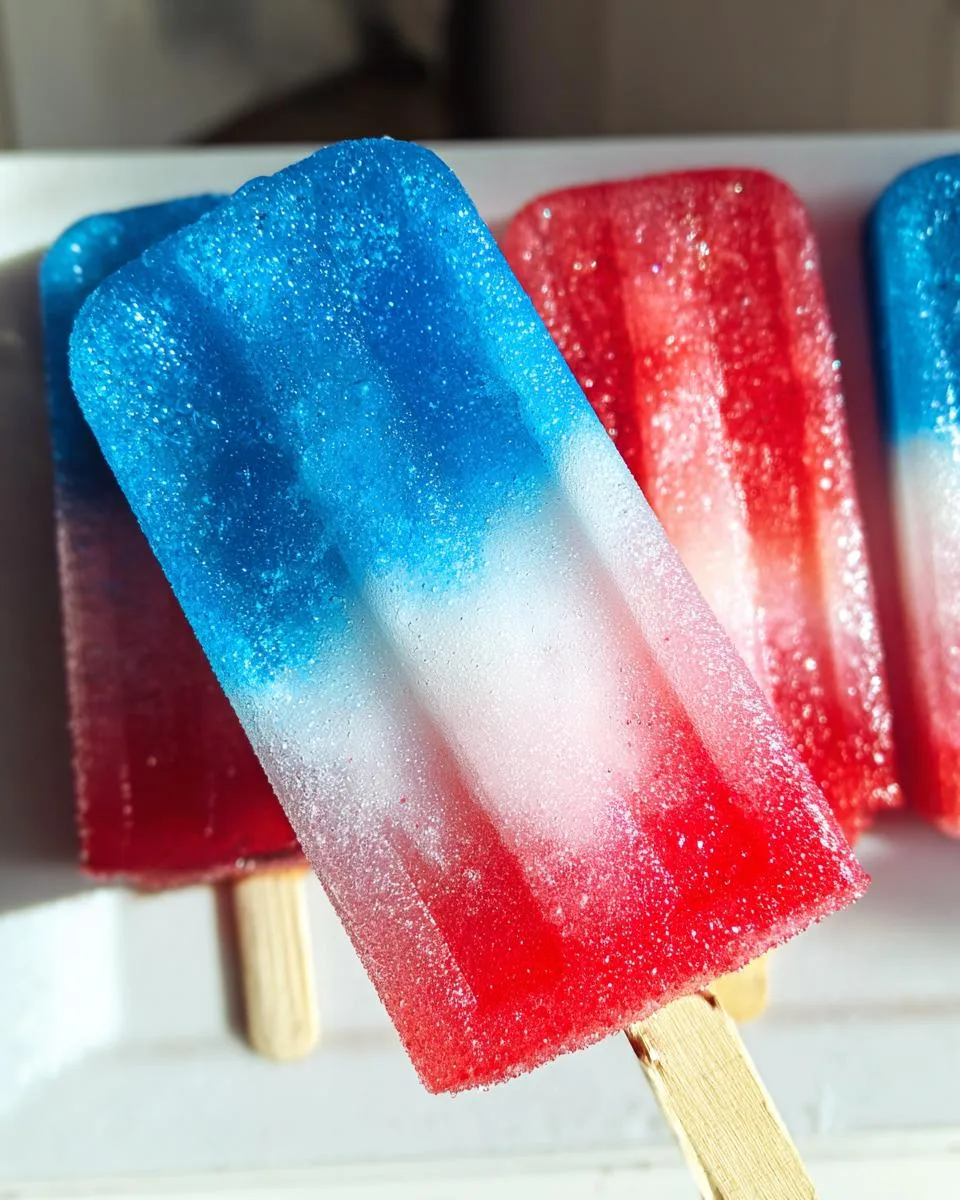
- Visually Stunning: These popsicles are a true showstopper. The bold, clean layers make them perfect for patriotic holidays like the Fourth of July or Memorial Day. They look like you spent all day on them, but the secret is so simple.
- Incredibly Easy: You only need four basic ingredients and zero special skills. If you can stir juice and wait for things to freeze, you can absolutely master this. There is no cooking, no fancy techniques, just simple assembly.
- Family-Friendly Fun: This is a fantastic activity to do with kids. My nieces love being in charge of pouring each colorful layer. It teaches a little patience (waiting for the freezer to do its job) and gives them a delicious reward.
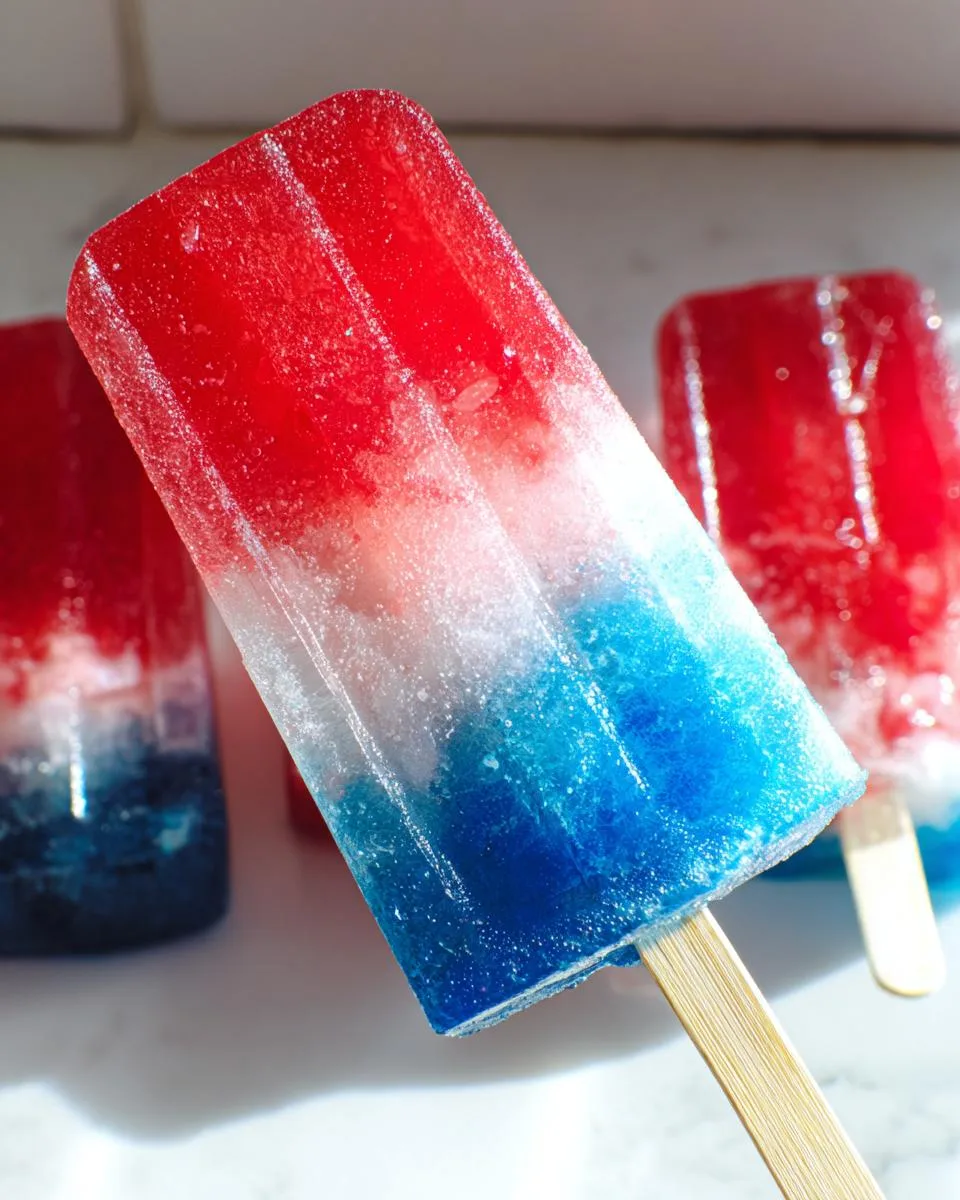
- Refreshing & Fruity: The combination of tart cranberry, sweet grape, and bright blue raspberry is incredibly refreshing. It is the ultimate way to beat the summer heat with a burst of real fruit flavor.
- Foolproof Layers: Do not worry about the colors mixing into a murky purple. The method of freezing each layer completely solid before adding the next is the key. It guarantees those sharp, patriotic stripes every single time.
This recipe delivers maximum impact with minimal effort, which is exactly what we need during a busy, fun-filled summer.
Ingredients You’ll Need
You need just four simple ingredients to create these vibrant, layered popsicles. Let’s talk about what each one brings to the party.
- 1 cup unsweetened cranberry juice: This gives us that perfect, bold red layer. Using unsweetened juice is my pro tip. It provides a lovely tart flavor that balances the sweetness of the other layers, and it lets you control the overall sugar level.
- 1 cup white grape juice: This is our “white” layer hero. It stays beautifully clear when frozen, creating that clean stripe between the red and blue. If you only have apple juice, that works great as a substitute and tastes delicious.
- 1 cup blue raspberry flavored drink mix powder: Look for this in the drink aisle near the lemonade mixes. The powder dissolves perfectly in cold water for an intense, vibrant blue. Make sure you get a powder, not a liquid concentrate, for the right consistency.
- 2 cups cold water, divided: Don’t let this simple ingredient fool you. Dividing the water is the secret to the recipe’s structure. We use it in specific amounts for each layer to get the perfect pourable consistency.
If you want a more natural blue, you can blend fresh or frozen blueberries with a bit of water and strain out the pulp. Just know the color will be a deeper, more purple-ish blue rather than that classic bright sky shade. With these ingredients on your counter, you are just a few pours away from a festive frozen dessert.
How to Make Red White and Blue Popsicles
Making these popsicles is a relaxing process. The key is working in stages. Just follow these simple steps for perfect, stripey results every time.
Step 1: Prepare Your Molds and the Red Layer
First, grab your popsicle molds. Give them a quick check to make sure they are clean and dry. Now, let’s make the red base. In a small pitcher or a bowl with a spout, combine one cup of unsweetened cranberry juice with a half cup of cold water. Stir it well.
Carefully pour this vibrant red liquid into your molds. You only want to fill each one about one-third of the way up. Using a liquid measuring cup helps you pour with control and keep the layers even.
Step 2: Freeze the First Layer Solid
This is the most important step for clean layers. Gently place the molds in the freezer on a flat shelf. Let them freeze completely. This takes about 2 hours, but check for firmness. The top should be solid to a gentle touch, with no liquid jiggle. If you rush this, the colors will bleed. Patience here makes all the difference.
Step 3: Create and Add the White Layer
While the red layer chills, make the white mixture. Combine one cup of white grape juice with another half cup of cold water. Once the red layer is rock solid, take the molds out. Slowly pour the white grape juice mixture over the red ice. Fill the molds up to about the two-thirds mark. Now, insert your popsicle sticks.
Because the red layer is frozen, the sticks will stand up straight. Put the molds back in the freezer for another 2 hours, or until this white layer is also completely firm.
Step 4: Mix and Pour the Final Blue Layer
Time for the grand finale, the blue layer! Grab a bowl and a whisk. Add one cup of blue raspberry drink powder and the final one cup of cold water. Whisk it vigorously until every last bit of powder dissolves and the liquid is a smooth, bright blue.
Pull your molds from the freezer. The white layer should be solid. Pour the blue mixture slowly, filling each mold all the way to the very top. This final pour secures the popsicle stick in place.
Step 5: Final Freeze and Unmolding
Place the filled molds back in the freezer for the last time. Let them freeze for at least 4 hours. For the best, most solid popsicles, I always leave them overnight. To release your creations, do not pull on the sticks.
Simply run the outside of the mold under warm tap water for 10-15 seconds. Then, gently twist the stick and pull. The popsicle should slide out easily, revealing those perfect red, white, and blue stripes.
Pro Tips for the Best Red White and Blue Popsicles
A few simple tricks will take your popsicles from good to absolutely perfect. These are the little things I’ve learned after making countless batches.
- Measure for Clean Lines: Use a liquid measuring cup with a spout for pouring each layer. This gives you precise control and helps create those perfectly even, distinct stripes. Eyeballing it can lead to lopsided layers.
- The Patience Test: Patience truly is the secret ingredient. Before adding the next layer, the current one must be completely solid. Gently press the center with a clean finger. If it feels hard like an ice cube and doesn’t give, you’re good to go. If it’s at all soft or slushy, wait longer.
- Easy Release Secret: For foolproof unmolding every time, give your clean popsicle molds a very light spray with cooking oil before you start. This creates a nearly invisible barrier that lets the popsicles slide right out after their warm water bath.
- Balance the Sweetness: Some blue raspberry drink mixes are very sweet. If you prefer a less sugary pop, dissolve the powder in 1 ¼ cups of cold water instead of just one cup. It makes for a more balanced, refreshing final layer.
- Charlotte’s Freezing Trick: Always place your molds on a flat, level shelf in the freezer. If they’re tilted, your layers will freeze at an angle. For the final freeze, leaving them overnight is my golden rule for the hardest, smoothest texture.
Follow these tips and you’ll have stunning, professional-looking popsicles that are incredibly easy to enjoy.
Common Mistakes to Avoid
Even the simplest recipes have little pitfalls. Knowing what to watch for helps you avoid them completely and get perfect results on your first try.
- Adding Layers Too Soon: This is the number one reason colors bleed into a muddy purple. It happens when the previous layer is still slushy. The fix is simple. Wait until each layer is frozen completely solid. Test it by gently touching the center. It should feel hard like an ice cube.
- Not Dissolving the Powder Fully: If you just stir the blue raspberry powder lazily, little granules can remain. This creates a gritty, unpleasant texture in your final popsicle. The solution is to whisk the blue mixture vigorously for a full minute until the liquid is completely smooth and clear with no specks.
- Forcing the Popsicle Out: Yanking on the stick straight from the freezer often leads to broken sticks or shattered popsicles. The ice is stuck to the mold. Always run the outside of the mold under warm water for 10-15 seconds first. This melts just a thin layer, letting the popsicle slide out with a gentle twist and pull.
Skip these common errors, and you are guaranteed a batch of beautiful, clean-layered popsicles every single time.
Delicious Variations
The classic version is always a hit, but part of the fun is making this recipe your own. Feel free to play with these easy twists to create a whole new frozen treat.
- Berry Bliss: For a totally natural fruit version, swap the juices for purees. Use strained strawberry puree for the red layer. Use full-fat coconut milk (shaken well) for a creamy, gorgeous white layer. For blue, blend and strain blueberries. The colors will be deeper and more rustic, and the flavor is wonderfully fresh.
- Creamy Version: If you love a creamier texture, use thick, full-fat yogurt. Mix raspberry yogurt with a teaspoon of water to make it pourable for the red. Use plain vanilla yogurt for the white. For the blue, mix blueberry yogurt. The freezing time may be slightly longer, and the layers will have a lovely, soft bite.
- Adult Twist: For a fun party treat for grown-ups, add one tablespoon of vodka to each liquid layer before pouring. The alcohol prevents it from freezing solid, creating a fantastic slushy-style popsicle that’s perfect for a summer evening. Just keep these separate from the kids’ batch!
Each variation follows the same simple method. Just remember to freeze each creamy or boozy layer completely solid before adding the next one.
Serving Suggestions
These popsicles are the star of the show, but they love good company. Here are my favorite ways to serve them for maximum smiles.
For the ultimate patriotic spread, serve them straight from the freezer at your Fourth of July barbecue. They are the perfect cool, fruity finish to a meal of grilled burgers and smoky hot dogs. I like to arrange them standing up in a bowl of ice to keep them frosty while guests mingle.
They are also a fantastic portable treat. Tuck a few into a small cooler or lunchbox for a picnic in the park or a day at the pool. They will stay frozen for hours and are so refreshing on a hot afternoon.
Do not save them just for parties. They make a wonderful, fun dessert after a simple weeknight family dinner. My family loves them with homemade pizza. On any blisteringly hot summer day, enjoying one by itself is the perfect way to cool down and feel a little festive.
FAQs About Red White and Blue Popsicles
Can I use fresh fruit instead of juice?
Absolutely. For the best texture, puree your fresh or frozen fruit with a little water until completely smooth. Then, strain the mixture through a fine-mesh sieve to remove all the pulp and seeds. This gives you a clear liquid that will freeze into a smooth, solid popsicle layer.
How long do these popsicles keep in the freezer?
They store beautifully for up to 2 weeks. For the best quality, keep them in an airtight container or wrap each one tightly in plastic wrap. This prevents them from absorbing any freezer odors and stops freezer burn from forming on the surface.
My colors bled a little. What went wrong?
The most likely culprit is not freezing a layer long enough. If the previous layer is even slightly slushy, the next liquid layer will melt into it. The fix is simple. Always freeze each layer until it is completely solid and firm to the touch before adding the next one.
Can I make these popsicles ahead of time?
Yes, they are perfect for making ahead. The full freezing process takes at least 8 hours, so I always make them the day before I need them. This gives you one less thing to worry about on the day of your party or gathering.
What is the estimated calorie count per popsicle?
Using the exact ingredients listed, each popsicle is roughly 55 calories. This is a light and refreshing treat. Remember, the final count can vary slightly depending on the specific brands of juice and drink mix you use.
Enjoy Your Festive Red White and Blue Popsicles
And that is it. You have just made a stunning, refreshing summer dessert that is as simple as it is impressive. These Red White and Blue Popsicles are proof that the best treats don’t have to be complicated. I hope they bring a burst of color and joy to your table.
I would love to see your creations. Tag me on Pinterest or leave a comment below telling me how your family enjoyed them. For more easy, family-friendly recipes that deliver big flavor without the fuss, be sure to follow along right here. Now, go enjoy that first perfect, icy, fruity bite.
Print
Red White and Blue Popsicles
- Total Time: 435 minutes
- Yield: 10 servings 1x
- Diet: Low Calorie
Description
Beat summer heat with these patriotic layered popsicles. They are a fun, fruity, and refreshing treat.
Ingredients
- 1 cup unsweetened cranberry juice
- 1 cup white grape juice
- 1 cup blue raspberry flavored drink mix (powdered)
- 2 cups cold water
Instructions
- Prepare your popsicle molds.
- Combine cranberry juice with 1/2 cup cold water. Stir.
- Pour cranberry mixture into molds, filling one third.
- Freeze for 2 hours until firm.
- Combine white grape juice with another 1/2 cup cold water. Stir.
- Pour white grape mixture into molds, filling another third.
- Insert sticks. Freeze for 2 hours until firm.
- Whisk blue raspberry powder with remaining 1 cup cold water.
- Pour blue raspberry mixture into molds, filling to top.
- Freeze for at least 4 hours or overnight.
- Run mold under warm water to unmold. Twist and pull.
Notes
- Freeze each layer solid before adding the next to prevent bleeding.
- Use 1 1/4 cups water for a sweeter blue layer.
- Use high-quality molds for easy removal.
- Prep Time: 15 minutes
- Cook Time: 420 minutes
- Category: Dessert
- Method: Freezing
- Cuisine: American
Nutrition
- Serving Size: 1 popsicle
- Calories: 55 kcal
Keywords: popsicles, frozen dessert, patriotic, summer treat, fruit juice