Get ready to fall in love with one of Canada’s most famous treats: the iconic Nanaimo Bars Recipe! My first bite of this no-bake wonder was at a small café in Nanaimo, British Columbia, the very city it’s named after, and I’ve been completely obsessed ever since. The combination of textures and rich chocolate is pure dessert magic, and I’m so excited to share my perfected version with you.
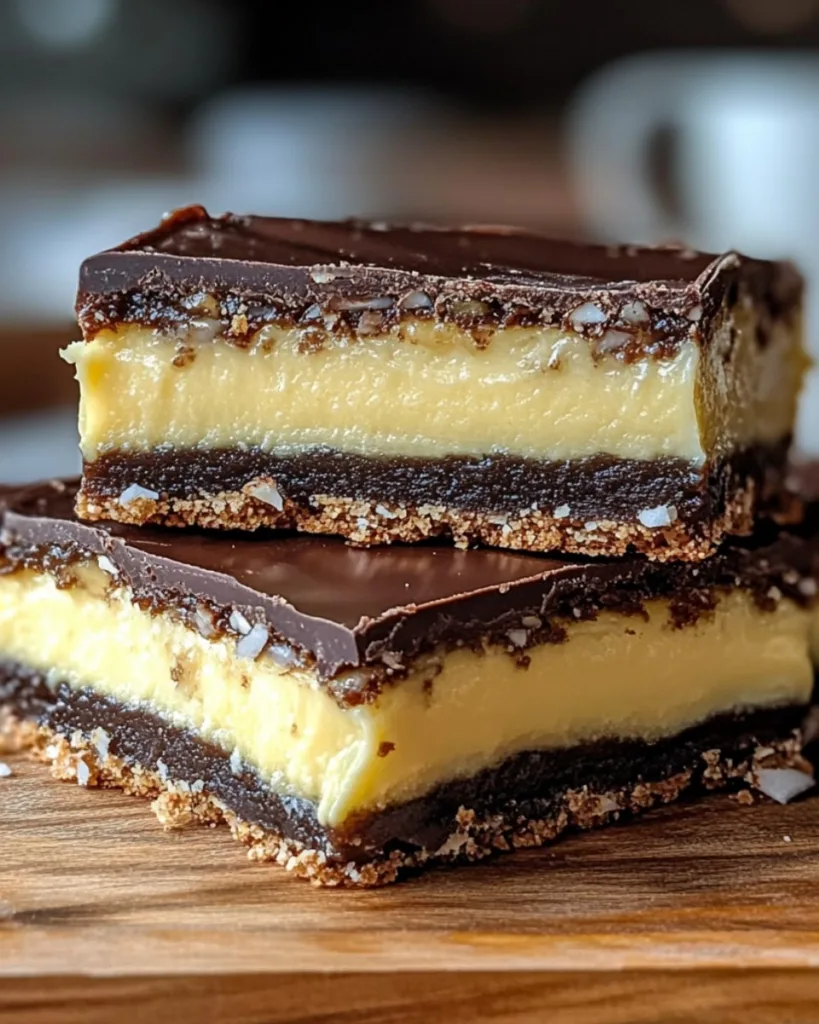
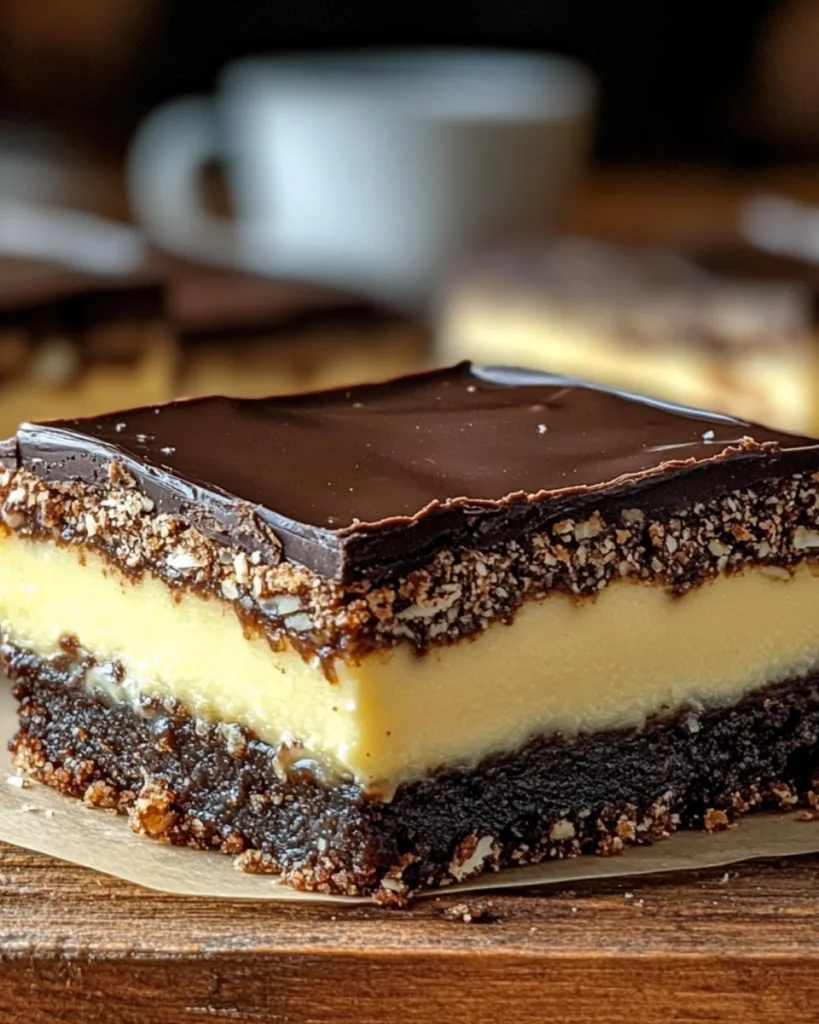
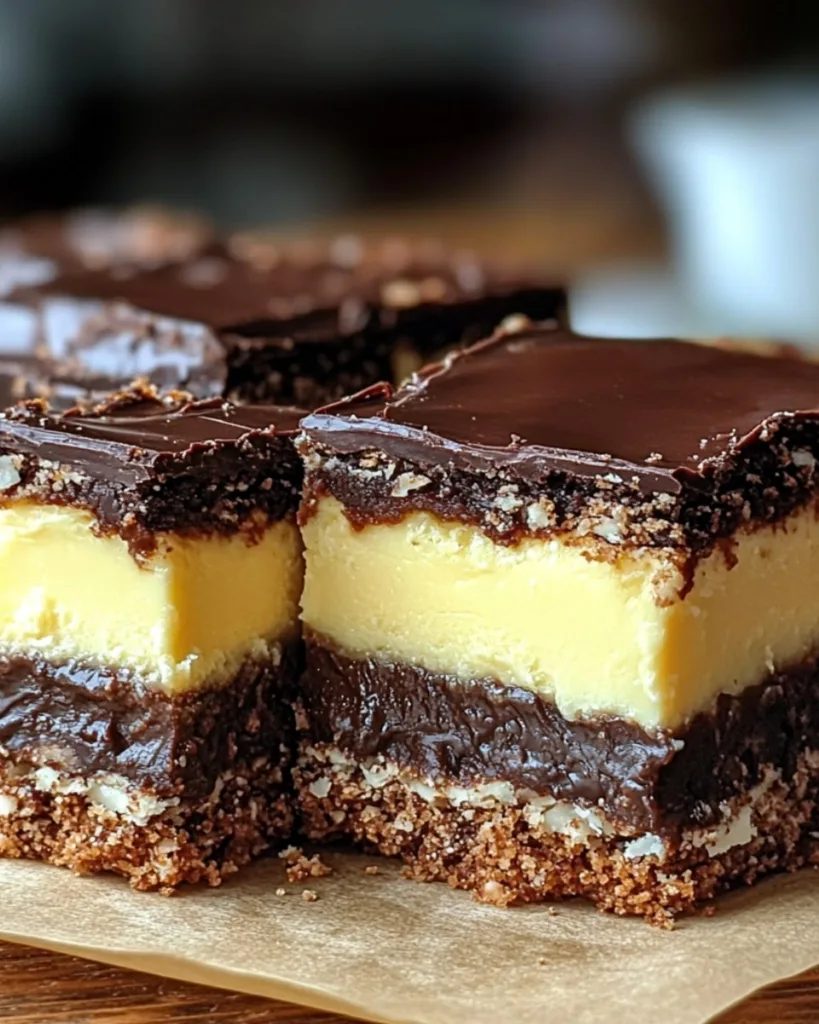
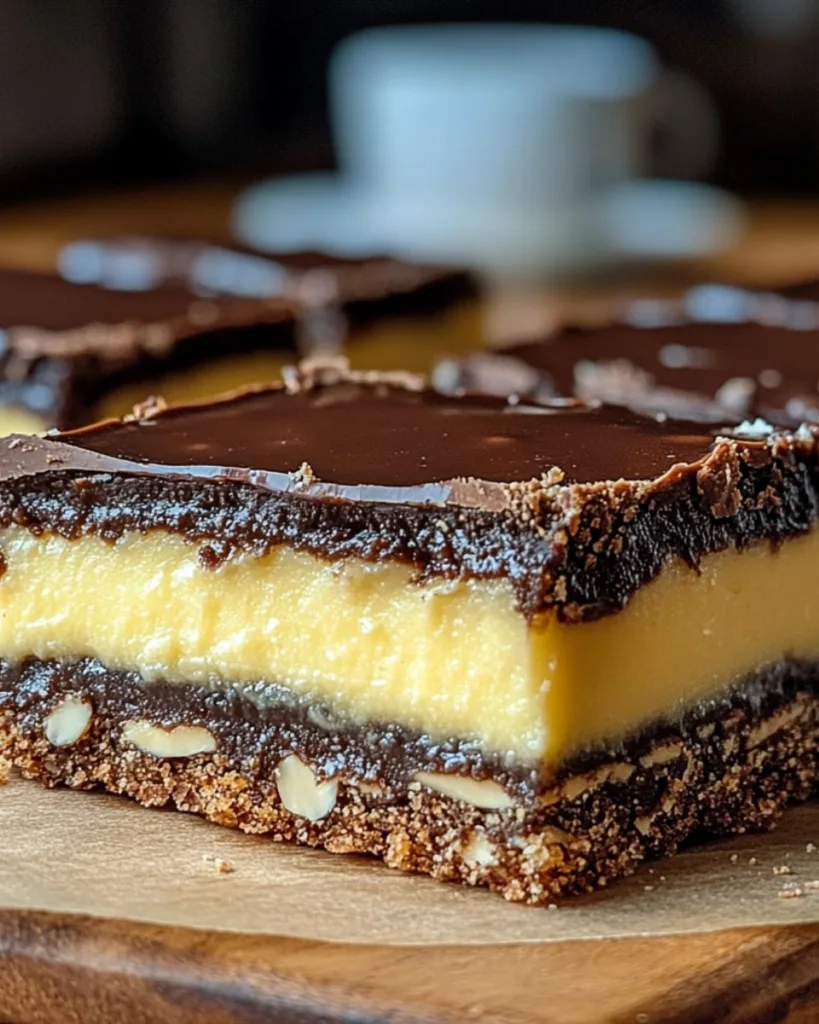
Imagine a crumbly chocolate and coconut crust, a soft, velvety custard center, and a glossy dark chocolate topping that snaps perfectly with every bite. It’s a truly unforgettable treat. Don’t let the three beautiful layers intimidate you; these bars are surprisingly simple to make, and you likely have most of the ingredients already. The only hard part is waiting for them to chill! This recipe is a guaranteed hit for any occasion.
Table of Contents
Why You’ll Love This Nanaimo Bars Recipe
Listen, these bars aren’t just delicious, they’re downright addictive. Here’s why:
- No oven needed: Seriously, just melt, mix, and chill. Perfect for those scorching summer days when baking sounds like torture.
- That dreamy texture: Crunchy base, creamy middle, smooth chocolate top, every bite is a little party in your mouth.
- Impressively easy: Looks fancy? Absolutely. Takes skill? Nah. Even my cousin Dave (who burns toast) nailed these.
- Crowd-pleaser magic: Bring these to any gathering and watch them disappear faster than you can say “Canadian dessert.”
Oh, and here’s my favorite part, they actually get better after a day in the fridge. The flavors meld together beautifully. Just try not to eat the whole pan!
Ingredients for Nanaimo Bars
Alright, let’s gather our goodies! I like to organize everything by layer, it keeps me from accidentally putting custard powder in the base (yes, that happened once). Here’s what you’ll need:
For the Chocolate Base Layer:
- 1/2 cup unsalted butter (cold butter? No thanks, melt it first!)
- 1 cup granulated sugar (the sweet foundation)
- 1/2 cup unsweetened cocoa powder (go for the good stuff)
- 2 eggs, beaten (room temp works best)
- 2 cups graham cracker crumbs (about 15 sheets crushed)
- 1 cup finely chopped almonds (toast them for extra oomph!)
- 2 cups shredded coconut (sweetened or unsweetened, your call)
For the Custard Filling:
- 1/2 cup unsalted butter, softened (not melted, key difference!)
- 1/4 cup heavy whipping cream (makes it luxuriously smooth)
- 1/2 cup Bird’s custard powder (the magic yellow powder, no substitutes!)
- 2 teaspoons vanilla extract (real stuff, please)
- 4 cups powdered sugar (sifted to avoid lumps)
For the Chocolate Ganache Topping:
- 200 grams dark chocolate (chopped, 60% cacao or higher)
- 1/2 cup heavy whipping cream (hot but not boiling)
Pro tip: Measure everything before starting. Trust me, scrambling mid-recipe with buttery fingers is no fun!
How to Make Nanaimo Bars
Alright, let’s get to the fun part, making these beauties! Don’t worry, it’s easier than it looks. Just follow these steps, and you’ll have a tray of Nanaimo Bars that’ll make you feel like a dessert pro. The key here is patience, let each layer chill properly. I know, waiting is hard, but it’s worth it. Trust me.
Step 1: Prepare the Chocolate Base Layer
First things first: the base. This is the foundation of your Nanaimo Bars, so don’t rush it. Grab a large saucepan and melt the butter, sugar, and cocoa powder over medium heat. Stir it often, you don’t want it to burn. Once it’s smooth and glossy, take it off the heat. Here’s the trick: let it cool for a minute or two before adding the eggs. If it’s too hot, you’ll end up with scrambled eggs in your dessert (yuck!).
Whisk in the beaten eggs slowly, stirring constantly until everything is combined and silky. Now, add the graham cracker crumbs, chopped almonds, and shredded coconut. Mix it all together until it’s like a sticky, chocolatey dough. Line a 9×13-inch pan with parchment paper, this makes cleanup a breeze, and press the mixture firmly into the bottom. I like to use the back of a measuring cup to get it nice and even. Pop it in the fridge to chill while you work on the next layer.
Step 2: Make the Custard Filling
This custard layer is the heart of the Nanaimo Bars, so let’s make it extra dreamy. In a mixing bowl, beat the softened butter until it’s smooth and creamy. Add the heavy cream, custard powder, and vanilla extract, and mix until it’s all combined. Now, here’s where the magic happens: gradually add the powdered sugar, one cup at a time, beating well after each addition. You’ll end up with a fluffy, cloud-like filling that’s just begging to be spread.
Take the chilled base out of the fridge and spread the custard filling evenly over the top. I like to use an offset spatula for this, it keeps everything smooth. Once it’s all covered, pop it back in the freezer for about 15-20 minutes while you prepare the ganache. This step is crucial, it keeps the layers from mixing together when you add the chocolate topping.
Step 3: Add the Chocolate Ganache Topping
Finally, the crowning glory: the chocolate ganache. In a small saucepan, heat the heavy cream over low heat until it’s just starting to simmer. Don’t let it boil! Pour the hot cream over the chopped dark chocolate and let it sit for a minute to melt. Then, stir it gently until it’s smooth and glossy. Let it cool for about 10 minutes, this helps it thicken slightly so it’s easier to spread.
Take the pan out of the freezer and pour the ganache over the custard layer. Use a spatula to spread it evenly, making sure every inch is covered. Now, here’s the hard part: pop it back in the fridge and let it chill for at least 4 hours, or better yet, overnight. I know, it’s torture, but the wait makes the first bite even more magical. Once it’s set, slice into squares, and get ready to impress everyone with your Nanaimo Bars masterpiece!
Tips for Perfect Nanaimo Bars
Want bakery-worthy Nanaimo Bars every time? These little tricks make all the difference:
- Chill between layers: I know it’s tempting to rush, but letting each layer set properly prevents muddy layers. The freezer is your friend here!
- Parchment paper wings: Leave extra paper hanging over the pan edges. When set, just lift the whole slab out for cleaner slicing.
- Hot knife trick: Dip your knife in hot water (dry it quick!) before slicing. Clean cuts every time, no cracked chocolate tops.
- Room temp butter matters: For the custard, butter that’s too cold won’t cream properly. Too warm? Greasy mess. Goldilocks temperature is key!
See? Pro-level bars don’t require pro skills, just these simple tweaks!
Variations & Substitutions
Listen, I get it, sometimes you’re missing an ingredient or need to tweak things. Here’s how to adapt this Nanaimo Bars recipe without losing that magic:
- Gluten-free? Swap graham crumbs for gluten-free biscuit crumbs or even ground-up gluten-free cookies. Works like a charm!
- Nut allergies? Skip the almonds and add extra coconut or use toasted sunflower seeds for crunch.
- No custard powder? Mix 2 tbsp cornstarch + 1 tsp vanilla pudding powder as a quick fix (not quite the same, but it’ll do in a pinch).
- Vegan twist: Use coconut oil instead of butter and a flax egg for the base. For the custard, try vegan butter and coconut cream.
The beauty of these bars? They’re forgiving. Just keep the ratios similar, and you’ll still get something delicious!
Storing and Serving Nanaimo Bars
Here’s the thing about Nanaimo Bars, they’re even better the next day! Once you’ve sliced them, store them in an airtight container in the fridge. They’ll stay perfect for up to a week (if they last that long).
Pro tip: Layer them between parchment paper so they don’t stick together.
Want to serve them at their absolute best? Let them sit at room temperature for about 10 minutes before serving. That little warm-up makes the custard layer extra creamy while keeping the chocolate crisp. And if you’re feeling fancy? Dust with a little extra cocoa powder or sprinkle with sea salt flakes for a pretty finish. Just try not to eat them all in one sitting, I know it’s hard!
Nanaimo Bars Nutrition Information
Let’s be real – these are dessert bars, not health food! But for those curious, each indulgent square packs about 450 calories with that perfect balance of sweet and rich. The values below are estimates (your specific ingredients may vary slightly). And hey, life’s short – sometimes you just need that custardy chocolate bliss!
FAQs About Nanaimo Bars
What are Nanaimo Bars called in the USA?
In the United States, Nanaimo Bars are almost always still called Nanaimo Bars, though they are less common and many people may not be familiar with them. In some regions, they might be known by other names like “New York Slice” or “Prayer Bars”. However, the name “Nanaimo Bar” is the most widely recognized term for this specific three-layered dessert.
What is special about Nanaimo Bars?
What makes Nanaimo Bars so special is their unique combination of three distinct, no-bake layers that create a perfect harmony of textures and flavors. You have a crunchy, crumbly chocolate-coconut base, a soft and sweet custard-flavored buttercream filling, and a firm, snappy layer of chocolate on top. They are an iconic Canadian confection, and their rich history and delicious taste make them a treasured national dessert.
What does a Nanaimo bar taste like?
A Nanaimo Bar is a symphony of sweet flavors and contrasting textures. The bottom layer is rich and chocolaty with a chewy, nutty crunch from coconut and nuts. The middle layer is a very sweet, creamy, and smooth custard-flavored buttercream that melts in your mouth. The top layer is a simple, firm layer of dark or semi-sweet chocolate that provides a satisfying snap and a slightly bitter contrast to the sweet filling.
What makes up a Nanaimo bar?
A classic Nanaimo Bar is made up of three distinct layers:
The Bottom Layer: A no-bake crust made of melted butter, sugar, cocoa powder, graham cracker crumbs, shredded coconut, and finely chopped nuts (usually walnuts or almonds).
The Middle Layer: A rich, creamy filling made from butter, heavy cream, powdered sugar, and custard powder (like Bird’s Custard Powder), which gives it its signature yellow color and vanilla flavor.
The Top Layer: A simple, glossy layer of melted semi-sweet or dark chocolate that is spread over the chilled filling and left to set until firm.
More Sweet Recipes to Satisfy Your Cravings
- White Chocolate Raspberry Cheesecake
- Gummy Glazed Donuts
- Strawberry Cheesecake Crumble Cookies
- Black Forest Cream Roll Cake
Share Your Nanaimo Bars Experience
Okay, confession time, I want to see your Nanaimo Bars! Did you add a twist? Did they disappear faster than expected? Drop a comment below (bonus points if you include a photo, I live for those chocolatey layers!). And if you loved this recipe as much as I do, give it a rating so others know it’s a winner, and follow me on Instagram and Pinterest for more recipes. Happy baking!
Print
Nanaimo Bars Recipe
- Total Time: 4 hours 40 minutes
- Yield: 24 bars 1x
- Diet: Vegetarian
Description
These classic Canadian Nanaimo Bars feature a rich chocolate-coconut base, a creamy custard filling, and a glossy chocolate ganache topping. Completely no-bake and decadently delicious, they’re perfect for holidays, potlucks, or any occasion when you crave something sweet and indulgent.
Ingredients
For the Base Layer:
- 1/2 cup unsalted butter
- 1 cup granulated sugar
- 1/2 cup unsweetened cocoa powder
- 2 eggs, beaten
- 2 cups graham cracker crumbs
- 1 cup finely chopped almonds
- 2 cups shredded coconut
For the Custard Filling:
- 1/2 cup unsalted butter, softened
- 1/4 cup heavy whipping cream
- 1/2 cup Bird’s custard powder
- 2 teaspoons vanilla extract
- 4 cups powdered sugar
For the Chocolate Ganache:
- 200 grams dark chocolate
- 1/2 cup heavy whipping cream
Instructions
- Make the Base Layer: In a large saucepan, melt butter, granulated sugar, and cocoa powder over medium heat. Stir frequently until smooth and glossy.
- Remove from heat and whisk in the beaten eggs gradually, stirring constantly so they don’t scramble. Mix until smooth.
- Stir in graham cracker crumbs, chopped almonds, and shredded coconut until fully combined. Line a 9×13-inch pan with parchment paper and press the mixture firmly and evenly into the bottom. Chill while preparing the filling.
- Prepare the Custard Filling: In a mixing bowl, beat softened butter until creamy. Add heavy cream, custard powder, and vanilla extract. Mix until smooth.
- Gradually add powdered sugar, one cup at a time, beating until the filling is light, fluffy, and spreadable.
- Spread the custard filling evenly over the chilled base layer. Place the pan in the freezer while you make the chocolate topping.
- Make the Chocolate Ganache: In a small saucepan, melt dark chocolate and heavy cream together over low heat, stirring until smooth and glossy. Let it cool for about 10 minutes.
- Pour the cooled ganache over the custard layer and spread evenly with a spatula for a smooth finish.
- Chill and Serve: Refrigerate for at least 4 hours or until completely set. Once firm, slice into squares using a sharp knife warmed under hot water for clean cuts.
Notes
- For best results, chill the bars overnight before cutting to allow clean slices.
- You can substitute vanilla pudding mix for Bird’s custard powder if unavailable.
- Store Nanaimo Bars in the refrigerator for up to 1 week or freeze for up to 3 months in an airtight container with parchment paper between layers.
- Prep Time: 30 minutes
- Cook Time: 10 minutes
- Category: Dessert
- Method: No-Bake
- Cuisine: Canadian
Nutrition
- Serving Size: 1 bar
- Calories: 450
- Sugar: 38g
- Sodium: 150mg
- Fat: 30g
- Saturated Fat: 18g
- Unsaturated Fat: 10g
- Trans Fat: 0g
- Carbohydrates: 45g
- Fiber: 3g
- Protein: 5g
- Cholesterol: 75mg
Keywords: nanaimo bars, canadian dessert, no bake recipe, custard slice, chocolate dessert