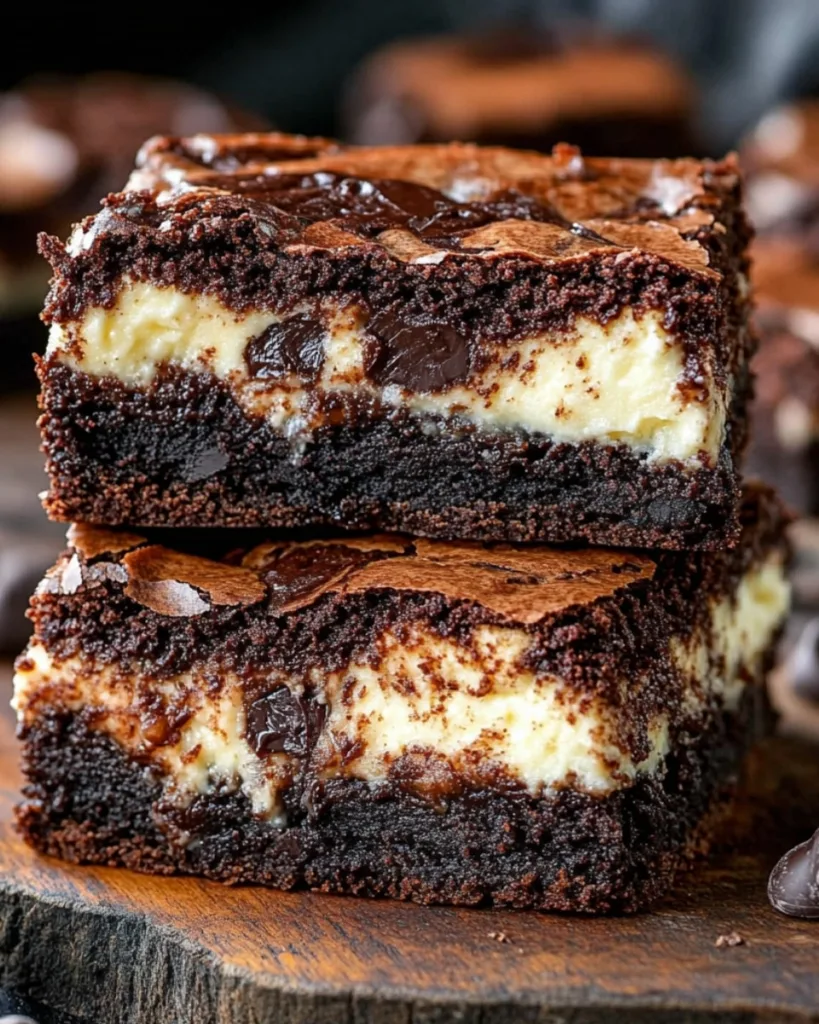
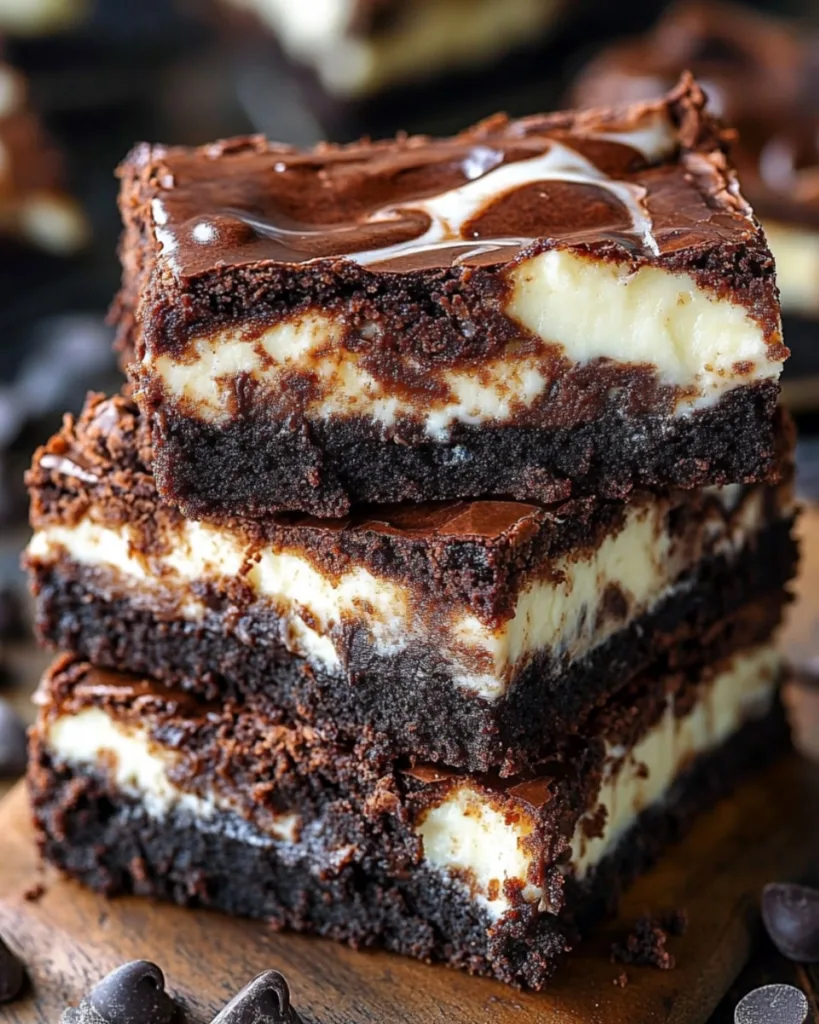
You are in for such a treat today! I’m sharing my all-time favorite dessert for when I need a guaranteed crowd-pleaser: these incredible Cheesecake Brownies. Imagine the best of both worlds, a rich, fudgy brownie base with a tangy, creamy cheesecake swirl baked right in. It’s absolute heaven in a single bite!
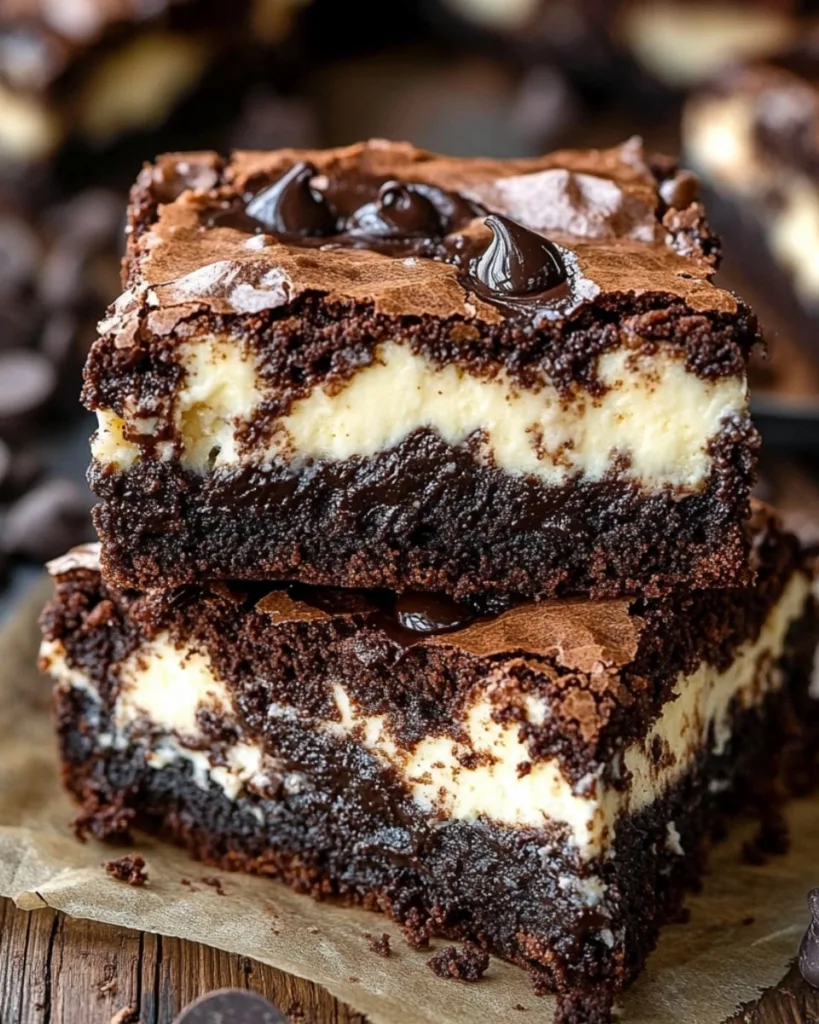
I first made these for a potluck, and they disappeared in minutes. Now, they’re the one dessert my family requests for every single gathering. The secret is a foolproof brownie batter that stays dense and moist, topped with just the right amount of cheesecake filling for that perfect sweet and tangy balance. These look so impressive, but they are surprisingly simple to make. Trust me, once you try one, you’ll understand why they’re called “dangerously good.”
Table of Contents
Why You’ll Love These Cheesecake Brownies
Listen, I know you’re going to fall head over heels for these cheesecake brownies, just like I did! Here’s why:
- That perfect swirl – The marbled layers aren’t just pretty, they give you little pockets of tangy cheesecake surprise in every fudgy bite
- No fancy skills needed – If you can microwave chocolate and stir batter, you’re already halfway there (I promise!)
- Two desserts in one – Why choose between brownies and cheesecake when you can have both baked together perfectly?
- Crowd-pleaser magic – These disappear fast at parties, I’ve seen grown adults sneak seconds when they think no one’s looking
- Better the next day – The flavors meld beautifully overnight (if you can resist eating them all fresh from the oven)
Seriously, these are the brownies that’ll make people ask for your recipe, just like my friends still do years later!
Ingredients for Cheesecake Brownies
Okay, let’s gather our goodies! Here’s everything you’ll need to make these swoon-worthy cheesecake brownies. I’ve split them into two parts because, well, we’re basically making two amazing desserts that become one spectacular treat.
Pro tip: Measure everything before starting, it makes the baking process so much smoother!
For the Brownie Layer:
- 12 oz semi-sweet or bittersweet chocolate chips: The better the chocolate, the better your brownies (I splurge on the good stuff here)
- 6 tbsp unsalted butter, cubed: Room temp is ideal for easy melting
- 3/4 cup granulated sugar: Just enough sweetness to balance the rich chocolate
- 1 tsp vanilla extract: Pure vanilla makes all the difference
- 3 eggs, room temperature: Cold eggs can make the chocolate seize up
- 1/4 cup unsweetened cocoa powder: For that deep chocolate flavor
- 1/3 cup cornstarch: My secret for extra fudgy texture
- 1/2 tsp salt: Don’t skip this! It enhances all the flavors
- 1 cup mini semi-sweet chocolate chips – Because more chocolate is always better
For the Cheesecake Layer:
- 8 oz cream cheese, softened: Full-fat please, this isn’t diet food!
- 1/2 cup granulated sugar: Just enough to sweeten the tangy cream cheese
- 1 egg, room temperature: Helps set the cheesecake layer
- 1/2 tsp vanilla extract: Adds that classic cheesecake flavor
See? Nothing too crazy, just quality ingredients that work together to create something magical. Now let’s get baking!
Equipment You’ll Need for Cheesecake Brownies
Before we dive in, let’s grab our tools! You probably have most of these already, I love recipes that don’t require fancy gadgets. Here’s what you’ll need:
- 9-inch square baking pan: My trusty workhorse for perfect brownie thickness
- Parchment paper: Lifesaver for clean removal (trust me on this one)
- Microwave-safe bowl: For melting our chocolate and butter
- Hand mixer or stand mixer: Makes the cheesecake layer silky smooth
- Rubber spatula: Essential for scraping every last bit of batter
- Small bowls: For pre-measuring ingredients
That’s it! No special equipment needed, just the basics to create something extraordinary.
How to Make Cheesecake Brownies
Alright, let’s make some magic happen! I’ve made these cheesecake brownies so many times I could probably do it in my sleep, but I’ll walk you through each step carefully. The key is taking your time and enjoying the process – the results are SO worth it.
1. Prep Like a Pro
First things first: preheat that oven to 350°F (175°C). While it’s heating up, grab your 9-inch square pan and line it with parchment paper – leave some overhang on the sides so you can lift the brownies out later. A quick spritz of cooking spray helps the parchment stay put. This step saves so much frustration when it’s time to slice!
2. Melt the Chocolate Dream
Now the fun begins! In a large microwave-safe bowl, combine your chocolate chips and cubed butter. Microwave in 30-second bursts, stirring well after each one. Watch closely – chocolate can go from melted to burned in seconds! When it’s smooth and glossy, stir in the sugar and vanilla. The mixture will look grainy at first, but keep stirring – it’ll come together.
3. Eggs Make the Magic
Add your eggs one at a time, mixing well after each addition. This is crucial for that perfect fudgy texture. The batter should look shiny and thick now. In a separate small bowl, whisk together your cocoa powder, cornstarch and salt. Gently fold these dry ingredients into the chocolate mixture. Don’t overmix – just stir until no flour streaks remain. Finally, fold in those mini chocolate chips for extra chocolatey pockets!
4. Cheesecake Swirl Time
Now for the star of the show! In another bowl, beat the softened cream cheese until smooth and fluffy (about 1 minute). Add the sugar and beat until combined, then mix in the egg and vanilla. Your cheesecake mixture should be silky with no lumps. Here’s the fun part: pour about two-thirds of the brownie batter into your prepared pan and smooth the top. Then dollop the cheesecake mixture over it. Use a spoon to drop the remaining brownie batter in blobs across the top. Take a butter knife and gently swirl everything together – just a few figure-eight motions for that beautiful marbled effect!
5. Bake to Perfection
Pop your masterpiece in the oven for 30-35 minutes. You’ll know they’re done when the edges look set but the center still has a slight jiggle (like cheesecake should). A toothpick inserted near the edge should come out with moist crumbs, not wet batter. Resist the urge to overbake – these continue setting as they cool!
6. The Hardest Part – Waiting
Let the pan cool completely on a wire rack – I know, the smell is torture! For cleanest slices, chill them in the fridge for an hour first. Use the parchment “handles” to lift the whole slab out before cutting. And there you have it – the most decadent, swoon-worthy cheesecake brownies you’ll ever make!

Tips for Perfect Cheesecake Brownies
After making these cheesecake brownies more times than I can count, I’ve picked up some tricks that guarantee success every time:
- Room temp is key: Cold eggs can make chocolate seize, and cold cream cheese won’t blend smoothly. Take everything out about 30 minutes before baking.
- Don’t overbake! The center should still jiggle slightly when you pull them out, they’ll set as they cool. Overbaked cheesecake brownies lose that dreamy fudginess.
- Chill before slicing: I know it’s hard to wait, but popping them in the fridge for an hour gives you those picture-perfect clean cuts.
- Swirl gently: Just a few knife strokes creates that beautiful marbled effect without mixing the layers completely.
- Line that pan: Parchment paper isn’t just for easy cleanup, it’s your ticket to removing these beauties intact!
Follow these simple tips, and your cheesecake brownies will turn out bakery-perfect every single time!
Ingredient Substitutions for Cheesecake Brownies
Ran out of something? No worries, I’ve tested plenty of swaps for these cheesecake brownies over the years! Here are my favorite foolproof substitutions:
- Chocolate chips: Dark chocolate works beautifully if you prefer less sweetness, just chop a bar into small pieces.
- Cream cheese: In a pinch, full-fat Greek yogurt (strained overnight) can substitute half the cream cheese, the texture will be slightly tangier but still delicious.
- Eggs: For each egg, mix 1 tbsp ground flaxseed with 3 tbsp water and let it thicken for 5 minutes.
- Cornstarch: All-purpose flour works too, but your brownies will be slightly less fudgy.
Remember, some substitutions change the texture slightly, but the results will still be delicious! Baking should be fun, not stressful.
Serving and Storing Cheesecake Brownies
The best part? You get to enjoy these cheesecake brownies however you like! I personally love them slightly chilled, the cheesecake layer firms up just enough while the brownie stays fudgy. But room temperature lets all those chocolate flavors shine. For parties, I cut them into cute little squares while cold, then let them sit out about 15 minutes before serving.
Storing is easy, just pop them in an airtight container in the fridge for up to 5 days (if they last that long!). You can also freeze them for up to 3 months, wrap individual brownies in plastic before freezing so you can grab one whenever a craving hits. A quick 10-second microwave zap brings them back to gooey perfection!
Nutritional Information for Cheesecake Brownies
Just a quick note: while these Cheesecake Brownies are absolutely divine, they are definitely an indulgent treat! The nutritional values provided are an estimate based on a yield of 9 servings and can vary depending on the specific brands of chocolate, cream cheese, and other ingredients you use. Enjoy every rich, fudgy bite!
| Nutrient | Amount (Approx. per serving) |
|---|---|
| Calories | 350 |
| Sugar | Varies |
| Fat | Varies |
| Protein | Varies |
FAQs About Cheesecake Brownies
Can I use a different pan size?
Absolutely! A 9×13 inch pan works great, just reduce the baking time by about 5 minutes. For mini brownies, try a muffin tin (lined with paper cups) and bake for 20-25 minutes.
How long do they last in the fridge?
They stay fresh in an airtight container for up to 5 days. The flavors actually deepen over time, so they’re just as delicious on day 3 as they are fresh from the oven!
Can I freeze cheesecake brownies?
Yes! Wrap them individually in plastic wrap, then store in a freezer bag for up to 3 months. Thaw in the fridge overnight or zap in the microwave for a quick treat.
Why do my brownies crack on top?
A little cracking is normal, but overbaking or using cold ingredients can make it worse. Stick to room temperature eggs and cream cheese, and pull them out when the center still jiggles slightly.
Can I make these gluten-free?
Sure! Just swap the cornstarch for a gluten-free alternative like arrowroot powder. The recipe is naturally gluten-free otherwise!
Sweet Treats You’ll Want to Make Next
- White Chocolate Raspberry Cheesecake
- Strawberry Cheesecake Crumble Cookies
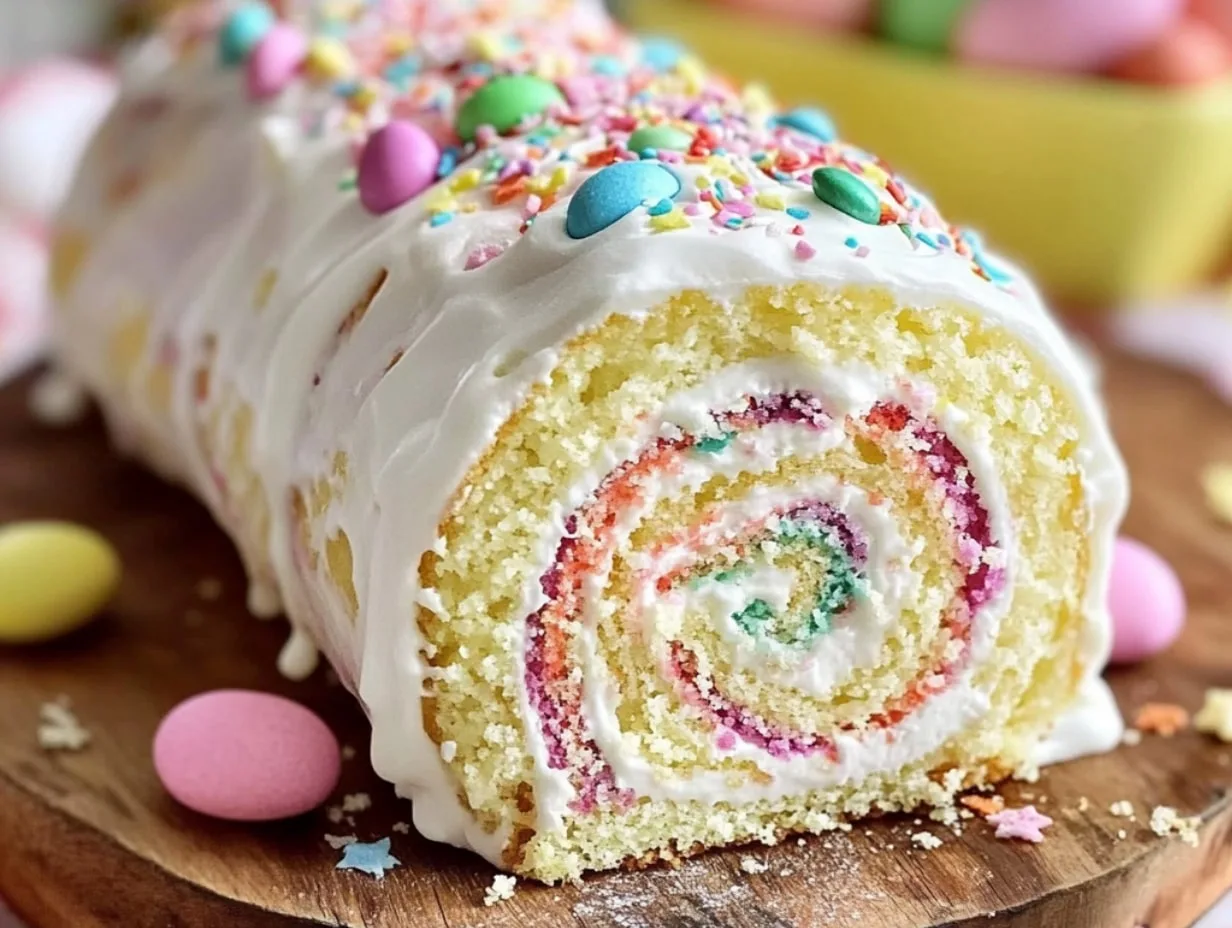
- Black Forest Cream Roll Cake
- Nanaimo Bars Recipe
Share Your Cheesecake Brownies Experience
I’d love to hear how your cheesecake brownies turned out! Did you add any fun twists? Tag me on Instagram with your marbled masterpieces, seeing your creations makes my day. And if you loved this recipe as much as I do, leave a star rating to help other bakers find this gem. Happy baking, friends!
Print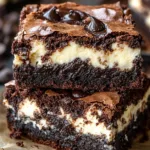
Cheesecake Brownies
- Total Time: 55 minutes
- Yield: 16 brownies 1x
- Diet: Vegetarian
Description
These Cheesecake Brownies combine rich, fudgy chocolate brownies with a smooth, tangy cheesecake layer for the ultimate dessert! Perfect for chocolate and cheesecake lovers alike.
Ingredients
For the Brownies:
- 12 oz semi-sweet or bittersweet chocolate chips
- 6 tbsp unsalted butter, cubed
- 3/4 cup granulated sugar
- 1 tsp vanilla extract
- 3 eggs, room temperature
- 1/4 cup unsweetened cocoa powder
- 1/3 cup cornstarch
- 1/2 tsp salt
- 1 cup mini semi-sweet chocolate chips
For the Cheesecake Layer:
- 8 oz cream cheese, softened
- 1/2 cup granulated sugar
- 1 egg, room temperature
- 1/2 tsp vanilla extract
Instructions
- Prep the Pan & Oven: Preheat oven to 350°F (175°C). Lightly spray a 9-inch square baking pan with cooking spray and line with parchment paper, leaving an overhang for easy removal.
- Make the Brownie Batter: In a large bowl, combine chocolate chips and butter. Microwave in 30-second intervals, stirring between each, until smooth. Stir in sugar and vanilla until combined. Add eggs one at a time, stirring after each addition.
- In a separate small bowl, whisk together cocoa powder, cornstarch, and salt. Add to the wet ingredients and stir vigorously for 1–2 minutes until smooth and the batter pulls away from the sides. Stir in mini chocolate chips. Pour 2/3 of the brownie batter into the prepared pan and smooth the top.
- Make the Cheesecake Layer: Using a hand or stand mixer, beat the cream cheese until light and fluffy. Add sugar and beat until combined, then mix in egg and vanilla until smooth.
- Assemble the Brownies: Spoon the cheesecake filling evenly over the brownie base, then drizzle or spoon the remaining brownie batter over the top.
- Bake & Cool: Bake for 30–35 minutes, or until a toothpick inserted in the center comes out with a few moist crumbs. Let cool completely in the pan. Use the parchment overhang to lift out the brownies and cut into squares.
- Serve & Store: Store in an airtight container in the refrigerator. Enjoy chilled or at room temperature!
Notes
- For extra richness, drizzle the cooled brownies with melted chocolate before slicing.
- These brownies taste even better the next day once the flavors meld.
- Store in the refrigerator for up to 5 days or freeze for up to 2 months.
- Prep Time: 20 minutes
- Cook Time: 35 minutes
- Category: Dessert
- Method: Baking
- Cuisine: American
Nutrition
- Serving Size: 1 brownie
- Calories: 310
- Sugar: 28g
- Sodium: 130mg
- Fat: 19g
- Saturated Fat: 11g
- Unsaturated Fat: 7g
- Trans Fat: 0g
- Carbohydrates: 34g
- Fiber: 2g
- Protein: 5g
- Cholesterol: 70mg
Keywords: cheesecake brownies, fudgy brownies, cream cheese swirl, chocolate dessert, easy brownie recipe